Gardena 1254 Manuel de l'opérateur - Page 5
Parcourez en ligne ou téléchargez le pdf Manuel de l'opérateur pour {nom_de_la_catégorie} Gardena 1254. Gardena 1254 8 pages. Valve box
Également pour Gardena 1254 : Manuel d'utilisation (8 pages), Manuel de l'opérateur (11 pages), Manuel d'utilisation (9 pages)
3. OPERATION
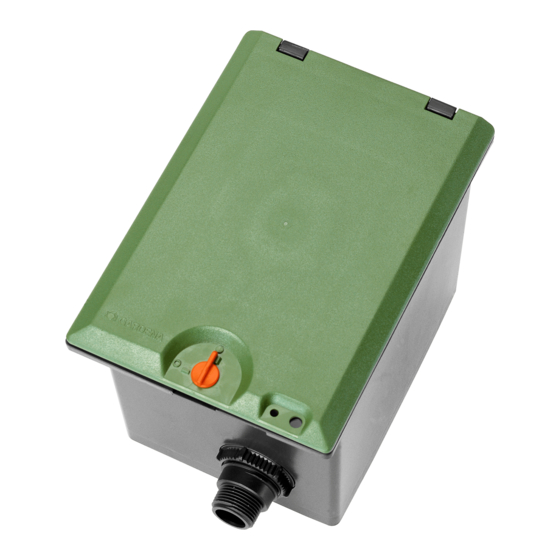
Adjusting valve control [ Fig. O1 ]:
Fully Automatic Control:
a
to "AUTO / OFF".
v Set selection lever
Programcontrolled water flow to watering system
according to programming (using Controller /
Radio Receiver or Watering Controller).
An automatically opened valve cannot be closed
manually.
4. STORAGE
To put into storage / Winter storage [ Fig. O1 / S1 ]:
The following precautions must be taken
– especially before the frost period starts
– to prevent damage to the Irrigation Valves and
the entire watering system:
1. Close the water tap and disconnect the hose from the
GARDENA Water Connection Point Art. 1594 /
2795.
This allows air to flow freely.
2. If the watering system is directly connected to the
water tap, turn off the water supply and open the
venting tap.
3. Set the selection lever
position.
4. Draining the Irrigation Valve / Valve Box.
There are various ways to drain the system:
– Drain the system by blowing out the water
with compressed air.
– Remove all the valves and store in a place
protected from frost.
5. TROUBLESHOOTING
Problem
Watering Valve does not open,
no water flow
Watering Valve does not close,
constant flow of water
NOTE: For any other malfunctions please contact the GARDENA service department.
Repairs must only be done by GARDENA service departments or specialist dealers approved
by GARDENA.
a
of all valves to the "ON"
Possible Cause
Watering Controller / Controller
not connected correctly to
Watering Valve.
No water supply.
Watering Valve installed in opposite
direction to flow direction.
Selector lever
"ON" position.
Controller was removed during
watering.
Manual Control:
v Set selection lever
Permanent water flow, independent of the program
ming.
– With Valve Box V3, open the draining cap
and empty the supply line. You can leave the
Watering Valves in the Valve Box provided
that the lines leading from the Valve Box V3
are drained via a draining valve (e. g. in the
GARDENA Popup Sprinklers) that is installed
lower than the Watering Valve.
5. Remove the battery from the Control Unit /
Radio Receiver.
6. Lock the box lid (see 2. ASSEMBLY,
Locking the box lid).
Disposal:
(in accordance with RL2012/19/EC)
The product must not be disposed of to normal
household waste. It must be disposed of in line
with local environmental regulations.
IMPORTANT!
Dispose of the product through or via your municipal
recycling collection centre.
Remedy
v Connect Watering Controller /
v No water supply.
v Turn Watering Valve in the box
a
set to
v Set selector lever
v Attach controller and switch off
a
to "ON".
Controller correctly to Watering
Valve.
(observe the direction of the water
flow).
a
to
"AUTO / OFF".
using controller.
6
11