Aqua Medic Biostar Manuel d'utilisation - Page 8
Parcourez en ligne ou téléchargez le pdf Manuel d'utilisation pour {nom_de_la_catégorie} Aqua Medic Biostar. Aqua Medic Biostar 12 pages.

Fig. 3: mounting of the biostar at the
aquarium
Start the system:
After complete mounting of the filter at the side of the aquarium, the filter housing is
completely filled with water and the pump is started. The system is evacuated automatically
and the water level in the filter housing is regulated by the level switch for long term
automatic operation.
5. Cleaning
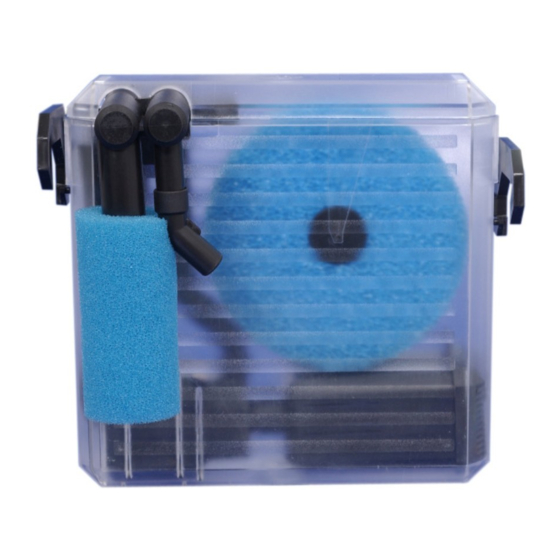
If the Biorotor stops turning around, it has to be cleaned. To prevent that the bacteria are
damaged it is recommended to clean the Biorotor sponge in aquarium water. The pre-filter sponge
at the water inlet has to be cleaned more frequently, so the inflow of water is not disturbed. The
filter sponge at the pump (7) is cleaned together with the Biorotor sponge.
6. Warranty
Should any defect in material or workmanship be found within 12 months of the date of purchase
AB Aqua Medic GmbH undertakes to repair or, at our option, replace the defective part free of
charge – always provided the product has been installed correctly, is used for the purpose that was
intended by us, is used in accordance with the operating instructions and is returned to us carriage
paid. The warranty term is not applicable on the all consumable products.
Proof of Purchase is required by presentation of an original invoice or receipt indicating the dealer's
name, the model number and date of purchase, or a Guarantee Card if appropriate. This warranty
may not apply if any model or production number has been altered, deleted or removed,
unauthorised persons or organisations have executed repairs, modifications or alterations, or
damage is caused by accident, misuse or neglect.
We regret we are unable to accept any liability for any consequential loss.
Please note that the product is not defective under the terms of this warranty where the product,
or any of its component parts, was not originally designed and / or manufactured for the market in
which it is used.
These statements do not affect your statutory rights as a customer.
If your AB Aqua Medic GmbH product does not appear to be working correctly or appears to be
defective please contact your dealer in the first instance.
Before calling your dealer please ensure you have read and understood the operating instructions.
If you have any questions your dealer cannot answer please contact us.
Our policy is one of continual technical improvement and we reserve the right to modify and adjust
the specification of our products without prior notification.
AB AQUA MEDIC GmbH - Gewerbepark 24 - 49143 Bissendorf/Germany
8
An air hose (10) is connected to the suction
nozzle of the pump (12) and to the hose
connection (13) of the water inlet. The level
switch (5) is inserted into the inlet tube of
the in- and outlet piece (6) inside the filter
housing. Outside in the aquarium, the pre-
filter sponge is mounted on the water inlet.
This sponge has always to be used to
prevent clogging of the level switch by
leaves or detritus. A 45° elbow at the water
outlet allows the adjustion of the water flow.
The complete water in- and outlet unit is
mounted with 2 pcs. 45° elbows on the
water outlet of the pump and pressed into
the 2 half openings for pipes in the filter
housing. The cable for the pump is placed in
the opening at the side. If anything is not
mounted correctly, the lid (2) will not fit.
-
Technical changes reserved –
