Avonic CM-CON100 Manuel de l'utilisateur - Page 14
Parcourez en ligne ou téléchargez le pdf Manuel de l'utilisateur pour {nom_de_la_catégorie} Avonic CM-CON100. Avonic CM-CON100 16 pages. Ptz camera controller
Également pour Avonic CM-CON100 : Manuel de l'utilisateur (12 pages), Manuel de l'utilisateur (10 pages), Manuel de l'utilisateur (13 pages), Manuel de l'utilisateur (11 pages)

7. Joystick Calibration
After a long time of use the joystick may need calibration. See the table below how to do it.
Funtionality
Operation
Pan Left
Move
Pan Right
Move
Tilt Up
Move
Tilt Down
Move
Zoom Tele
Move
Zoom Wide
Move
Free State
Press
Save/Cancel
Move the
8. Key Custom
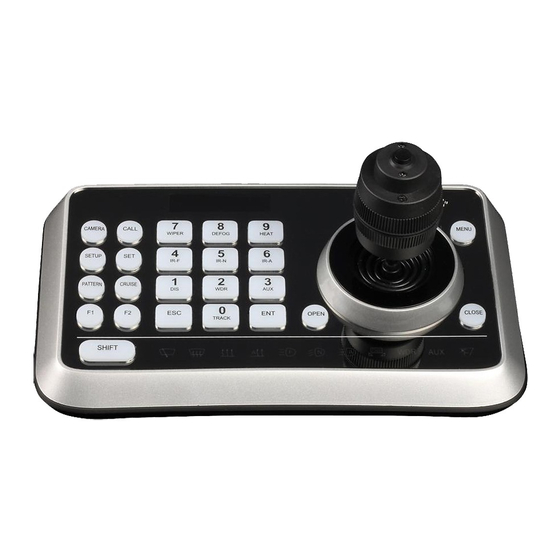
Key custom is used to make extra presets for the controller next to the SET/CALL function (see page 11).
Unfortunatily, you cannot make Patterns or use the Cruise functionality with the CON100. Note that this
functionality is unreliable. It will not always work. Use as much as you can the SET/ CALL functionality.
Step
Operation
1
Move in NON-Setup Menu the joystick to set the camera in the desired position.
Move in Setup Menu to Key Custom and open te menu. Screen Menu preset shows up.
2
3
Press PATTERN, CRUISE or MENU Button (see picture above). The corresponding Menu opens
4 *
Press the preset number** (0-255) to set and press
wrong number.
5
Screen Changed to: appears. Move the joystick to the left to leave the menu
In Non-Setup Menu press the number you just made a preset for and press Pattern, Cruise or Menu
6
button. The camera will automatically move in the desired position.
* Do not make a preset with the same number using the SET button and the PATTERN, CRUISE or MENU button! It is
possible that the preset made using the PATTERN, CRUISE or MENU button will be overridden by the CON100 and will not
work. For a correct functionality of the presets, stick always to 255 presets and do not make for example two presets
number 2, 3, 4, 5 etc !
**
Note also that it is possible to easily confuse the preset functionality with setting up camera (protocol ) Address and
ID number! (see page 12) Keep always in mind in which feature and menu you are.
www.avonic.com
to the limit and press
to the limit and press
to the limit and press
to the limit and press
clockwise to the limit and press
anti-clockwise to the limit and press
to confirm.
to swich between SAVE and CANCEL. Press
at the same time.
at the same time.
at the same time.
at the same time.
at the same time.
at the same time.
to save or cancel.
to confirm. Press ESC if you pressed the
Back to top
14
