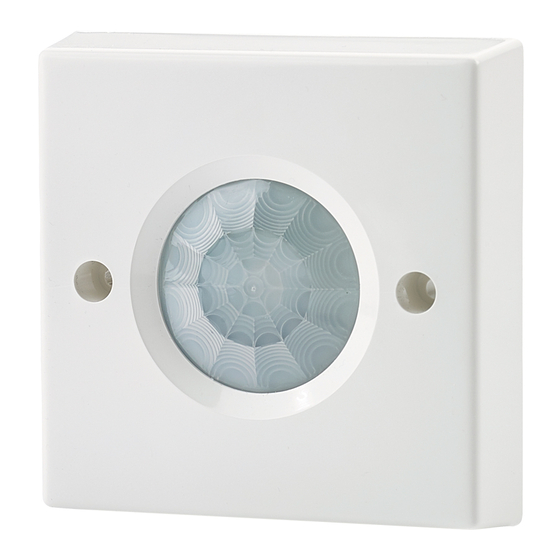
CP Electronics SPIR-F/C-IP Manuel d'installation - Page 7
Parcourez en ligne ou téléchargez le pdf Manuel d'installation pour {nom_de_la_catégorie} CP Electronics SPIR-F/C-IP. CP Electronics SPIR-F/C-IP 12 pages. Basic switching, ip55, ceiling, back box mounted, pir, occupancy sensor

Setting final time & Lux settings | Festlegen der endgültigen Zeit- und Lichtstärkeeinstellungen | Configurar
el tiempo final y los ajustes de iluminación | Configuração das definições de temporização final e LUX |
Régler les paramètres finaux de temps et Lux | Configurazione delle impostazioni di tempo e lux finali |
Definitieve tijds- en luxinstellingen | Установка конечного времени & настроек освещенности
EN
To set the final Lux level, wait until the level of natural daylight
is just enough that lighting is required. Starting with the LUX control
fully clockwise (at minimum), very slowly turn the control anti-
clockwise until the lights come on.
Note: When the LUX control is at maximum then the lights will
always come on with occupancy.
Set the time out period required (Adjustable 10 seconds to 30
minutes).
DE
Stellen Sie die endgültige Lichtstärke (LUX-Pegel) dann
ein, wenn das natürliche Tageslicht gerade so eine Beleuchtung
erforderlich macht. Drehen Sie den LUX-Drehregler gegen den
Uhrzeigersinn bis zum Anschlag (Minimum) und dann sehr langsam
im Uhrzeigersinn, bis die Beleuchtung eingeschaltet wird.
Hinweis: Wenn sich die Lichtstärkesteuerung in Maximalstellung
befindet, wird die Beleuchtung immer eingeschaltet, wenn der
Anwesenheitssensor auslöst (unabhängig vom Umgebungslicht).
Stellen Sie die gewünschte Abschalt-Zeitspanne ein (Einstellbereich
10 Sekunden bis 30 Minuten).
ES
To Para establecer la espera del nivel de LUX final hasta que
el nivel de luz natural diurna sea justo lo suficiente para requerir
esa iluminación. Comenzando con el control LUX completamente
girado en la dirección de las agujas del reloj (al mínimo), lentamente,
gire el control en sentido contrario a las agujas del reloj hasta que las
luces se enciendan.
Nota: Cuando el control LUX esté al máximo, las luces siempre se
encenderán cuando se detecte ocupación.
Establezca el periodo de desconexión requerido (ajustable 10
segundos a 30 minutos).
PT
Para configurar o nível LUX final, aguarde até o nível de luz
diurna natural ser apenas o suficiente necessário. Começando
com o controlo LUX totalmente girado na direção dos ponteiros do
relógio (no mínimo), gire o controlo muito lentamente na direção
oposta aos ponteiros do relógio até as luzes se acenderem.
Nota: Quando o controlo LUX estiver no nível máximo, as luzes
acendem-se sempre em caso de ocupação.
Defina o período de intervalo necessário (ajustável entre 10 e 30
segundos).
Install detector | Melder installieren | Instalación del detector | Instalaçao do detector | Installer le détecteur |
Installazione del sensore | Installeer detector | Установка датчика
5
FR
niveau de lumière naturelle du jour nécessite tout juste un éclairage.
Commencez par la commande LUX complètement tournée dans le
sens horaire (au minimum), tournez très lentement la commande
dans le sens antihoraire jusqu'à ce que les lumières s'allument.
NB : Lorsque la commande LUX est au maximum, les lumières
s'allument toujours avec présence.
Réglez la période de temporisation requise (Réglable de 10
secondes à 30 minutes).
IT
della luce naturale scenda abbastanza da avere bisogno
dell'illuminazione. A cominciare dal controllo LUX completamente
in senso orario (al minimo), ruotare lentamente il controllo in senso
antiorario fino a quando le luci non si accendono.
Nota: Quando il controllo LUX è al massimo, le luci si accendono
sempre quando c'è occupazione.
Impostare il periodo di timeout richiesto (regolabile da dieci secondi
a trenta minuti).
NL
totdat voor het natuurlijke daglicht net verlichting nodig is. Begin
met LUX volledig naar rechts (minimum) heel langzaam linksom te
draaien totdat de lampen aangaan.
Opmerking: Als het menuwieltje LUX op maximum staat, gaan de
lampen bij aanwezigheid altijd aan.
Stel de gewenste time-outperiode in (Verstelbaar van 10 seconden
tot 30 minuten).
RU
освещенности, подождите, пока уровень естественного
дневного света не станет достаточным для освещения.
Начиная с регулятора LUX по часовой стрелке (как минимум),
очень медленно поворачивайте регулятор против часовой
стрелки, пока не включится освещение.
Примечание. Когда регулятор LUX установлен на максимум,
светильники всегда включаются при детекции присутствия.
Установите требуемый период времени (от 10 секунд до 30
минут).
EN
Push wires into housing and tighten
screws to mount onto the wall. Cover with
screw caps.
DE
Drücken Sie die Kabel in das
Gehäuse und ziehen Sie die Schrauben
fest an, um das Gehäuse an der Wand
anzubringen. Setzen Sie Schutzkappen auf
die Schrauben.
ES
Empuje los cables en la carcasa
y apriete los tornillos para montarlo en la
pared. Cubra con las tapas de los tornillos.
PT
Empurrar os fios na carcaça e aperte
os parafusos para a montagem na parede.
Cobrir com as tampas de parafusos.
Pour régler le niveau Lux final, attendez jusqu'à ce que le
Per impostare il livello Lux finale attendere che il livello
Wacht voor het instellen van het definitieve LUX-niveau
Чтобы установить окончательный уровень
FR
Pousser les câbles dans le boîtier
et serrer les vis pour réaliser le montage
mural. Couvrir avec les caches.
IT
Spingere i cavi nell' a lloggiamento
e serrare le viti per effettuare l'installazione
sulla parete. Coprire con i cappucci per le viti.
NL
Duw de draden in de behuizing en
draai de schroeven aan voor bevestiging
op de wand. Dek de schroeven af met
schroefdoppen.
RU
Вставьте провода в корпус и
затяните винты, чтобы закрепить их на
потолке. Накройте колпачками.
7
