EarthQuake XJ-700R Manuel de l'utilisateur - Page 6
Parcourez en ligne ou téléchargez le pdf Manuel de l'utilisateur pour {nom_de_la_catégorie} EarthQuake XJ-700R. EarthQuake XJ-700R 17 pages. Life mono block / high efficiency / 700 watts / class j / sobwoofer
amplifier
Également pour EarthQuake XJ-700R : Manuel de l'utilisateur (12 pages)

Introduction
Congratulations and thank you for choosing the Earthquake's XJ-700R, a high power LFE mono block amplifier
designed for powering large subwoofers or tactile transducers, suited for both professional and home use.
Engineered with the patented Class "J" circuitry, the XJ-700R efficiently delivers massive amounts of power with
minimal heat production. It comes fully equipped with optimized presets for movie or music listening, a digital
volume readout with rotary dial, boundary EQ, variable low pass filter, phase adjustments, and remote.
Simply put, the XJ-700R amplifier is the perfect amplifier whether you are an advanced user or a novice in need of a
compact but efficient and powerful amplifier.
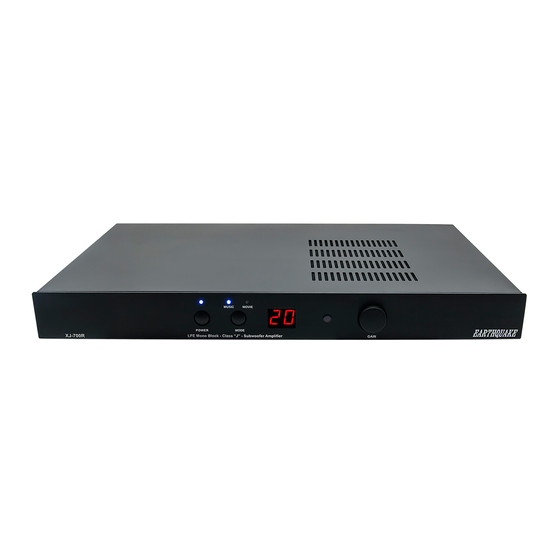
Product Overview - Front Panel
(1) Power Button & LED Indicator
The Power button switches the amplifier
between ON and STAND-BY. When ON, the
Power LED lights up BLUE along with one of
the Mode LEDs. When the amplifier is on
STAND-BY, the Power LED lights up RED while
the Mode LEDs are off.
Additionally, the Power LED reflects the state of
the amplifier (i.e. whether the Signal Sensing is
set on ON/AUTO/+12V and whether signal is
being fed to the amplifier).
Signal Sensing Is there signal? LED Color
ON
AUTO
+12V
* after about 20 minutes without signal
Note that this feature will work only when the
Main Power switch (located on the back panel
of the amplifier) is in the ON position.
(2) Music/Movie Quick Mode Button
The Mode button switches the amplifier's EQ
between a preset Music mode (flat) and a
6
XJ-700R Manual
(1)
(2)
3 2
Yes
Blue
No
Blue
Yes
Blue
No
Red*
Yes
Blue
No
Red
Earthquake Sound Corp. | (800) 576-7944 | www.earthquakesound.com
(3)
(4)
(5)
preset Movie mode (+8dB between 30 - 80Hz).
(3) Digital Readout
This digital readout shows the gain/volume
setting of the amplifier as it is being changed,
either by turning the Gain/Volume Control knob
or by pressing the +Vol/-Vol on the remote.
(4) IR Sensor
(5) Gain/Volume Control
This infinite rotary knob allows the user to
control the gain/volume of the amplifier. Always
start at the lowest setting and slowly increase
the volume until the desired level is reached. It
is best to use the gain adjustment on the
receiver or pre-amp to make any minor
adjustments.
