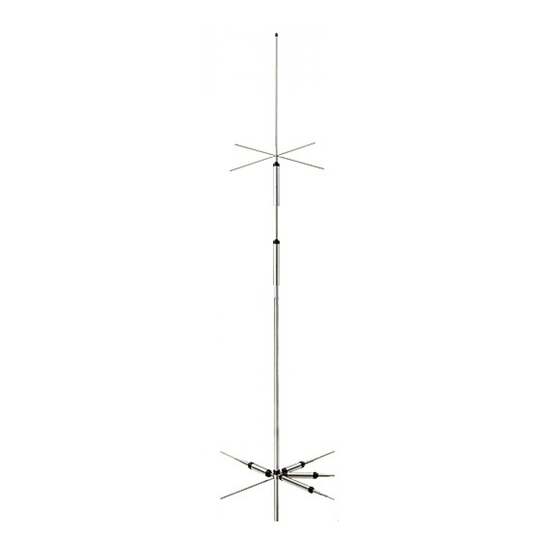
Diamond Antenna CP-5HS Manuel d'utilisation - Page 6
Parcourez en ligne ou téléchargez le pdf Manuel d'utilisation pour {nom_de_la_catégorie} Diamond Antenna CP-5HS. Diamond Antenna CP-5HS 6 pages. 40m, 20m, 15m, 10m and 6m (7/14/21/28-29 and 50mhz) five-band vertical antenna

⑤Attach mast support pipe to mast
with mast brackets. Mast support
pipeʼs tapping hole has to be placed
above the brackets and it has to be
pointed outside against the mast.
Upper end of mast support pipe
has to be placed more than 12cm
(4.7") above the top end of the mast.
Applox. 12cm(4.7")
Trapping hole
this side
Mast
Mast bracket
Spring washer
Support
Mast
pipe
V-bolt
⑥Place the two radial element holder
from upper end of the support pipe
and fasten temporary with screwdriver.
Do not fasten too tightly at this stage,
otherwise feedpoint assemblies might
not be put into the support mast later.
⑦Connect a coaxial cable to feedpoint
assemble through the support pipe.
Then align the hole in the lower part
of feedpoint assembly with the hole
in the support pipe and secure them
with hex head screw and spring washer.
⑧Place vertical element on feedpoint
assembly and fix with two hex head
screws and spring washers.
⑨Turn each radial element into radial
element holders. Then align water
drain hole in each radial element trap
coil assembly downward by turning
backward and fasten each element
with grip nut, Note that 6m radial
element does not have trap coil
assembly.
Radiator
Hex head screw
Feed point assembly
Grip nut
Screw
(2pcs/upper
& lower)
Align water drain hole
downward when attach
Hex head screw
Radial element holder
(2pcs/upper & lower)
Mast support pipe
<<Note>>
To avoid breaking each radial
element trap coil assembly, turn it
into a holder lightly till it stops and
turn backward to align water drain
hole downward and secure with a
screw.
Miyata Building, No.15-1,1-chome Sugamo,Toshimaku Tokyo,Japan 170-0002 TEL.03-3947-1411 FAX.03-3944-2981
・ Adjustment
<<Note for frequency adjustment>>
Practice the following adjustment
procedure at the place where the
antenna is actually installed.Test
transmission for the adjustment has
to be performed for as short time as
possible and with as low RF power as
possible. Maximum RF power rating of
continuous wave (FM/CW) is about
Coaxial cable
1/3 of it in SSB mode. If the antenna
is installed on a long balcony railing,
the railing itself may work as a radial
element and VSWR of the antenna may
not be changed with the adjustment
of attached radial element length. If
resonant frequency of the antenna is
Support pipe
within a desired range, the antenna can
be used normally in this case. If
resonant frequency is out of desired
frequency range and adjustment is
required, the antenna has to be isolated
from the railing, moved to a different
place or installed on a mast, which is
at least 1m to 2m (3.3ʼ to 6.6ʼ) long.
Nut
①Prepare suitable VSWR meter for
operating frequencies and output
RF power. Then connect it as shown
in below.
(Fig-7)
Tranceiver
②Adjustment procedure can be started
from any frequency you like. Transmit
at desired frequency and trim
adjustment length of radial element
to have lower VSWR at the frequency.
・ Adjustment length of radial element
①Adjustment length of each radial
element is shown in the following table.
If you do not have a VSWR meter,
adjust it to a typical adjustment length.
Band
40m
(7MHz)
20m
(14MHz)
15m
(21MHz)
10m
(28-29MHz) 600mm
6m
(50MHz)
※If the radial element of a band is made
Radial element
longer, resonant frequency of the band
is made lower proportionally.
※Though typical adjustment length of
each radial element is set at center
frequency of each band, it varies more
or less depending on the place the
antenna is installed.
(Fig-8)
Adjustment example:
If center frequency of 40m band is set
at 7.050MHz and real center frequency
when the antenna is installed is at
7.010MHz, then frequency difference
between is:
7.050MHz (desired center frequency)
‒ 7.010MHz (real center frequency)
= 40KHz
DIAMOND ANTENNA CORPORATION
Home Page http://www.diamond-ant.co.jp
E-mail [email protected]
CP-5HS
VSWR
meter
(Fig-9)
Spread
One
Length/
radials
direction
Frequency
radials
Applox.
Applox.
10mm/
570mm
530mm
10KHz
Applox.
Applox.
15mm/
620mm
600mm
20KHz
Applox.
Applox.
32mm/
680mm
620mm
50KHz
Applox.
Applox.
27mm/
590mm
50KHz
Applox. Applox.
50mm/
550mm
550mm
1MHz
(Table A)
From Table A, adjustment length at
40m band is about 10mm per 10KHz,
therefore:10mm x 40KHz / 10KHz =
40mm, Since real center frequency is
lower than desired center frequency,
radial element has to be made 40mm
shorter to have 7.050MHz center
frequency.
・ VSWR
・ Specifications
Frequency range 40, 20, 15, 10, 6m
(7, 14, 21, 28-29, 50MHz)
Feed point Impedance
VSWR Less than 1.5
Maximum power rating
200W SSB (7MHz)
400W SSB (14/21MHz)
500WSSB(28/29/50MHz)
Maximum RF power rating of
continuous wave (FM/CW) is about
1/3 of it in SSB mode.
Maximum wind resistance 100MPH
Vertical element length
Radial element length
Weight
Mast diameter accepted
Design 5band trap vertical antenna
with trap radials
Though these products purchased
are manufactured under strict quality
control, if damage is caused by
transporting, ask your dealer promptly.
Design and specifications of these
products will be changed for future
improvement without advance notice.
50Ω
(45m/sec)
142"(3.6m)
71"(1.8m)
7.5lbs (3.4Kg)
1 1/5" ‒ 2 1/3"
(30-62φ)
