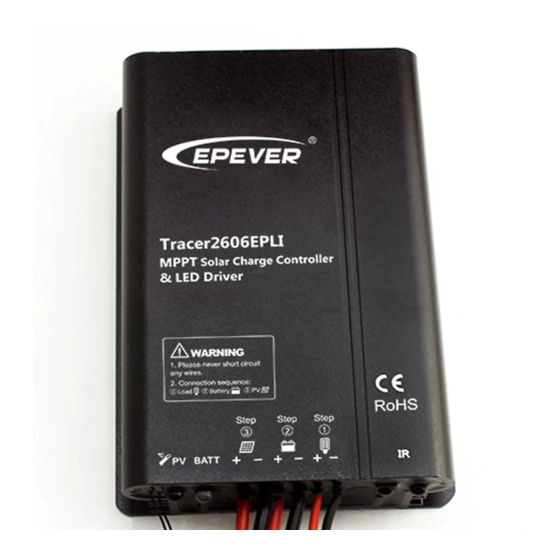
Epever Tracer2610EPLI Manuel
Parcourez en ligne ou téléchargez le pdf Manuel pour {nom_de_la_catégorie} Epever Tracer2610EPLI. Epever Tracer2610EPLI 6 pages. Mppt solar charge controller with built in led driver

Thank you for selecting the Tracer EPLI series MPPT solar charge
controller with built-in LED driver. Please read this manual carefully
before using the product and pay attention to the safety
information.
MPPT Solar Charge Controller
Thank you for selecting the EPSolar Tracer EPLI series MPPT solar charge controller. It
combines solar charge controller and LED constant current driver into one unit which is
ideal for solar LED Lighting, especially when dimmer function is needed. The control
parameter can be programmed via IR communication, such as Mobile APP, RC-01 and
SPP-02.
1. Safety Information
Read all of the instructions in the manual before installation.
DO NOT disassemble or attempt to repair the controller.
Install external fuse or breaker as required.
Do disconnect the solar module and fuse/ breakers near to battery before installing
or moving the controller.
Power connections must remain tight to avoid excessive heating from a loose
connection.
Only charge batteries that comply with the parameters of controller.
Battery connection may be wired to one battery or a bank of batteries.
Risk of electric shock, the PV and load can produce high voltages when the
controller is working.
2. Overview
The advanced Maximum Power Point Tracking charging methods enables the system
charging and discharging management to obtain the most radical optimization. Increase
the system flexibility, yet lower down the system cost .The features are listed below:
High quality components, perfecting system performance, with maximum conversion
efficiency of 98%
Advanced Maximum Power Point Tracking (MPPT) technology, with tracking
efficiency no less than 99.5%
Ultra-fast tracking speed and guaranteed tracking efficiency
Accurately recognizing and tracking of multiple power points
12/24VDC automatically identifying system voltage or user-defined working voltage
Digital precision constant current control and the control accuracy are less than ±2%
Maximum output efficiency of 96%
PV and Load power limitation function
The output current can be adjusted among the rated power and current range
Without any button, parameter setting via Mobile APP, Remoter Meter and SPP with
IR function
Aluminum housing for better cooling
Real-time energy statistics function
Battery temperature compensation function
IP68 waterproof degree
3. Product Features
②
①
③
Figure 1 Tracer1305/26**/39**EPLI
①
Charging Status LED indicator
②
Battery Status LED indicator
③
Infrared Receiver Module
④
Infrared LED
4. Wiring
1) Connect components to the charge controller in the sequence as shown above and
pay much attention to the "+" and "-". Please don't insert the fuse or turn on the breaker
during the installation. When disconnecting the system, the order will be reserved.
2) After power on the controller, check the battery LED indicator on the controller, it will
be green. If it's not green, please refer to chapter 8.
3) Connecting a fuse in series through battery positive (+) in the circuit and the battery
circuit fuse must be 1.25 to 2 times to the rated current. The installed distance is within
150mm.
4) The process of charging and discharging can't operate simultaneously, and the
discharging process is prior to charging.
BEIJING EPSOLAR TECHNOLOGY CO., LTD.
---with built in LED Driver
④
⑤
⑥ ⑦
Figure 2 Tracer52**EPLI
⑤
Temperature Sensor
⑥
PV Positive and Negative Wires
⑦
Battery Positive and Negative Wires
⑧
Load Positive and Negative Wires
Optional Accessory:
Name:Fixed Plate
Quantity:Four
Overall dimension:20mm×18mm×6mm
Mounting hole size:Φ3.5mm
1
Tel:+86-10-82894112 / 82894962 Website:www.epsolarpv.com/www.epever.com
5. LED Indicators
Indicator
Charging (green) and battery indicator (orange)
flashing simultaneously
6. Setting Operation
Figure 4 Setting Ways
7. Load Working Mode
1) Manual Mode
2) Light ON/OFF(Default)
⑧
3) Light ON + Timer
Light ON + Timer1
Light ON + Timer2
Figure 3 Wiring
Color
Status
Green
On Solid
Green
OFF
Green
Slowly Flashing(1Hz)
Green
Fast Flashing(4Hz)
Green
On Solid
Green
Slowly Flashing(1Hz)
Green
Fast Flashing(4Hz)
Orange
On Solid
Red
On Solid
Red
Fast Flashing(4Hz)
There are three methods that it can realize
controller load modes and parameters through IR
function:
1) IR Remote Control—RC-01.
2) Super Parameter Programmer—SPP-02.
This method can realize one-key setting
operation which is suitable for bulk quantity
products setting or applied in the projects.
3) Mobile APP, IAM(Ir-Android-Micro).
APP software can be downloaded from the
website of http://www.epsolarpv.com.
Note: Please refer to the user manual of
handheld device.
2
Instruction
PV connection normal
but low
voltage(irradiance)
from PV, no charging
No PV voltage(night
time) or PV connection
problem
In charging
PV Over voltage
Normal
Full
Over voltage
Under voltage
Over discharged
Battery Overheating
System voltage error
