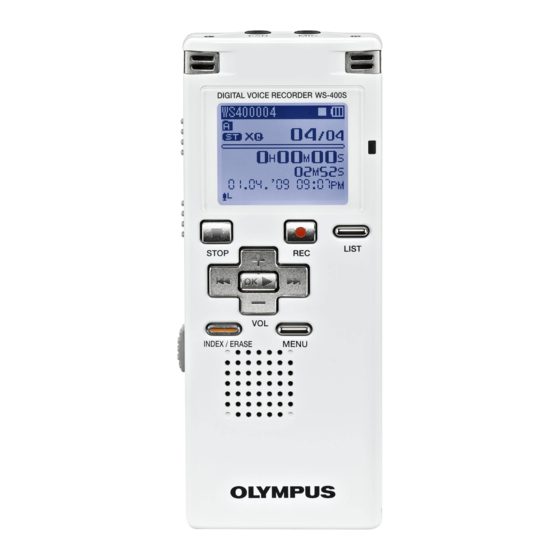
Olympus WS-400S Manuel d'instructions - Page 9
Parcourez en ligne ou téléchargez le pdf Manuel d'instructions pour {nom_de_la_catégorie} Olympus WS-400S. Olympus WS-400S 33 pages. Ws-500m instructions (english, español, français, português)
Également pour Olympus WS-400S : Manuel d'instructions (14 pages)

Playback (Fig. 7)
" For WS-500M:
• When playing back files
transferred from a PC, set the
mode switch according to the
folder type.
• When playing back files
recorded on the recorder, set the
mode switch to [VOICE].
1 Select the folder which contains the
files to be played back.
• Pressing the LIST button at the
file display during playback or
while stopped will return you to
the next higher level. Pressing
the LIST button repeatedly
will bring you to the folder list
display.
• Pressing button + or − at the
folder list display will select the
folders for voice recordings and
press the OK ` or 9 button.
2 In the File list display, press the + or
− button to select the file that you
want to playback.
• In the File display, press the 9
or 0 button to select a file.
3 Press the OK ` button to start
playback.
• [6] will appear on the display.
a File name
b Folder indicator
c Playback position bar indicator
d Elapsed playback time
e File length
4 Press the + or − button to adjust to
a comfortable listening volume.
• The volume can be adjusted
within a range from [00] to [30].
5 Press the STOP 4 button at
any point you want to stop the
playback.
• [4] will appear on the display.
Setting an index mark or
a temp mark (Fig. 8)
1 While the recorder is during
recording mode or playback mode,
press the INDEX/ERASE button.
• Even after an index or temp mark
is placed, recording or playback
will continue so you can place
index or temp marks in other
locations in a similar manner.
Clearing an Index Mark or
a Temp Mark (Fig. 9):
1 Locate the index or temp mark
youwant to clear.
2 Press the 9 or 0 button to
select the index or temp mark to
erase.
3 While the index or temp number
appears for approximately 2
seconds on the display, Press the
INDEX/ERASE button .
• The index or temp mark is
erased.
Note:
• Up to 16 index and temp marks
can be set in a fi le. If you try to
place more than 16 index or temp
marks, [Index Full] message
will appear for index marks, and
[Temp Mark Full] for temp marks.
How to begin segment
repeat playback (Fig. p)
1 Select a file that has a segment you
would like to play back repeatedly.
2 In the file list display, press the + or
− button to select the file you want
to clear.
3 Press the OK ` button to start
playback.
4 Press the RECs button at the point
you want to start segment repeat
playback.
• [w] will flash on the display.
5 Press the RECs button again at
the position where you want to end
segment repeat playback.
• The recorder repeatedly plays
back the segment until the
segment repeat playback is
cancelled.
Note:
• As in regular play mode, playback
speed can be changed during
segment repeat playback as well.
If an index mark and temp mark
are inserted or eliminated during
segment repeat playback, segment
repeat playback will be canceled
and it will return to regular play
mode.
Erasing (Fig. q)
1 Select the folder or file you want to
erase.
2 In the file list display, press the + or
− button to select the file you want
to erase.
3. While the recorder is during stop
mode, press the INDEX/ERASE
button.
4 Press the + button to select
[Erase in Folder] or
[File Erase].
5 Press the OK ` button.
6 Press the + button to select
[Start].
7 Press the OK ` button.
• The display changes to [Erase!]
and erasing will start.
• [Erase Done] is displayed when
the file is erased. File numbers
will be reassigned automatically.
Notes:
• The locked fi les and fi les set as
read-only cannot be erased.
• If an action is not selected within 8
seconds, the recorder will return to
stop status.
• It may take over 10 seconds to
complete processing. Never
remove batteries during this time
because data may be corrupted. In
addition, replace the batteries with
new ones in order to ensure that
the batteries will not run out while
processing.
• For WS-500M only:
You can delete other than [Music]
folders when the recorder is set
to [MUSIC] mode. However, you
cannot delete any folders when
the recorder is set to [VOICE]
mode.
• For WS-400S only:
You cannot delete folders through
therecorder.
9
EN
