Olympus BX51 Manuel d'utilisation - Page 5
Parcourez en ligne ou téléchargez le pdf Manuel d'utilisation pour {nom_de_la_catégorie} Olympus BX51. Olympus BX51 11 pages. System
Également pour Olympus BX51 : Manuel d'utilisation (17 pages), Manuel d'instructions (40 pages), Manuel d'instructions (34 pages), Manuel d'instructions (37 pages)

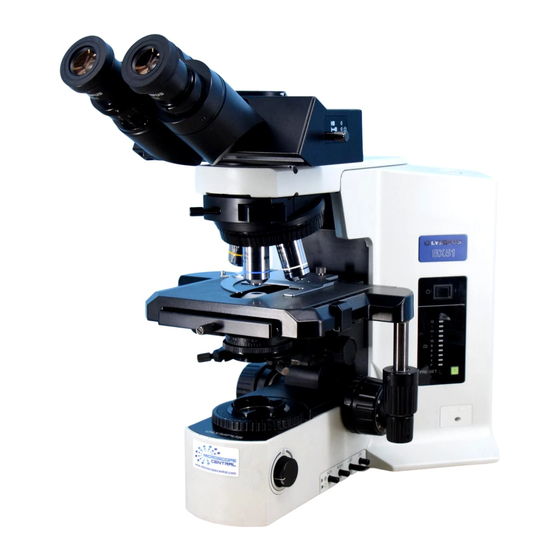
(1) White (halogen) light power switch – turns on both transmitted and reflected light.
(2) Eyepiece/Camera light path selector – sends light to eyepieces, camera or both.
(3) Brightness adjustment – controls intensity of transmitted and reflected light.
(4) Light intensity and toggle switches –The toggle selects the lower (transmitted) or upper (reflected)
light source. The 'PRESET' button gives maximum illumination.
(5) Eyepieces – can adjust the interpupillary distance and focus. The left eyepiece has a micrometer.
(6) Objectives
(7) Stage with steel plates for magnetic probe arms for fluidic devices. Remove the glass stage to use
magnetic probes.
(8) Stage clip. Ask Beth to put it on.
(9) Stage controls (actually on left side of stage).
(10) Fine and Coarse focus. Each unit is 1 micron in stage height adjustment.
(11) Diopter ring – for focusing the ocular
(12) Rotating nosepiece – for selecting objectives
(13) Field iris diaphragm for transmitted light – for establishing Koehler illumination
(14) Condenser height adjustment ‐ for establishing Koehler illumination
(15) Condenser centering screws ‐ for establishing Koehler illumination
(16) Condenser aperture iris diaphragm ‐ for establishing Koehler illumination
(17) Filter wheel holding mirrors and filters for reflected light
(18) Mercury lamp power switch – to turn the fluorescence light on and off.
(19) Mercury lamp power indicator – red when the mercury bulb is ON.
(20) Shutter knob –shutter for reflected light (white or fluorescent) to protect sample from excess UV light.
(21) Field iris diaphragm – restricts the diameter of the beam of light entering the objective (excludes
extraneous light and improves image contrast). Also slows fading in other parts of the sample.
(22) Aperture iris diaphragm – adjusts the brightness of the observed image and improves contrast.
Use to fine‐tune after using the ND filters.
(23) Not on this model
(24 top) ‐ condenser screw. Not on this model
(24 bottom) – reflected light analyzer. Not on this model.
(25) Polarizer
(26) DIC prism slide filter – adjusts the contrast when using DIC
(30) Light path selector – selects halogen lamp and or mercury lamp for reflected light.
(31) Buttons for built‐in filters
ND6 decreases excitation light intensity to 6% (fluorescence applications)
ND25 decreases excitation light intensity to 25% (fluorescence applications)
LBD
color conversion filter to simulate daylight (BF, image capture)
OP
dunno
(32) Slide filters for reflected light
U‐25FR, frost slide filter ‐ to eliminate uneven illumination
U‐25ND25, ND slide filter ‐ to reduce the excitation light intensity.
(33) Rear halogen lamp housing – source of the reflected white light.
WHAT DOES THAT KNOB DO?
5
