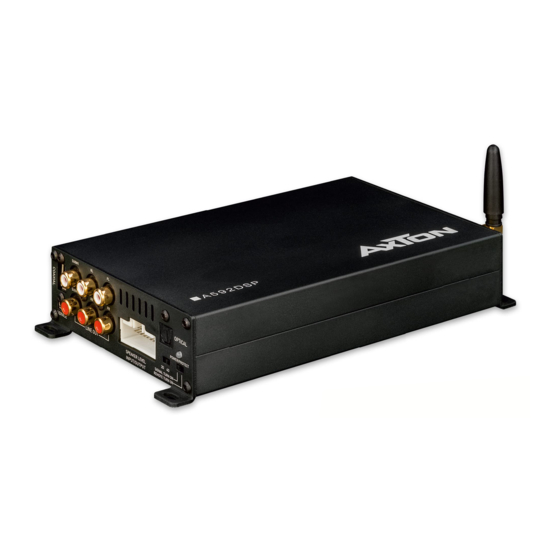
AXTON A592DSP Manuel d'installation et d'utilisation - Page 4
Parcourez en ligne ou téléchargez le pdf Manuel d'installation et d'utilisation pour {nom_de_la_catégorie} AXTON A592DSP. AXTON A592DSP 20 pages. 4-channel smart digital amplifiers

SUBW2
RR
FR
POWER/PROTECT
2Ω
4Ω
LINE OUT
SERVICE
SPEAKER LEVEL
SIGNAL TURN ON
CONNECTIONS + CONTROLS A592DSP
INPUT/OUTPUT
REMOTE TURN ON
GND
BATT.
ANT
FUSE
POWER IN
REMOTE CONTROL
A592DSP
(20 A)
1
2
3
4
5
6
7
SUBW1
RL
FL
OPTICAL
SUBW2
RR
FR
POWER/PROTECT
2Ω
4Ω
SERVICE
LINE OUT
SPEAKER LEVEL
SIGNAL TURN ON
INPUT/OUTPUT
REMOTE TURN ON
8
9
bl
bm
GND
BATT.
ANT
1* In some cases with old headunits the Auto-Turn-On function cannot work. If you meet this problem, please connect
"ACC-IN" wire to ACC/Amp Remote of the car stereo or another cable which will provide +12 V only when the car
stereo is turned on. Secondly select "REMOTE TURN ON" on the remote switch.
POWER IN
FUSE
REMOTE CONTROL
A592DSP
(20 A)
2* REM-Out: Connect this wire to the remote input of a separate amplifier, for example a mono amp for a subwoofer.
REMOTE CONTROL
1
Connect the optional RC for convenient operation of Master Volume, Bass Volume and
Mute function.
When you are using the ABT50 with OTG for iPhone for lossless audio transmission,
the signal is sent directly avoiding any converter. That's awesome. But it also means
you are not able to adjust the volume with your iPhone. Therefore you need to
connect the separate available RC.
2
ANTENNA
External Bluetooth antenna of the audio streaming BT module, called "BT Audio" in your
mobile settings. The second BT module, called "A592DSP" is for doing the adjustments
only and does not need a separate antenna.
POWER TERMINAL
3
Connect Ground and Battery cables when additional power is necessary or desired.
FUSE
4
If the fuse is broken, replace it with a new fuse of same value.
COAXIAL
5
This input provides power for the ABT50 and also receives audio data from this device.
It's impossible to connect usual USB sticks.
SPEAKER
1*
ACC-in
11
Rem-out
2*
12
RR-in
3
13
4
RR+in
14
5
RL-in
15
RL+in
6
16
7
FL-in
17
8
FL+in
18
9
FR-in
19
FR+in
10
20
bn
– 6 –
SPEAKER IMPEDANCE
6
Choose according to the connected speakers. If your system is equipped with 3 ohms
speakers or less, switch to 2 ohms. Minimum load is 2 ohms.
7
OPTICAL
Connect to ABT50 for lossless Hi-Res audio transmission from your smartphone.
SERVICE
8
For internal use only.
20
LINE OUT
9
GND
If you only want to use the DSP function of the A592DSP with a separate high
+B
performance amplifier, connect the line out of the A592DSP with the RCA input of your
FL+out
amplifier.
FL-out
bl
SPEAKER LEVEL INPUT/OUTPUT
This is the main connector for Plug & Play installation.
FR+out
REMOTE / SIGNAL TURN ON
FR-out
bm
Choose if the amp shall turn on by separate ACC+/Remote wire or by DC Offset
RL+out
signal.
RL-out
POWER
bn
RR+out
Two color LED: Green light shows normal operation. Green light blinking shows a
RR-out
current data transfer, i.e. receiving data from the app. Red light shows protection
mode, i.e. too low impedance.
MOUNTING INSTRUCTIONS A592DSP
1. Before you start with the installation, make sure you know the security code of your
headunit (if applicable).
2. Remove the headunit from the dashboard and disconnect the main wire harness.
3. Find a place for the A592DSP and connect the provided (or optionally available car-
specific) wire harness to the amp.
4. Optionally: For more power output please follow these steps: Run a 10 mm
wire from the (+) pole of the battery to the (BATT) terminal of the amplifier. Use a fuse
with the related value of the cross section of the power wire. The distance
between the B+ pole and the fuse holder must be 30 cm or less. Run the minus cable
with the same cross section from the (GND) terminal of the amp to the vehicle chassis
ground. Make sure that the contact surface is clean in order to get best conductance.
5. Optionally: For Hi-Res Sound from your smartphone: Connect the optical and
coaxial cables to the inputs of A592DSP and outputs of the AXTON ABT50. Connect
your smartphone via Bluetooth to the ABT50 for using APTX-HD standard or use the
AXTON OTG cable for absolutely lossless audio transmission: the signal is sent from
your smartphone directly to the amplifier without passing any D/A converter.
6. Optionally: Connect the remote control for convenient operation of the Master Volume,
Bass Extender and Mute function. Recommended when using A592DSP without any
headunit.
7. Connect the wire to the headunit.
8. Install the headunit back in the dashboard.
power
2
– 7 –
