CREE LIGHTING Noctura Series Instructions d'installation
Parcourez en ligne ou téléchargez le pdf Instructions d'installation pour {nom_de_la_catégorie} CREE LIGHTING Noctura Series. CREE LIGHTING Noctura Series 2 pages. Led area lights
Également pour CREE LIGHTING Noctura Series : Manuel d'instructions d'installation (10 pages), Manuel d'instructions d'installation (6 pages)
When using electrical equipment, basic safety precautions should always be followed including the following:
READ AND FOLLOW ALL SAFETY INSTRUCTIONS
1.
DANGER- Risk of shock- Disconnect power before installation.
DANGER – Risque de choc – Couper l'alimentation avant l'installation.
SAVE THESE INSTRUCTIONS FOR FUTURE REFERENCE
TO INSTALL:
1
NTA (11L)
Remove the (4) Screws
INSTALLATION
STEP 1:
Remove the (4) Phillips head screws on the back of the luminaire and discard screws. See Figure 1.
STEP 2:
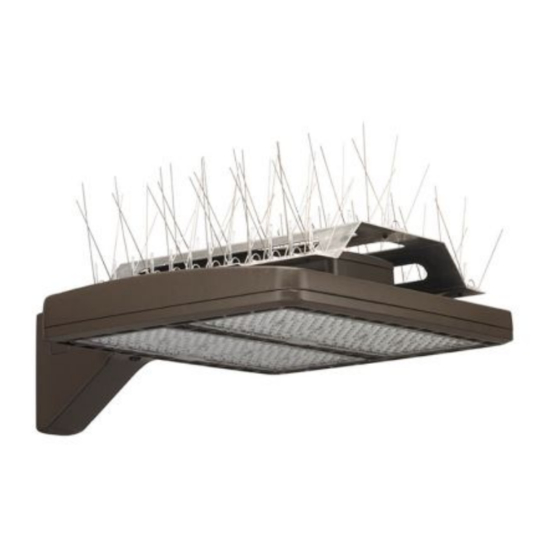
Locate the bird spike frame on the back of the luminaire, aligning the screws included with the bird spike accessory with the holes in luminaire. Tighten
screws to 20 in-lbs (2.2 N·m)
© 2019 Cree Lighting, A company of IDEAL INDUSTRIES. All rights reserved. For informational purposes only. Content
is subject to change. See www.creelighting.com/warranty for warranty and specifications. Cree
registered trademarks of Cree, Inc.
1 of 1
IMPORTANT SAFEGUARDS
NTA (19L)
Remove the (4) Screws
and the Cree logo are
®
Noctura Series
LED Area Lights
INSTALLATION INSTRUCTIONS
INSTRUCTIONS D'INSTALLATION
NTA (35L)
Remove the (4) Screws
www.creelighting.com
LPN00636X0001A0_B
Bird Spikes