CREE LIGHTING CONNECTED MAX CMACC-CMSC-UNV-WH Instructions d'installation - Page 2
Parcourez en ligne ou téléchargez le pdf Instructions d'installation pour {nom_de_la_catégorie} CREE LIGHTING CONNECTED MAX CMACC-CMSC-UNV-WH. CREE LIGHTING CONNECTED MAX CMACC-CMSC-UNV-WH 3 pages. Smart in-wall 5-button scene controller
1
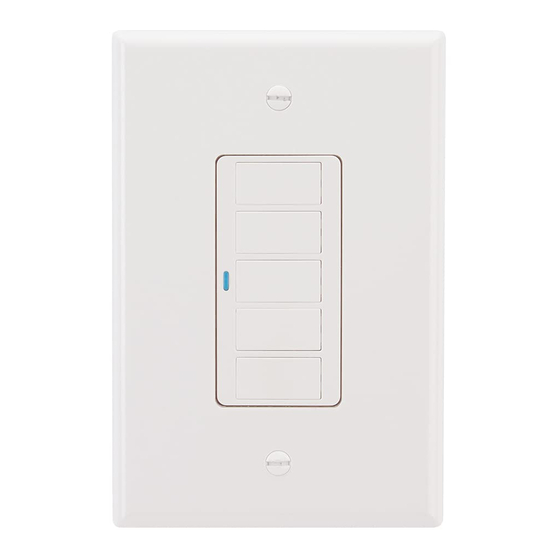
Status
LED
SMART IN-WALL 5-BUTTON SCENE
CONTROLLER FEATURES
•
Personalize to control or change
scenes at the push of a button. See
Figure 1.
•
Provides preset scene control from a
single-gang push-button wall station.
•
Personalized scenes may be assigned
to each of the 5 buttons. See Figure 1.
•
Preset scenes may assign light levels,
color temperatures (CCT), or both.
•
Press any button to power on the
controller. The Status LED light will
indicate the power is on.
•
Each Scene button can be connected to
one or more lamps and/or groups.
2 of 3
C
M
A
C
- C
C
M
S
C
Top
Button/
Button 1
Button 2
Button 3
Button 4
Button 5
INSTALLATION
NOTE: For ease of installation, Cree
recommends using a deep wall box.
STEP 1:
Disconnect power to circuit by turning circuit
breaker OFF before installation.
STEP 2:
If necessary remove existing wall plate and
switch.
STEP 3:
Strip existing wires ½". If two wires will
be connected to the same terminal on the
controller, both wires must be the same
gauge (12AWG or 14AWG).
STEP 4:
Wire the LINE (black), NEUTRAL (white),
and GND (green or bare) supply wires to
the corresponding pigtail leads on the Cree
device, as shown in Figure 2.
NOTE: If replacing an existing wall switch, the
Wireless Scene Controller shall be wired as
instructed; however, the switched power to
2
NEUT
LINE
the load must also be tied directly to the AC
supply leads.
STEP 5:
Attach the wall plate (reference the wall plate
instruction sheet).
STEP 6:
Switch the circuit breaker ON.
STEP 7:
Press and release buttons 1, 3, and 5 at the
same time. The blue LED should blink twice
and then go off. If the blue LED does not
respond with the two-blink sequence, please
follow the RESET instructions to return the
Scene Controller to factory defaults.
GND
SUPPLY
LEADS
LPN00838X0004A0_A