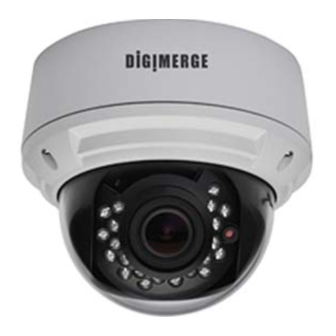
Digimerge DPD24DL Manuel d'instruction - Page 6
Parcourez en ligne ou téléchargez le pdf Manuel d'instruction pour {nom_de_la_catégorie} Digimerge DPD24DL. Digimerge DPD24DL 14 pages. Ultra resolution day & night ir dome camera
Également pour Digimerge DPD24DL : Manuel d'instruction (14 pages)

INSTALLATION. VANDAL DOME
a) Remove the three tamper screws using the Hex key
1
provided.
b) Use included mounting template to mark and pre-drill
b
or Remove the camera base by unscrewing the base
a
2
a
3
a) Remove camera cover by squeezing the back and front
4
of the cover as indicated by the "PRESS" indicators at the
same time and lifting it up and away from the lens.
b) Insert the included video test cable into the RCA jack and
connect to test monitor to set up camera. (see page 8)
c) Adjust camera viewing angle and secure into place by
tightening thumb screw using a flat head screwdriver.
Make lens and OSD adjustments as required. NOTE lens
adjustment levers are by default in the locked position,
turn counter clockwise to unlock.
5
a) Re-attach the camera cover, using the locking nut as a
guide, until it snaps into place.
b) Use the Hex key to tighten the tamper screws to create a
proper weatherproof seal.
Note: Make sure dome cover cord attached to the camera
module does not get caught in the rubber seal of
dome.
the required holes. Use included 2.8" screws
to mount the camera directly to the mounting
surface. Proceed to step 4
locking screw (indicated with a padlock marking)
and turn camera module approx. 5 degrees
counter-clockwise to detach camera base from
the camera module. Proceed to step 3
a) Use the included surface mounting template or
the base to mark and pre-drill all required holes.
Attach camera base to mounting surface.
NOTE: If you plan on installing onto a junction box,
attach provided mounting plate first to the
junction box and then attach camera base to
the mounting plate.
a) Reinsert camera module into camera base
by ligning up the arrow notches, and turning
camera module clockwise to lock into place.
b) Reinstall base locking screw as indicated
by padlock mark to secure camera base to
camera module.
b
Note: If you plan to use conduit fitting, remove
conduit cap using the conduit key.
-6-
INSTALLATION. INTERNAL DOME
1
a) Press down on the tab marked with an arrow to lift
b) While pressing on tab, twist the dome cover anti-
b
a
2
3a
3
b
3b
c
4
b
FLUSH MOUNT ONLY
a) Cut flush mounting hole into surface using provided flush
mounting template.
b) Insert dome into cutout and turn screwdriver clockwise
to unlock the 3 mounting arms.
c) Continue turning clockwise to move mounting arms
c
down until they make contact with inner mounting
5
surface.
Follow step 4 on page 6.
6
a) Re-attach the camera cover, using the locking nut as a guide, until it snaps into place.
b) Reattach dome cover.
up the dome cover slightly
clockwise to release dome cover from back clips.
Lift off the cover.
SURFACE MOUNT ONLY
a) Use included mounting template to mark and
pre-drill the required holes. Use included 2.8"
screws to mount the camera directly to the
mounting surface. Proceed to step 5
OR Remove the camera base by unscrewing the
base locking screw (indicated with a padlock
marking) and turn camera module approx. 5
degrees counter-clockwise to detach camera
base from the camera module.
a) Use the included surface mounting template or
the base to mark and pre-drill all required holes.
Attach camera base to mounting surface.
NOTE: If you plan on installing onto a junction
box, attach provided mounting plate first to the
junction box and then attach camera base to
the mounting plate.
b) Reinsert camera module into camera base
by ligning up the arrow notches, and turning
camera module clockwise to lock into place.
c) Reinstall base locking screw as indicated by
padlock mark to secure camera base to camera
module.
Skip step 4
-7-
