Sony XPL-SDKW Manuel de l'utilisateur - Page 6
Parcourez en ligne ou téléchargez le pdf Manuel de l'utilisateur pour {nom_de_la_catégorie} Sony XPL-SDKW. Sony XPL-SDKW 9 pages. Equipped with the global shutter polarization cmos sensor gige vision
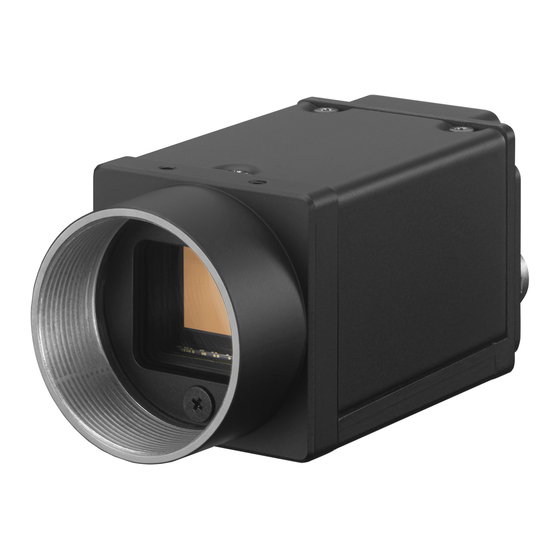
Connecting the Cables
1
2
Connect the camera cable to the DC IN connector and connect the
LAN cable to the RJ45 connector respectively. If you use a camera
module interface board or a hub that supports PoE, you can
operate the camera even if you do not connect the camera cable
to the DC IN connector. When you connect the LAN cable with
fastening screws, turn the two screws on the connector to secure
the cable tightly.
Connect the other end of the camera cable to the DC-700/700CE
and the other end of the LAN cable to the camera module interface
board or a hub.
1 RJ45 connector
2 DC IN connector
4 Fastening screws
5 Camera cable
Note
Do not supply power to the camera cable and LAN cable
at the same time.
Controlling the Camera From the Host Device
Control functions
Operating mode
Free run
Trigger edge
detection
Trigger pulse
width detection
Gain
Partial Scan
(the number of settable lines are 16 or more)
LUT (Look Up Table)
External trigger input
Video output switch
Monochrome model: Mono 8 / 10 / 12 bit
Defect correction
Shading correction
Image flip
Area gain
2020
3
4
5
3 LAN cable
Description
Free run/Trigger
1/100,000 s to 60 s
1/100,000 s to 60 s
Setting by trigger pulse width
0 dB to 18 dB
Variable, 4-line increments
OFF/ON (Mode: 5 types)
DC IN connector
OFF/ON
OFF/ON
OFF/ON
OFF/ON
Trigger Signal Input
Trigger signals can be input via the 2nd, 3rd, 4th pins of the DC IN
connector, or the software command. Switchover of the trigger
signal can be changed via the TriggerSource register.
Register
Parameter
Line1 (0)
Line2 (1)
Trigger
Line3 (2)
Source
Software (4)
FreeSetSequence (13)
PTP (15)
* XCG-CG160/CG160C: Unavailable. Dedicated to output.
Trigger signal polarity
Positive refers to a trigger signal polarity activated while rising from
Low to Hi, or during the Hi interval.
Negative refers to a trigger signal polarity activated while falling
from Hi to Low, or during the Low interval.
Register
Parameter
FallingEdge (0)
Trigger Activation
RisingEdge (1)
DC IN connector specifications
2.0 µs or less
2.0 µs or less
10 µs to 2 s
1 frame time or more
Trigger input polarity = Negative
2.0 µs or less
2.0 µs or less
10 µs to 2 s
1 frame time or more
Trigger input polarity = Positive
Note
• When inputting a trigger signal to the camera using the DC-
700/CE, use DC 5 V or less at the logical high level.
• Make sure to supply power to the camera module and confirm
that the camera module is operating before inputting a trigger
signal. If you input trigger signal to a camera module without
the power supplied, this may cause a malfunction of the
camera module.
Trigger Signal Specifications
Trigger input polarity = Positive
2.0 µs
2.0 µs or less
or less
10 μs to 2 s
Trigger input polarity = Negative
10 µs to 2 s
2.0 µs
2.0 µs or less
or less
Voltage reading shows figure by terminal with 10 kΩ or more.
Note
When inputting a trigger signal to the camera using the DC-700/DC-
700CE, use DC 5 V or less at the logical high level.
Setting
DC IN connector 2nd pin (GPI1)
DC IN connector 3rd pin (GPI2)
DC IN connector 4th pin (GPI3) *
Software (TriggerSoftware register)
FreeSetSequence mode
IEEE1588 synchronization mode
Setting
Negative
Positive
5 to 24 V (DC IN
connector 2nd pin)
3.5 to 5.5 V (DC IN
connector 3rd and
4th pins*)
0 to 0.4 V
5 to 24 V (DC IN
connector 2nd pin)
3.5 to 5.5 V (DC IN
connector 3rd and
4th pins*)
0 to 0.4 V
* Except XCG-CG160/CG160C
5 V to 24 V
0 V to +0.4 V
5 V to 24 V
0 V to 0.4 V
XCG-CP510/XPL-SDKW
31