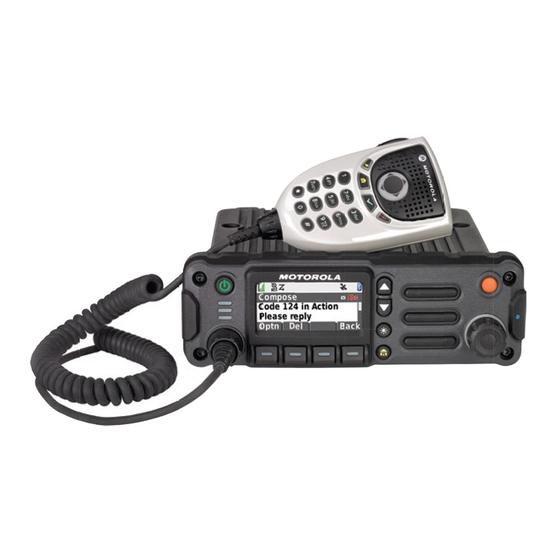
Motorola ASTRO APX O2 Control Head Mobile Radio Carte de référence rapide - Page 3
Parcourez en ligne ou téléchargez le pdf Carte de référence rapide pour {nom_de_la_catégorie} Motorola ASTRO APX O2 Control Head Mobile Radio. Motorola ASTRO APX O2 Control Head Mobile Radio 44 pages. Control head mobile radio
Également pour Motorola ASTRO APX O2 Control Head Mobile Radio : Manuel d'installation (25 pages)

O2CH_QR-Card.book Page 3 Friday, August 30, 2013 4:26 PM
m
®
ASTRO
APX™
O2 Control Head Mobile Radio
Quick Reference Card
RF Energy Exposure and Product Safety Guide for
Mobile Two-Way Radios
ATTENTION!
This radio is restricted to Occupational use only. Before
using the radio, read the RF Energy Exposure and
Product Safety Guide for Mobile Two-Way Radios which
contains important operating instructions for safe usage
and RF energy awareness and control for Compliance
with applicable standards and Regulations.
Radio Controls
LED Indicators
Up & Down
Power Button
Buttons*
Multi-function Knob
(MFK)*
Home Button
Dimmer Button
Menu Select Buttons*
Accessory Port (Microphone)
*These controls/buttons are programmable.
Radio On/Off
Press the Power button to turn the radio on or off.
Adjusting Volume
If volume is set as the primary mode,
1
Turn the MFK clockwise to increase volume or
counterclockwise to decrease the volume.
If volume is not set as the primary mode, press the MFK
once and repeat step 1.
Selecting a Zone
If zone is set as the primary mode,
1
Turn the MFK until the display shows the desired
zone and press the PTT button to begin transmitting
on the displayed zone.
If zone is not set as the primary mode, press the MFK
Emergency
once and repeat step 1.
Button*
OR
>
<
2
or
(on the keypad mic.) to scroll to Zone.
3
Press the Menu Select button directly below Zone.
4
Rotate the MFK or
5
Press the Menu Select button directly below Sel or
the button (on the keypad mic.) to confirm the
selected zone number.
6
Press the PTT button to begin transmitting on the
displayed zone.
Selecting a Channel
If channel is set as the primary mode,
1
Turn the MFK until the display shows the desired
channel and press the PTT button to begin
transmitting on the displayed channel.
If channel is not set as the primary mode, press the MFK
once and repeat step 1.
OR
>
2
3
Press the Menu Select button directly below Chan.
4
Rotate the MFK or press
channel.
5
Press the Menu Select button directly below Sel or
the button (on the keypad mic.) to confirm the
channel.
6
Press the PTT button to transmit on the displayed
channel.
Receiving and Transmitting
1
Take the microphone off the hook.
2
Select zone/channel.
3
Listen for a transmission.
OR
>
Menu Select button directly below Mon and listen for
activity.
4
Adjust volume, if necessary.
D
U
or
to the desired zone.
5
Press the PTT button to transmit; release to receive.
Sending an Emergency Alarm
1
Press the Emergency button. A tone sounds and the
display alternates Emergency and the home display.
2
A dispatcher acknowledgment Ack received display
follows.
AND, Trunking Only:
A high-pitched tone indicates that the alarm has been
received by the trunked system's central controller.
To exit emergency at any time, press and hold the
Emergency button or the PTT button.
<
or
(on the keypad mic.) to scroll to Chan.
D
U
or
to the desired
<
or
(on the keypad mic.) to Mon then press the
English
