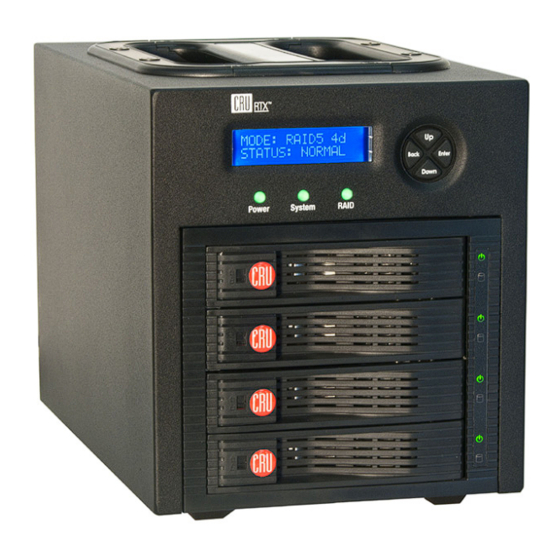
CRU Dataport RTX430-3QR Manuel de l'utilisateur - Page 3
Parcourez en ligne ou téléchargez le pdf Manuel de l'utilisateur pour {nom_de_la_catégorie} CRU Dataport RTX430-3QR. CRU Dataport RTX430-3QR 9 pages.
Également pour CRU Dataport RTX430-3QR : Manuel de démarrage rapide (2 pages)

1.3 Warnings and Notices
Please read the following before beginning installation.
General Care
• The main circuit board of the HDD is susceptible to static
electricity. Proper grounding is strongly recommended to prevent
electrical damage to the enclosure or other connected devices,
including the computer host. Avoid all dramatic movement,
tapping on the unit, and vibration.
• Avoid placing hard drives close to magnetic devices, high
voltage devices, or near a heat source. This includes any place
where the product will be subject to direct sunlight. Do NOT
allow water to make contact with the drives or enclosure.
• Before starting any type of hardware installation, please ensure
that all power switches have been turned off and all power
cords have been disconnected to prevent personal injury and
damage to the hardware.
• To avoid overheating, the RTX enclosure should be operated in a
well-ventilated area and in such a way that sufficient airflow is
maintained across the controller chips.
• Remove the drives before transporting the RTX enclosure to
prevent damage to the drive interfaces.
RAID
• Use only hard drives that are in perfect condition. Avoid using
drives that have ever developed bad sectors during previous
usage. This could lead to possible device failure or loss of data.
• The RTX430-3QR supports SATA hard drives of various
specifications and different capacities. However, we recommend
using drives of the same brand and type for optimal performance.
If drives of different capacities are used in a RAID, the capacity
of the smallest drive will determine how much of each drive is
used. The additional capacity on the larger drives will not be
used by the RAID.
• RAID level 0 will allow you to use the full combined capacity of
the drives, and offers the best data transfer speeds. However,
RAID 0 offers no protection for the data. If one drive fails in a
RAID 0, the data on all of the drives is irretrievably lost. Before
creating a RAID, investigate the various RAID types and choose
the one that is best for your needs.
• Always back up data before switching RAID types. Switching
RAID types will destroy current data. You must reformat
your drives afterward.
2 Introduction to RAID
A RAID (Redundant Array of Independent Disks) is an array of multiple
hard drives that are combined in a way that provides faster performance
and/or data safety. Your RTX unit is capable of creating and managing
several different varieties of RAID. You may choose your preferred RAID
level based on factors such as disk capacity, desired data safety, and
desired performance.
2.1 Summary of RAID Levels
The RTX430-3QR supports RAID Levels 0, 1, 5, and 10. RAID Level 5
is most commonly used by those seeking an optimal balance of speed
and data safety.
RAID
Description
Level
0
Also known as striping. Data distributed
across multiple drives in the array. There is
no data protection.
1
Also known as mirroring. All data repli-
cated on two separate disks. This is a high
availability solution, but due to the 100%
duplication, only half the total disk capacity
is available for data storage.
5
Also known as Block-Interleaved Distrib-
uted Parity. Data and parity information is
subdivided and distributed across all disks.
Can withstand the failure of one drive. The
total capacity of all but one of the drives is
available for data storage.
10
Also known a stripe of mirrors. Data is
striped across two separate disks and mir-
rored to another disk pair.
* The RAID level becomes available as a menu option when exactly these numbers of
hard drives are installed inside of the RTX enclosure.
**If both drives in either the RAID 0 or RAID 1 set fail, then the entire RAID will fail. If
only one drive in each of the RAID 0 and RAID 1 sets fail, then the RAID is preserved.
2.2 Hot Spares (Host Standby)
Hot spares are connected as part of your RAID and are switched into
operation when a drive fails. RAID 5 will support hot spares when
configured with three hard drives (displayed as a "RAID5 3d" on the
LCD). When a drive fails, the RTX enclosure will immediately rebuild
the RAID. After that a new drive will need to be inserted in place of the
failed one. Replacement drives should preferably be the same model
and capacity as the failed one.
3 Installation Steps
3.1 Hard Drive Installation
a. Pull the ejection handle on the TrayFree bay to open the bay door.
b. Insert a SATA hard drive into the bay. Make sure it is label-side up
with the SATA connection on the drive inserted first toward the rear
of the enclosure.
c. Shut the bay door.
Required
Data
No. of
Redundancy
Drives*
2
No data
protection
2
1 drive
3 or 4
1 drive
4
1 drive**
Page 3
