Ariston 7HPKQ 644 D GH Mode d'emploi et manuel du propriétaire - Page 9
Parcourez en ligne ou téléchargez le pdf Mode d'emploi et manuel du propriétaire pour {nom_de_la_catégorie} Ariston 7HPKQ 644 D GH. Ariston 7HPKQ 644 D GH 25 pages.
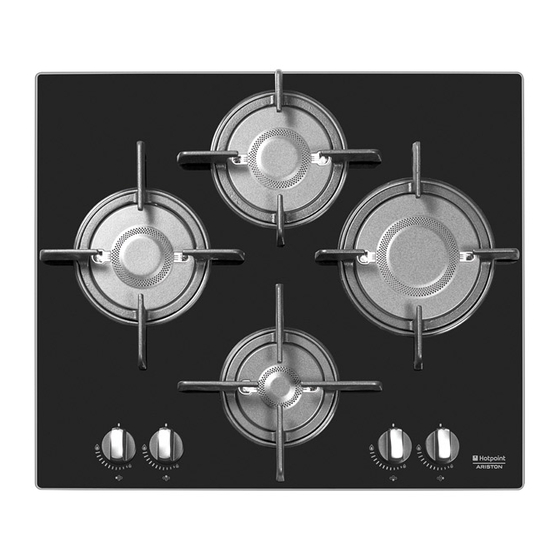
Start-up and use
! The position of the corresponding gas burner is shown
on every knob.
Gas burners
Each burner can be adjusted to one of the following settings
using the corresponding control knob:
●
Off
Maximum
Minimum
To turn on one of the burners, place a lighted match or
lighter near the burner, press the knob all the way in and
turn it anti-clockwise to the "High" setting.
The knob must be pressed in for about 2-3 seconds until
the device that keeps the flame lit warms up.
Some models are equipped with an ignition button
incorporated into the control knob. If this is the case,
the ignitor is present. To light a burner, simply press the
corresponding knob all the way in and then turn it anti-
clockwise to the "High" setting, keeping it pressed in until
the burner lights.
! If a flame is accidentally extinguished, turn off the control
knob and wait for at least 1 minute before trying to relight it.
To switch off the burner, turn the knob in a clockwise
direction until it stops (when reaches the "•" position).
Practical advice on using the burners
To ensure the burners operate efficiently:
• Use appropriate cookware for each burner (see table)
so that the flames do not extend beyond the bottom of
the cookware.
• Always use cookware with a flat base and a cover.
• When the contents of the pan reach boiling point, turn
the knob to minimum.
Burner
Fast (R)
Semi Fast (S)
Auxiliary (A)
To identify the type of burner, refer to the designs in the
section entitled, "Burner and Nozzle Specifications".
! Make sure the pans do not overlap the edges of the hob
while it is being used..
Ø Cookware Diameter (cm)
24 - 26
16 - 20
10 - 14
Correct positioning of the FTGH burners
Precautions and tips
! This appliance has been designed and manufactured
in compliance with international safety standards. The
following warnings are provided for safety reasons and
must be read carefully.
General safety
• This is a class 3 built-in appliance.
• Gas appliances require regular air exchange to
maintain efficient operation. When installing the hob,
follow the instructions provided in the paragraph on
"Positioning" the appliance.
• These instructions are only valid for the countries
whose symbols appear in the manual and on the
serial number plate.
• The appliance was designed for domestic use inside the
home and is not intended for commercial or industrial use.
• The appliance must not be installed outdoors, even in
covered areas. It is extremely dangerous to leave the
appliance exposed to rain and storms.
• Do not touch the appliance with bare feet or with wet or
damp hands and feet.
• The appliance must be used by adults only for the
preparation of food, in accordance with the instructions
outlined in this booklet. Any other use of the appliance
(e.g. for heating the room) constitutes improper use and
is dangerous. The manufacturer may not be held liable
for any damage resulting from improper, incorrect and
unreasonable use of the appliance.
• Ensure that the power supply cables of other electrical
appliances do not come into contact with the hot parts
of the oven.
GB
9