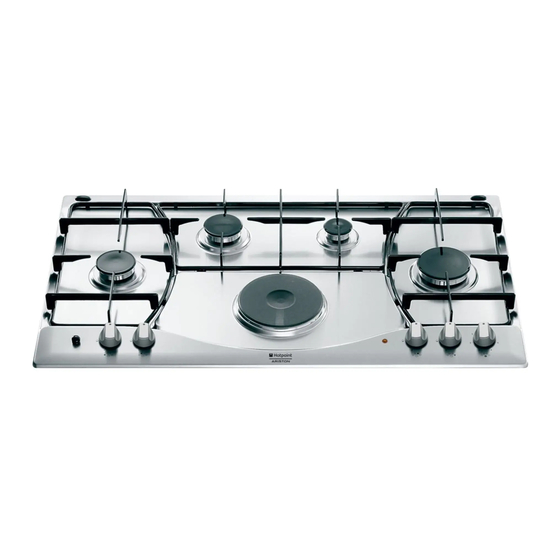
Ariston PH 941MSTB Manuel d'instructions pour l'installation et l'utilisation - Page 3
Parcourez en ligne ou téléchargez le pdf Manuel d'instructions pour l'installation et l'utilisation pour {nom_de_la_catégorie} Ariston PH 941MSTB. Ariston PH 941MSTB 13 pages. Built-in cooking table
Également pour Ariston PH 941MSTB : Manuel d'utilisation (13 pages), Manuel d'installation et d'utilisation (34 pages), Manuel d'utilisation (20 pages)

The position of the corresponding gas burner or electric
hot plate (if present) is indicated on each control knob.
Gas Burners
The burners differ in size and power. Choose the most
appropriate one for the diameter of the cookware being
used.
The burner can be regulated with the corresonding control
knob by using one of the following settings:
• Off
High
Low
To turn on one of the burners, place a lighted match or
lighter near the burner, press the knob all the way in and
turn in the counter-clockwise direction to the "High" setting.
On those models fitted with a safety device (F), the
knob must be pressed in for about 6 seconds until the
device that keeps the flame lighted warms up.
On those models fitted with an ignitor (D), the "E" ignition
button, identified by the
and then the corresponding knob pushed all the way in
and turned in the counter-clockwise direction to the "High"
setting.
Some models are equipped with an ignition switch
incorporated into the control knob. If this is the case, the
ignitor (D) is present, but not the "E" switch (the
is located near each knob).
To light a burner, simply press the corresponding knob all
the way in and then turn it in the counter-clockwise
direction to the "High" setting, keeping it pressed in until
the burner lights.
Caution: If the burner accidently goes out, turn off the
gas with the control knob and try to light it again after
waiting at least 1 minute.
To turn off a burner, turn the knob in the clockwise
direction until it stops (it should be on the "•" setting).
Electric Hot Plates (only on certain models)
The hot plates vary in diameter and power: "normal" and
"fast". The latter can be identified by a red boss in the
center of the hot plate itself.
The hot plate can be regulated by turning the
corresponding knob in the clockwise or counter-clockwise
direction to any one of the 6 different settings:
0
Off
1
Low
2-5
Medium
6
High
Before cleaning or performing maintenance on your
appliance, disconnect it from the electrical power supply.
To extend the life of the cooktop, it is absolutely
indispensable that it be cleaned carefully and
thoroughly on a frequent basis, keeping in mind the
following:
•
The enameled parts and the glass top, if present, must
be washed with warm water without using abrasive
powders or corrosive substances which could ruin
them;
How To Use Your Appliance
symbol, must first be pressed
symbol
How to Keep Your Cooktop in Shape
The section entitled, "Practical Cooking Advise", provides
information on the recommended settings for various types
of food or cooking processes.
When the knob is on any of the settings other than "Off",
the "H" operating light comes on.
Cooktop Broiler (only on certain models)
The broiler can be regulated by turning the corresponding
knob in the clockwise or counter-clockwise direction to any
of the 12 possible settings:
0
Off
1
Low
2-11 Medium
12
High
When the knob is on any of the settings other than "Off",
the "H" operating light comes on.
Ceramic Glass Module (only on certain models)
This cooktop is fitted with dual-ring radiant heating elements
located beneath the glass. It is possible to turn on only the
circular part of the elemement (identified by the letter "A") or
the cooking surface can be enlarged by turning on both "A"
and "B". To turn only the circular "A" element, simply turn the
knob in the clockwise direction to any one of the 12 available
settings. To add the "B" section, turn the knob to setting 12
and then click it into the
the knob in the counter-clockwise direction to one of the 12
settings.
The figure shows the heating zones, which become red when
the element is turned on.
A. Circular heating zone;
B. Extended heating zone;
C. Indicator light to show when the cooking zone is above
60°C, even after the heating element has been turned
off.
When the knob is on any of the settings other than "Off",
the "H" operating light comes on.
•
The removable parts of the burners should be washed
frequently with warm water and soap, making sure to
remove caked-on substances;
•
On cooktops with automatic ignition, the end of the
electronic ignition device must be cleaned carefully and
frequently, making sure that the gas holes are not
clogged;
•
The electric hobs should be cleaned using a damp cloth
and then rubbed with oil while still warm;
•
Stainless steel can be stained if it remains in contact
13
setting. Then proceed by turning
A
B
