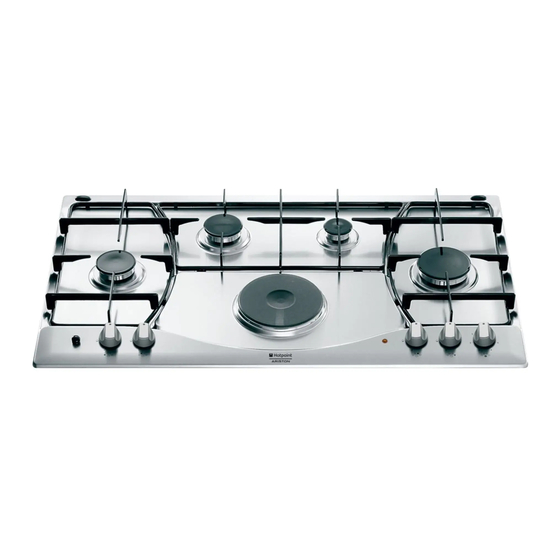
Ariston PH 941MSTB Manuel d'utilisation - Page 15
Parcourez en ligne ou téléchargez le pdf Manuel d'utilisation pour {nom_de_la_catégorie} Ariston PH 941MSTB. Ariston PH 941MSTB 20 pages. Built-in cooking table
Également pour Ariston PH 941MSTB : Manuel d'instructions pour l'installation et l'utilisation (13 pages), Manuel d'utilisation (13 pages), Manuel d'installation et d'utilisation (34 pages)

! There might be traces of grease left by the glue used to seal the glass
which should be removed before using the appliance with a mild cleaning
product. During the first few hours of use you might smell rubber but this will
disappear quickly.
Electric hotplates*
The corresponding knob may be turned clockwise or anti-clockwise and set
to six different positions:
Setting
Normal or Fast Plate
0
Off
1
Minimum power
2-5
Intermediate powers
6
Maximum power
When the selector knob is in any position other than the off position, the 'on'
light comes on.
Practical advice on using the electric hotplates*
To avoid heat loss and damage to the hotplates, use pans with a flat base,
whose diameter is no less than that of the hotplate itself.
Setting
Normal or Fast Plate
0
Off
1
Cooking vegetables, fish
2
Cooking patatoes (using steam) soups,
chickpeas, beans.
3
Continuing the cooking of large quantities of
food, minestrone.
4
For roasting (average)
5
For roasting (above average)
6
For browning and reaching a boil in a short time
! Before using the hotplates for the first time, you should heat them at maximum
temperature for approximately 4 minutes, without placing any pans on them.
During this initial stage, their protective coating hardens and reaches its
maximum resistance.
Practical Advice on Using the Half Fish-Kettle Burner*
The two "Half Fish-Kettle" burners, are eliptic in form and can be turned up
to 90°. This makes the cooktop more flexible in terms of how it can be used.
To turn the two burners 90°, proceed as follows:
• Make sure that the burners are cool;
• Lift the burner completely out of its housing;
• Replace it in its housing in the position desired;
• Make sure that the burners are positioned correctly before use.
In addition, the two burners can be used in tandem or speartely with cookware
of different shapes and sizes:
• Double burner for a fish-kettle or oval cookware )Fig. A(.
• Double burner for a griddle or rectangular/square cookware with minimum
dimensions of 28x28 cm (Fig. B)
• Double burner for large cookware (diameter of 26-28 cm) (Fig.C).
• Single burner for medium size cookware (diameter of 16-20 cm) (Fig.D).
Fig. A
Fig. C
Practical Advise on Using the Broiler*
Preheat the broiler by turning the knob to 12. Settings 1-8 are recommended
for reheating food or for keeping it warm after it has been cooked. In general,
cooking vegetables can cause stains which are difficult to remove.
Food
Weight
(Kg)
Pork chops
0,50
Steak
0,60
Sausages
0,45
Shish Kabobs (Meat)
0,40
Hamburger
0,40
Toasted Sandwiches
N°3
Bread
3 slices
Aubergines
3 slices
Oven-roasted Tomatoes
N°4
Precautions and tips
! This appliance has been designed and manufactured in compliance with
international safety standards. The following warnings are provided for safety
reasons and must be read carefully.
General safety
• This is a class 3 built-in appliance.
• Gas appliances require regular air exchange to maintain efficient
operation. When installing the hob, follow the instructions provided
in the paragraph on "Positioning" the appliance.
• These instructions are only valid for the countries whose symbols
appear in the manual and on the serial number plate.
• The appliance was designed for domestic use inside the home and is not
intended for commercial or industrial use.
• The appliance must not be installed outdoors, even in covered areas. It is
extremely dangerous to leave the appliance exposed to rain and storms.
• Do not touch the appliance with bare feet or with wet or damp hands and
feet.
• The appliance must be used by adults only for the preparation of food,
in accordance with the instructions outlined in this booklet. Any other
*
Only available on certain models.
Fig. B
Fig. D
Knob
Preheating
Cooking
Setting
(min.)
time
(min.)
12
15
5
10
20
12
10
5
10
5
20
12
14
5
10
15
5
11
2
5
11
3
5
12
5
5-7
12
10-15
5
GB
15
