Blackberry 857 Installation et mise en route
Parcourez en ligne ou téléchargez le pdf Installation et mise en route pour {nom_de_la_catégorie} Blackberry 857. Blackberry 857 2 pages. Travel charger
Également pour Blackberry 857 : Caractéristiques supplémentaires (2 pages), Garantie limitée sur les accessoires (7 pages), Référence rapide pour les langues (3 pages), Information (3 pages)
Refer to your Installation and Getting Started Guide and Handheld User Guide for more
detailed information about your handheld.
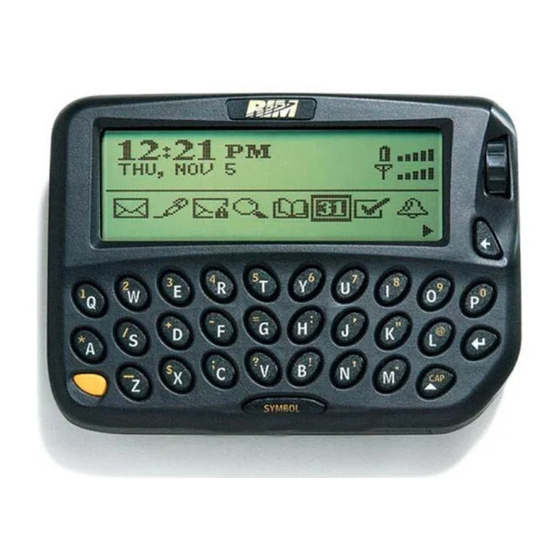
Using the keyboard and trackwheel
The handheld includes a keyboard and a trackwheel. The trackwheel helps
you navigate, view, and select items on each screen. To scroll though menu
items or text, roll the trackwheel. To select applications and menu options,
click (press) the trackwheel.
Charging your handheld
Your handheld is powered by an internal rechargeable battery. When you
first receive your handheld, you must charge the battery.
Warning: When you connect your handheld to your computer, use only the
cradle provided by Research In Motion® for use with your handheld.
To connect the cradle to your computer
1. Connect the AC adapter to the cradle's serial port connector.
2. Plug the cradle cable into an available serial port on your computer.
3. Plug the AC adapter cord into a wall outlet.
To charge your handheld
1. Insert your handheld into the charging cradle by aligning the
connector port on the bottom edge of your handheld with the
connector prongs of the cradle. Press your handheld firmly in place.
2. Let your handheld charge to full battery power before you use it.
When your handheld is charging, the battery power indicator (on the
upper right corner of the Home screen) changes to a charging
indicator. After your handheld is fully charged, the battery power
indicator replaces the charging indicator.
Installing the desktop software
You must install the desktop software to send and receive messages and to
use the other desktop software tools. You must install handheld
applications to update your handheld software. Refer to the Getting Started
Guide that came with your handheld for more information.
Turning on and turning off your handheld
To turn on your handheld, press the Power button. The Home screen
appears. To turn off your handheld, hold the Power button. You can also
click the Turn Power Off icon on your handheld's Home screen.
Turning on and turning off your radio
When you first receive your handheld, the wireless radio might be turned
off. On the Home screen, click the Turn Wireless On icon. The Turn
Wireless On icon is an antenna, but when you click it, the name changes
to Turn Wireless Off and the icon changes to an airplane. To turn off the
radio, click the Turn Wireless Off icon.
Setting the date and time
1. On the Home screen, click the Options icon. The Device Options
screen appears.
2. Click Date/Time. The Date/Time screen appears.
3. In the field that you want to set, press the Space key until the
preferred option appears.
4. Click the trackwheel to view the menu. Click Save.
Enabling a password
Warning: If the password that you set is typed incorrectly ten times, all
information is erased from your handheld for security reasons. Refer to the
Installation and Getting Started Guide that came with your handheld for
information on reloading your handheld applications.
1. On the Home screen, click the Options icon. The Device Options
screen appears.
2. Click Security. The Security screen appears.
3. In the Password field, press the Space key to enable a password. A
dialog box appears.
4. Type a password of at least four characters, and then click the
trackwheel. Type your new password again to verify it.
5. In the Security Timeout field, set how much idle time should pass
before the Lock screen appears. Press the Space key until the
preferred option appears.
6. Click the trackwheel to view the menu. Click Save.
The Options screen appears and your password is enabled.
Setting notification profiles
You can set how your handheld notifies you of alarms, appointments,
messages, pages, and tasks.
1. On the Home screen, click the Profiles icon. The Profiles screen
appears.
2. Select the profile that you want to enable and click the trackwheel to
view the menu. Click Enable. The word (On) appears beside your
selection.
Sending email or PIN messages
After you activate your handheld, you can send and receive email and
peer-to-peer (PIN) messages. Refer to the Getting Started Guide for more
information on sending messages.
1. On the Home screen, click the Compose icon. The To screen appears.
2. Select [Use Once]. Click the trackwheel to view the menu.
3. Select a send method (email or PIN). Type an email address or a PIN.
4. Type a subject.
5. Type your message.
6. Click the trackwheel to view the menu. Click Send.
Note: To locate your PIN number, on the Home screen, click the Options icon,
and then click Status. Your PIN number is displayed in the PIN field.