Displays2go SMHGSET4 Manuel de l'utilisateur - Page 6
Parcourez en ligne ou téléchargez le pdf Manuel de l'utilisateur pour {nom_de_la_catégorie} Displays2go SMHGSET4. Displays2go SMHGSET4 6 pages. Tension-suspended glass hanging shelves
4) Loosen the part A (at right) with the Allen key, and feed
the rope through the hardware. Then, use the steps below to
crimp the rope into place.
5) Feed the steel wire through
the second hole in the collar,
according to the arrow in Figure
1. The wire head should be level
with the collar, not protruding.
Then, pull the wire rope back, as
shown by the arrow in Figure 2 to ensure the wire loop is small.
After the loop is minimized, use the pliers to crimp the aluminum parts, in order
to secure the wire loop, as shown in Figure 3. Then, re-tighten the allen keys
back down onto the wire.
6) Slide the round copper piece (A) up to the collar, then use the Allen key to
tighten the two screws on this piece to prevent slippage.
7) Insert the wire rope into the cone part, as shown at right, then rotate and
tighten the tube. The spring in this hardware will allow for some tightening/
loosening to slightly adjust the tension of the wire. Adjust as desired.
8) Repeat all steps for each of the hanging points on the ceiling.
Enjoy your new
Enjoy your new
hanging shelves!
hanging shelves!
6
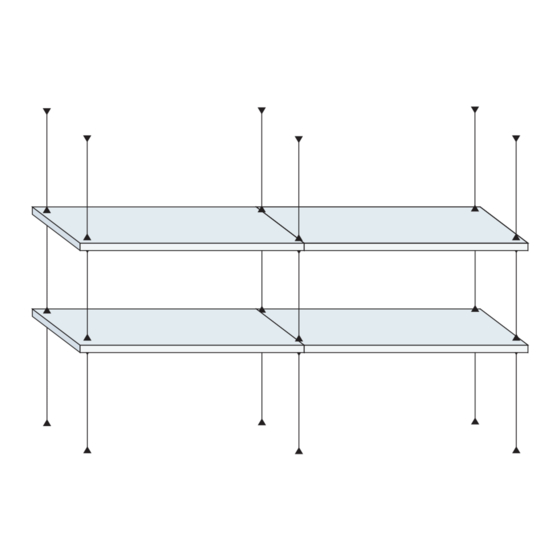
1) Drill holes into floor,
using the map on page 3 as
a guide. Be sure to measure
carefully, to ensure that the
shelves hang properly.
2) Once the holes are drilled,
insert and secure anchors into
each hole.
3) Unscrew part A, remove
the cone top and insert screw
through the cone, as shown.
Then, fasten the cone to
the ceiling, using the screw.
Repeat for each attachment
point.