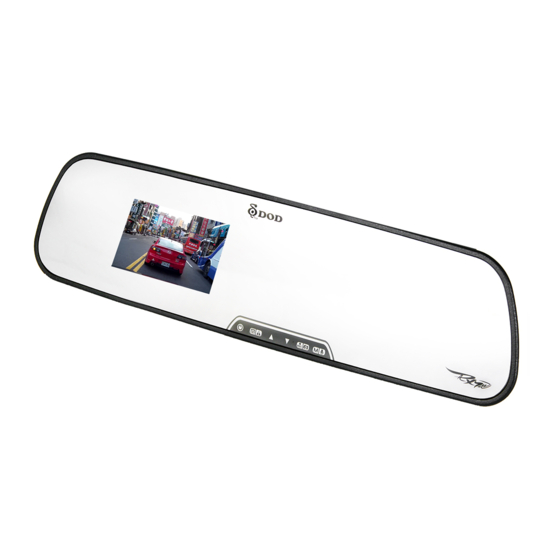
DOD RX7W Manuel d'installation du matériel - Page 2
Parcourez en ligne ou téléchargez le pdf Manuel d'installation du matériel pour {nom_de_la_catégorie} DOD RX7W. DOD RX7W 2 pages.

RX7W
Product Structure
Hardware Installation Guide
1
3
5 7
Thank you for purchasing Our company product,
please following the instruction to use the device
correctly.
Our company products are made of top materials to
provide the best quality product with the best image
2
4
6
quality to all customers.
Recording notes
8
10
12
1、Recording in a car without film on windshield can ensure the
best image recorded.
2
、
Please keep the windshield clean to prevent bad influence
on image quality.
9
11
3 If windshield wiper can't clean the windshield, please
、
replace it with a new one, or the image quality in the rainy
1、Power switch
9
、USB/Vehicle Charger
day will be influenced.
Power Supply Jack
2、MENU/SOS Emergency File
4 Image quality will be better while recording in a sunny day, but
、
Lock(Long press)
10、SD Card Slot
please note in backlight position the image will be darker, it's
3、UP
11、AV Output Port
the normal reaction while image sensor face the light straightly.
4、DOWN
12、HDMI Output Jack
、
5
In order to present a better video and audio quality, we suggest
5、Video Recording/Camera
using the following player software: Storm video, Windows
/Confirm
Media Player,QuickTime Player.
6、MODE/Mute Mode (Long press)
、
7、Microphone
6 After the machine high and low temperature testing; But in order
8、Reset key
to ensure a longer life, summer heat inside the car, such as the
machine without work, the proposed move to the shade.
Installation and Fixation
13
14
14
15
1.
2.
3.
4.
5.
、
16
1
Please clean the oil, fingerprint or any other filth on windshield
before installing.
2
、
Please insert the memory card into device as instruction, and
use the belt fixer to attach the device on rear view mirror.
13
、Speaker
3
、
Please adjust the lens to the best position.(Note: don't be
14
、Fixing Strap
blocked by the rear view mirror.)
15、Lens
、
4
Please tighten the belt fixer to prevent loosing, users can shear
16、
Display Screen
the unnecessary belt.
5
、
Please remove the protect film on lens and LCD before recording
to ensure the best picture quality.
Recording image
Power On/Off
1
2
3
4
5
6
7
8
Please connect the vehicle cigarette lighter and start the engine, the
device will be switched on immediately.
When car engine stooped or car power disconnected, the device will
9
shutdown in 10 seconds automatically.
Notes
1、For the users whose vehicle cigarette lighter keeps power
supplying after the engine stopped, please unplug the car
charger before leaving the vehicle.
11
12
13
2、Please use Class 6 or above Micro SD card.
Standby Image
3、Once the file be protected, the file will not be deleted by loop
recording. The device can protect up to 10 files, if the 11th file be
protected, the oldest protected file will be turned to unprotected
file which will be deleted by looping recording.
Software Operation
Switch On
1、Insert the memory card.
1、WDR works all time
8、Power connected
2、Connect the car charger into the vehicle cigarette lighter
2、Recording image
9、Motion Detection
and the device.
3、Recording mode
10、Time
4、Resolution
11、Memory Card icon
3、Start the vehicle.
5、Loop recording in 3 minutes length
12、Recording time
4、The device be turned
6、Exposure
13、Date
on, and start recording
7、Microphone
14、White Balance
automatically.
Recording Settings
System Settings
After stopped recording, press MENU to enter the recording
After stopped recording, press MENU twice to enter the system
setup.
settings.
Format: Format the memory card; please backup your data
14
WDR:
Toggle on the WDR function.
before formatting.
Resolution:Set the recording resolution.
Language:Support multiple languages; you can choose the
10
Exposure:Set the exposure value.
language according to your preferences.
White Balance: Adjust for ambient light.
Date/Time:Set the system time.
Record Audio:Toggle on or off the sound recording function.
Frequency:Adjust the light frequency of use of the
environment.
Date Stamp:Toggle on or off the data stamp function.
Beep Sound:Switch on or off the system beep indicator.
Loop recording:Set the video length in recording cycle mode, or
Screen Saver
:Set the screen automatic off time, or set it as
toggle off record cycle function.
always on.
Gsensor:Set the sensitivity level of the G-sensor file protection .
TV Mode:You can toggle between NTSC and PAL when in video
Motion Detection:Toggle on or off the motion detection recording
output mode.
function.
Version: Check the system version number.
Default Setting:Reset all the settings to the default state.
Plate stamp: can display the registration number on the
video.
Password settings: Set the system operation and to protect the
password file security.
Video Playback
Video-Play Operation
1、After stopped recording, press MODE to enter the video-play
mode.
2、Press UP or Down to select the desired video to play.
3、Press CONFIRM to start playing video.
4、Press CONFIRM again to pause the video.
Delete Video
1、After stopped recording, press MODE to enter the video-play
mode.
2、Press UP or Down to select the desired video to delete.
3、Press MENU, enter the menu to delete the video or delete all.
Play on Computer
Recommended PC requirements for 1080P 30fps video playing:
1、intel Core 2 Duo 2.0GHz or above CPU
2、2G or above DDRII RAM
3、Graphic card supports DirectX 10 or above
