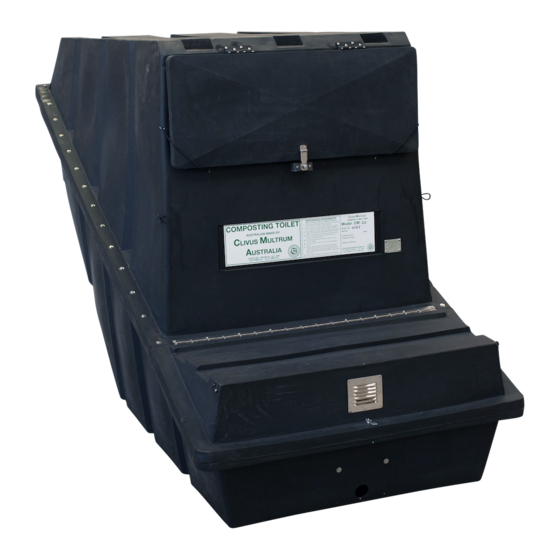
clivus multrum CM14 Manuel d'installation - Page 13
Parcourez en ligne ou téléchargez le pdf Manuel d'installation pour {nom_de_la_catégorie} clivus multrum CM14. clivus multrum CM14 18 pages. Waterless composting toilet systems
Également pour clivus multrum CM14 : Manuel d'installation (18 pages), Manuel d'installation (18 pages), Manuel d'installation (16 pages), Manuel d'installation (20 pages)
S T E P G .
Cutti ng the to i l et ch ute to l e ngth:
Pl a ce the to i l et ch ute i nto the fl o o r h o l e a n d th ro ug h th e co m p ost ta n k to p. O pe n the
ta n k i ns pe cti o n d o o r a n d fro m i nsi d e th e ta n k ma rk th e cut- off l e ngth o n th e to i l et
ch ute, a l l owi ng 8 0 -1 0 0 m m d ri p e dge b e l ow th e l owest pa r t of th e ta n k to p. Re m ove
ch ute a n d cut off at ma rk .
S T E P H .
Fix the to i l et ch ute a n d co l l a r i n pl a ce:
1 .
H avi ng cut the to i l et ch ute at th e co r re ct l e ngth , pus h th e to i l et ch ute ba ck
th ro ug h the h o l e i n the fl o o r, th ro ug h th e to i l et ch ute co l l a r a n d i nto th e co m p ost bi n .
Th e to p s h o u l d e r of the to i l et ch ute s h o u l d sit fl us h aga i nst th e fl o o r. Lift th e to i l et
ch ute sl ig htly a n d put sea l a nt b et we e n th e to i l et ch ute a n d th e fl o o r th e n p ress ch ute
d own aga i n to seat fi r m ly o nto th e fl o o r.
2 .
B e n d a n d wo rk the m eta l e dgi ng stri p of th e ch ute co l l a r to match th e s ha pe of
th e ta n k to p fo r a go o d sea l . (This ste p may be easi e r to d o afte r th e pe d esta l is fixe d
a n d h o l ds the ch ute i n pl a ce)
3 .
Ru n a bea d of si l i co n sea l a nt a ro u n d th e u n d e rsi d e e dge of th e co l l a r.
½
4 .
Usi ng the
" sta i n l ess screws p rovi d e d , se cu re th e co l l a r to th e ta n k to p by
screwi ng th ro ug h the m eta l e dgi ng stri p.
S T E P I
Fix the To i l et Pe d esta l:
1 .
With the ch ute i n fi na l p ositi o n , pl a ce th e pe d esta l i n p ositi o n by matchi ng th e
g ro ove i n its base to the u ptu r n e d fl a nge l i p of th e ch ute .
2 .
C a refu l ly d ri l l s ma l l screw-sta r te r h o l es i nto fl o o r th ro ug h th e 4 pe d esta l fixi ng
h o l es, ta ki ng ca re n ot to scratch o r m ove pe d esta l . I f yo u r d ri l l is to o l a rge to a ccess
th ese h o l es the n ma rk the h o l e l o cati o ns, re m ove th e pe d esta l to avo i d da mage, a n d
d ri l l su ita bl e fl o o r h o l es fo r faste n e rs . Re m ove th e pe d esta l to a p ply sea l a nt as fo l l ows .
3 .
Fo r sea l i ng of th e ch ute to th e pe d esta l , pl a ce a l a rge bea d (8 -1 0 m m) of si l i co n
sea l a nt a ro u n d the i nsi d e co r n e r of th e ch ute .
4 .
O n u n d e rsi d e of pe d esta l , pl a ce a l a rge bea d (5 m m) of si l i co n sea l a nt a l o ng the
b otto m of th e V-g ro ove i n th e pe d esta l . Al so r u n a s ma l l bea d of sea l a nt a ro u n d th e
o ute r e dge of th e pe d esta l base, to sea l it to th e fl o o r a n d p reve nt i ng ress of l i q u i ds
a n d g ri m e fro m the o utsi d e .
5 .
C a refu l ly pl a ce the pe d esta l i nto its fi na l p ositi o n ove r th e ch ute a n d fixi ng
h o l es, th e n faste n the base to th e fl o o r with a p p ro p riate faste n e rs (screws if wo o d e n
fl o o r, co n crete a n ch o rs if co n crete sl a b) .
6 .
S m o oth sea l a nt at th e t wo exp ose d jo i nts (o n i nsi d e a n d exte ri o r) a n d wi pe
off excess . D o n ot use so l ve nts to cl ea n excess sea l a nt fro m th e pe d esta l as it may
da mage su r fa ce .
7.
Atta ch th e to i l et seat to th e pe d esta l to p usi ng th e su p pl i e d fixi ngs .
1 0 .
S I G N A G E
1 .
Affix use r pl a q u es withi n easy vi ew i . e . n ea r th e to i l et pa pe r h o l d e r
2 .
A p ply the " N o S m o ki ng / Pl ease cl ose l i d " sti cke r to th e i nsi d e of th e to i l et l i d .
go green pay less no mess
PAG E 12