Aktakom ATE-9030 Panduan Pengguna - Halaman 4
Jelajahi secara online atau unduh pdf Panduan Pengguna untuk Alat Ukur Aktakom ATE-9030. Aktakom ATE-9030 9 halaman. Sound level meter

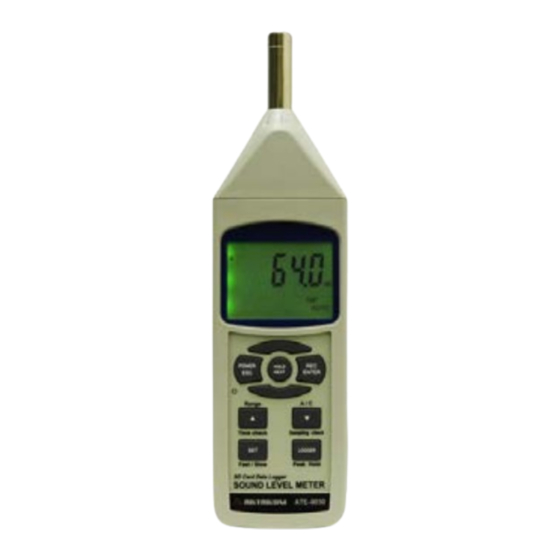
3-8 Peak Hold Button (Logger Button)
3-9 Microphone
3-10 AC output terminal
3-11 Calibration VR
3-12 RS-232 output terminal
3-13 DC 9V adapter socket
3-14 Tripod Fix Nut
3-15 Battery Cover Screws
3-16 Stand
3-17 Battery compartment/Cover
3-18 SD card socket
4. MEASURING PROCEDURE
4-1 Sound level meter
1) Power on by pressing the "Power On/Off Button" (3-2, Fig. 1), the meter's default function is "Auto range", "A
frequency weighting" & "Fast time weighting". The LCD display will show the unit "A. Fast Auto".
2) Select «A» or «C» frequency weighting by pressing the «A/C Button» (3-6, Fig. 1).
Note:
a. The characteristic table of A, C weighting.
b. The characteristic of A weighting is simulated as the «Human Ear Listening» response. Typically always select
the A weighting when makes environmental sound level measurement.
c. The C weighting characteristic is near the «FLAT» response. Typically it is suitable for checking the noise of
machinery (Q.C. check) & knowing the real sound level of the tested equipment.
3) Determine proper measuring range by pressing the «Range Button» (3-5, Fig. 1). After power on the default
range is «Auto range». In the same time the lower right display will show the text of «Auto». Under the auto range,
press the «Range Button» (3-5, Fig. 1) once step by step will enter to the manual range (range 1, range 2, range 3)
and auto range in sequence. There are still 3 manual ranges for your choice:
* Manual range 1, 30...80dB range: Display will show the unit of "30 – 80".
* Manual range 2, 50...100dB range: Display will show the unit of "50 – 100".
* Manual range 3, 80...130dB range: Display will show the unit of "80 – 130".
4) According to various measuring sound source, select the Time Weighting (Fast or Slow) by pressing the «Time
Weighting Button» (3-7, Fig. 1).
Note:
a. If select the function of «Fast» time weighting, the display will show the unit of «FAST».
b. If select the function of «Slow» time weighting, the display will show the unit of «SLOW».
4-2 Data Hold
During the measurement, press the «Hold Button» (3-3, Fig. 1) once will hold the measured value & the LCD will
display a «HOLD» symbol. Press the «Hold Button» once again will release the data hold function.
4-3 Data Record (Max., Min. reading)
1) The data record function records the maximum and minimum readings. Press the «REC Button» (3-4, Fig. 1)
once to start the Data Record function and there will be a «REC» symbol on the display.
2) With the «REC» symbol on the display:
a) Press the «REC Button» (3-4, Fig. 1) once, the «REC MAX» symbol along with the maximum value will appear
on the display. If intend to delete the maximum value, just press the «Hold Button» (3-3, Fig. 1) once, the display will
show the «REC» symbol only & execute the memory function continuously.
b) Press the «REC Button» (3-4, Fig. 1) again, the «REC MIN» symbol along with the minimum value will appear
on the display. If intend to delete the minimum value, just press the «Hold Button» (3-3, Fig. 1) once, the display will
show the «REC» symbol only & execute the memory function continuously.
c) To exit the memory record function, just press the «REC» button > 2 seconds at least. The display will revert to
the current reading.
4-4 LCD Backlight ON/OFF
After power ON, the «LCD Backlight» will light automatically. During the measurement, press the «Backlight Button»
(3-2, Fig. 1) once will turn OFF the «LCD Backlight». Press the «Backlight Button» once again will turn ON the «LCD
Backlight» again.
5. DATALOGGER
5-1 Preparation before execute datalogger function
a. Insert the SD card
Prepare a «SD memory card» (1 GB to 16 GB, optional), insert the SD card into the «SD card socket» (3-18, Fig.
1). The front panel of the SD card should face against the the down case.
b. SD card Format
If SD card just the first time use into the meter, it recommend to make the «SD card Format» at first.
c. Time setting
If the meter is used at first time, it should to adjust the clock time exactly.
d. Decimal format setting
The numerical data structure of SD card is default used the «.» as the decimal, for example «20.6» «1000.53». But
in certain countries (Europe ...) is used the «,» as the decimal point, for example «20, 6» «1000,53». Under such
situation, it should change the Decimal character at first, details of setting the Decimal point.
5-2 Auto Datalogger (Set sampling time ≥ 1 second)
a. Start the datalogger
Press the «REC Button (3-4, Fig. 1) once, the LCD will show the text «REC», then press the «Logger Button» (3-8,
Fig. 1), the «REC» will flashing sound, at the same time the measuring data along the time information will be saved
into the memory circuit.
The Display will show also show text «LOGGER» when the data save into the memory circuit.
b. Pause the datalogger
4
www.tmatlantic.com
