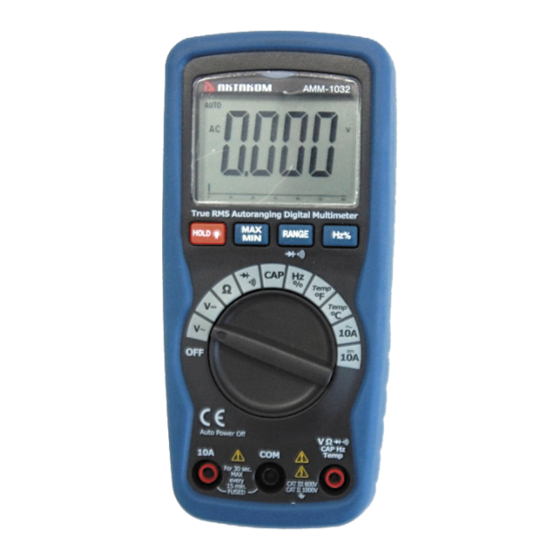
Aktakom AMM-1032 Panduan Pengguna - Halaman 4
Jelajahi secara online atau unduh pdf Panduan Pengguna untuk Multimeter Aktakom AMM-1032. Aktakom AMM-1032 8 halaman. True rms autoranging multimeter

has Auto OFF that automatically shuts the meter
OFF if 15 minutes elapse between uses.
If "OL" appears in the display during a
2.
measurement, the value exceeds the range you have
selected. Change to a higher range.
NOTE: On some low AC and DC voltage ranges, with the
test leads not connected to a device, the display may show a
random, changing reading. This is normal and is caused by
the high-input sensitivity. The reading will stabilize and give
a proper measurement when connected to a circuit.
AUTORANGING/MANUAL RANGE SELECTION
When the meter is first turned on, it automatically goes
into Autoranging. This automatically selects the best range
for the measurements being made and is generally the best
mode for most measurements. For measurement situations
requiring that a range be manually selected, perform the
following:
1. Press the RANGE key. The "AUTO" display indicator
will turn off or select diode /beeper, AC/DC Clamp
2. Press the RANGE key to step through the available
ranges until you select the range you want.
3. To exit the Manual Ranging mode and return to
Autoranging, press and hold the RANGE key for 2
seconds.
Note: Manual ranging does not apply for the Frequency
functions.
MAX/MIN
Note:
When
using
the
Autoranging mode, the meter will "lock" into the
range that is displayed on the LCD when
MAX/MIN is activated. If a MAX/Min reading
exceeds that range, an "OL" will be displayed.
Select the desired range BEFORE entering
MAX/MIN mode.
1. Press the MAX/MIN key to activate the MAX/MIN
recording mode. The display icon "MAX" will appear.
The meter will display and hold the maximum reading
and will update only when a new "max" occurs.
2. Press the MAX/MIN key again and the display icon
"MIN" will appear. The meter will display and hold the
minimum reading and will update only when a new
MAX/MIN
function
in
"min" occurs.
3. To exit MAX/MIN mode press and hold the
MAX/MIN key for 2 seconds
DISPLAY BACKLIGHT
Press and hold the HOLD key for >1 second to turn on or
off the display backlight function. The backlight will
automatically turn off after 10 seconds.
HOLD
The hold function freezes the reading in the display. Press
the HOLD key momentarily to activate or to exit the
HOLD function.
NON-CONTACT VOLTAGE (NCV)
The NCV function works on any rotary switch position.
1.Test the detector on a known live circuit before use.
2.Hold the top of the meter very close to the voltage source as
shown.
3.If voltage is present, the rim of the LCD display will flash a
bright red and a motor shaking will happen.
Hz/duty
1. Switch to Hz range.
2. Press the Hz button to show the reading in the
display and the "Hz" indicator will appear on the
display.
DC VOLTAGE MEASUREMENTS
CAUTION: Do not measure DC voltages if a motor
on the circuit is being switched ON or OFF. Large
voltage surges may occur that can damage the meter.
1. Set the function switch to the V DC position .
2. Insert the black test lead banana plug into the negative
(COM) jack and the red test lead banana plug into the
positive (V) jack.
3. Touch the test probe tips to the circuit under test. Be sure
to observe the correct polarity (red lead to positive, black
lead to negative).
4.
Read the voltage in the display. The display will
indicate the proper decimal point and value. If the
polarity is reversed, the display will show (-) minus
before the value.
