Domus CFA-WC1 Panduan Instalasi - Halaman 3
Jelajahi secara online atau unduh pdf Panduan Instalasi untuk Pengontrol Domus CFA-WC1. Domus CFA-WC1 6 halaman.

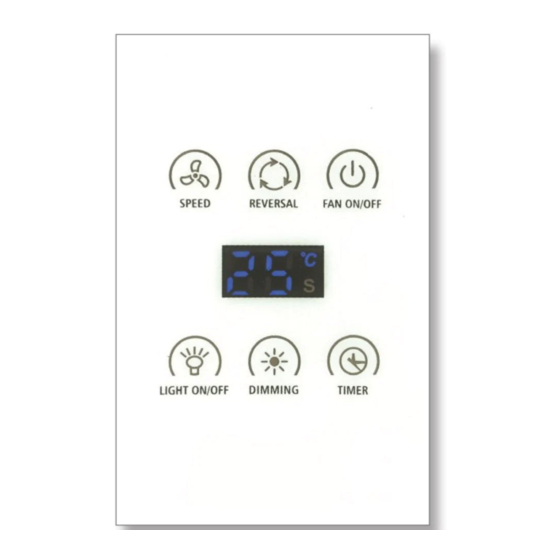
Instructions for all functions
SPEED: Press the "SPEED" button to operate fan. The LED screen will display the speed you choose. Press the "SPEED" button to cycle
fan speeds. 1 is the lowest speed and 9 is the highest speed.
F/R: Press the "F/R" button to change the fan directions. Forward is Summer mode and Reverse is Winter mode.
FAN OFF: Press the "FAN OFF" button to turn the fan off.
LIGHT ON/OFF: Press the "LIGHT ON/OFF" button to turn the light on and off.
DIMMING: To adjust brightness press the "DIMMING" button multiple times until the desired LED brightness. The LED screen will
display the brightness stages; 1 is the minimum and the 9 is the maximum. The receiver will beep when the light reaches minimum or
maximum brightness.
TIMERS: The timer buttons allow the fan & light be turned on for the duration shown on LED screen. 1H = 1 hour, 2H = 2 hours, 4H
= 4 hours & 8H = 8 hours.
Colour Changing Technology (CCT) Operation Instruction
• Press the Light On/Off button on the wall controller to change the Colour Temperature from Warm White (3000K), Cool White
(4000K) or Daylight (6000K).
• To select the colour temperature of your choice (3000K, 4000K & 6000K) toggle the wall switch on and off and on within 1
second to change the CCT. Once the desired colour temperature is selected, the light must remain off for 5 seconds to set the
colour temperature choice (using the wall controller).
*When using with a 9 speed remote control ceiling fan, the CCT colour changing technology is only available via remote handpiece
supplied with the fan.
NOTE: If isolation switch is used as a light switch On/Off, there is a delay of a approx. 2 seconds from the time it is switched off
before it can be switched back on. This insures the original colour temperature selected is retained. If the switch is turned On and Off
within 2 seconds, it will default to Cool White colour temperature.
How To Add an accessory 9 Speed 240V DC Wall Controller (sold separately)
The receiver can learn the identification code for a new DC wall controller using the following procedure:
For LED Light Fan with T Receiver
1. To program the DC wall controller to the fan & LED light
• Turn off power to fan at isolation / wall switch and wait for 30 seconds then turn power back on at the isolation / wall switch, the
fan will beep once.
• Press and hold "F/R" button until you hear once beep from the receiver. The DC wall controller will then be linked to the fan. Either
two remote handsets or one remote handset combined with one DC Wall Controller can be paired per fan and can control a
maximum of two ceiling fans.
* Please note maximum two ceiling fans using one DC wall controller. Both fans must have their own receiver and the wall controller
must be installed in the same room as the fans.
Maximise Product Life and Protect your Warranty
Damage caused by voltage or current surges will shorten the life of the product and is not covered by warranty. Surges may be caused
by lightning, problems in the electricity network or out of specification voltages from solar inverters. The chance of damage can be
minimised by turning off the isolation switch when a 240V DC Wall Controller controlled fan or light is not being used. It is good
practice to turn off the isolation switch just like you would with a normal light switch.
POWER OUTLETS OR FIXED WIRING MUST BE INSTALLED BY A LICENSED ELECTRICIAN
To protect your customer's WARRANTY please READ PAGE 2 of this booklet prior to the installation of this product.
Installation Manual
Date: December 5, 2022 12:41 pm
3
