Flycam HD-5000 Panduan Perakitan - Halaman 7
Jelajahi secara online atau unduh pdf Panduan Perakitan untuk Aksesori Kamera Flycam HD-5000. Flycam HD-5000 10 halaman. Video stabilizer
Juga untuk Flycam HD-5000: Buku Petunjuk (11 halaman), Buku Petunjuk (16 halaman)
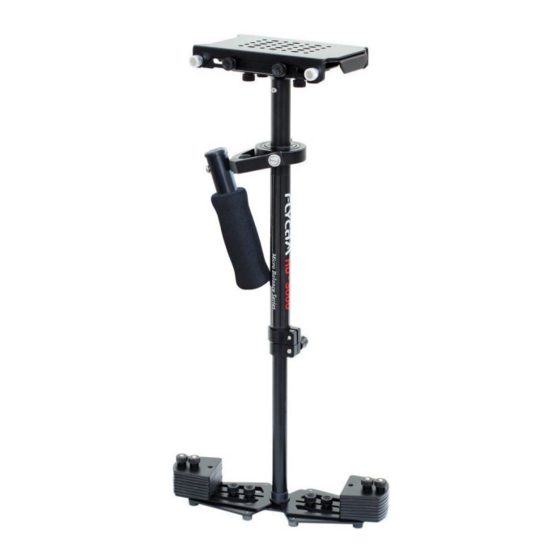
Balancing the Vertical Axis
The sled should be tied up to the docking adapter of your stand or similar, so that you can start the
fore & aft balancing adjustments by centering the camcorder over Central Post. To do this-
Loosen the side screws of Head Plate and the bottom screws of Bottom Plate.
Look at the stabilizer from side. If the camcorder lens is tipped up or down, move the camcorder
forward or backward until the center of balance is situated over Central Post.
Then, look at the stabilizer from front. If the post is not vertical, adjust the bottom plate until Central
Post is vertical.
You can also adjust the weight cups closer to & farther away from the sled as per requirement, till the
post is straight up and down.
NOTE: The stability of Flycam Stabilizer depends on it being slightly bottom heavy. If it is top heavy,
it will tilt more. If it is too bottom heavy, it will be sluggish and hard to aim.
Slightly Bottom Heavy, it will be both Stable and Easier to Control.
Check the Vertical Balance by using this Drop Time Test.
Make sure that everything is tight.
Grasp Central Post near the base and move it from vertical to horizontal.
Hold it there. Be sure that it will not hit the stand when you drop it. Keep your free hand to catch the
central post when it drops.
Count how many seconds it takes to fall to vertical. Try using a stopwatch.
If the drop time is less than 2 seconds, it is too bottom heavy. You need to move the bottom mass closer
to post.
If the drop time is more than 2 seconds, it is top heavy.
A Drop Time of 2-2.5 seconds is preferred.
NOTE: Recheck the balance by looking at sled. If necessary, use side screws and bottom plate
screws to make required adjustments.
26
7