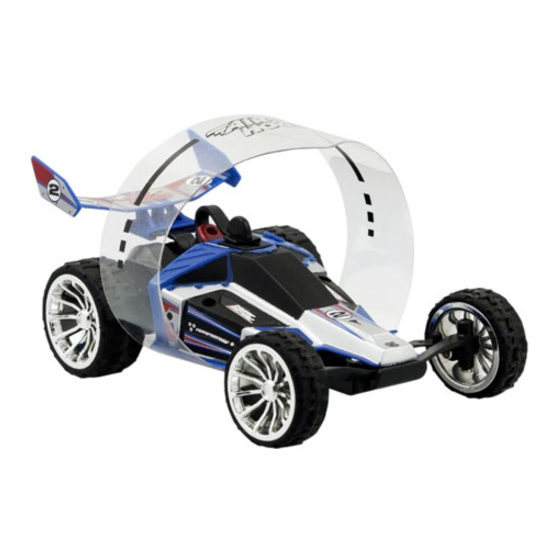
Air Hogs Hyper Actives Buku Petunjuk
Jelajahi secara online atau unduh pdf Buku Petunjuk untuk Mobil Mainan Bermotor Air Hogs Hyper Actives. Air Hogs Hyper Actives 2 halaman. 2.4ghz performance vehicle 12+ years expert

®
Rollbar
Interchangeable
Rubber and Foam Tires
for Various Terrains
Contents:
• 1 x Hyper Actives™
• 4 x Rubber All Terrain Tires
• 4 x Rubber Foam Indoor Tires
• 1 x Pistol Grip Remote/Charger
• 1 x Instruction Guide
1. Open the battery door with a
screwdriver (not included).
2. If used batteries are present,
remove these batteries from the
unit by pulling up on one end of
each battery.
3. Install new batteries as shown in
the polarity diagram (+/-) inside
the battery compartment.
4. Replace battery door securely.
5. Check your local laws and
regulations for correct recycling
and/or battery disposal.
1. Turn vehicle OFF.
2. Turn remote/charger OFF.
3. Remove charge plug from
storage base.
4. Remove charge cable from
bottom storage groove.
5. Remove vehicle charge
port cover.
6. Carefully insert the charge plug
all the way into the vehicle's
charge port.
7. Set the remote/charger switch
to CHG.
8. The red charging light will turn
on and charging will begin when
it starts to flash. After 30 to 50
minutes the charging will be
complete and the red charge
light and green power light will
both start to flash.
9. When charging is complete, set
the charge switch to OFF.
10. Remove charge plug from the
vehicle charge port.
11. Replace vehicle charge port
cover.
12. Store charge plug cable
and charge plug in remote/
charger base.
NOTE: 1. If the charge light and power light are flashing alternatively while
charging, there may be a bad cable connection. Check that cable and plug
are connected correctly and repeat charging steps 1 to 6.
2. The remote control will automatically shut off after idling for about
Forward/Reverse,
Left/Right.
1. Turn vehicle ON.
2. Turn remote/charger ON.
3. Pulling the throttle trigger
back moves the vehicle
forward. Pushing the
throttle trigger forward,
brakes then reverses
the vehicle.
4. To move the vehicle to the
right turn the directional
control to the right.
5. To move the vehicle to the
left turn the directional
control to the left.
INSTRUCTIONS
Charge
Port
Hyper Actives™
Rubber
All Terrain Tires
INSTALLING/REPLACING THE BATTERIES
Battery
Compartment
Cover
6 x
1.5V AA
Alkaline
Batteries
Battery
Compartment
HOW TO CHARGE YOUR HYPER ACTIVES™
1
O
I
5
6
CHG OFF ON
9
USING THE REMOTE/CHARGER
1
3
CHG OFF ON
2
Directional Control
Left/Right
SLOW
Variable
FAST
Speed Dial
BATTERY SAFETY INFORMATION
• Remote/charger requires 6 x 1.5V
AA alkaline batteries (not included).
• Batteries are small objects.
• Replacement of batteries must be
done by adults.
• Follow the polarity (+/-) diagram in
the battery compartment.
• Promptly remove dead batteries
from the toy.
• Dispose of used batteries properly.
• Remove batteries for prolonged
storage.
• Only batteries of the same or
equivalent type as recommended
are to be used.
CHG OFF ON
2
3
7
10
11
5 minutes. To reactivate turn off and on.
3. When the remote control is in either ON status or CHARGE status and
the green power light is flashing, it means that the battery level is low
and the batteries need to be replaced.
Forward
Reverse
12
TM
EXPERT
CHG/OFF/ON
Switch
Red
Charge Light
Green
Power Light
Throttle Trigger
Pull – Proportional Speed
Push – Brake and Reverse
Trim Dial
Charge
Plug
Remote/Charger
• DO NOT incinerate used batteries.
• DO NOT dispose of batteries in fire,
as batteries may explode or leak.
• DO NOT mix old and new batteries.
• DO NOT mix different types
of batteries, i.e.: alkaline/standard
(carbon-zinc) or rechargeable
batteries.
• DO NOT use rechargeable batteries.
• DO NOT recharge non-
rechargeable batteries.
• DO NOT short-circuit the supply
terminals.
• DO NOT store your car or controller
near heat or in direct sunlight.
4
CHG OFF ON
8
12
4
Right
5
Left
+
YRS
