DRYDEN AQUA 90026 Panduan Pengoperasian - Halaman 8
Jelajahi secara online atau unduh pdf Panduan Pengoperasian untuk Alat Ukur DRYDEN AQUA 90026. DRYDEN AQUA 90026 20 halaman.

Installation cont.
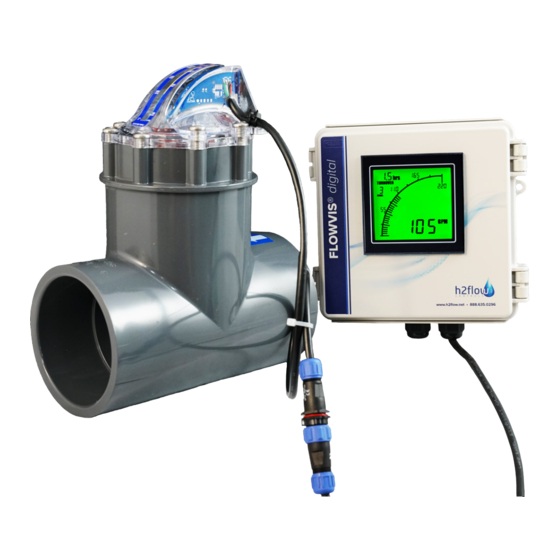
6.3 Installing FlowVis Digital to a new or existing FlowVis
PLEASE NOTE: If you are installing FlowVis Digital to either, a) an existing 1.5"(DN40), 2x2.5"(DN50/65), please refer to
section 6.1, or b) an FV-3(DN80 or FV-4(DN-100) that was manufactured before November 2020, please refer to section 6.2 of
this manual before proceeding with section 6.3.
1.
Check the contents of your FlowVis Digital box to ensure that they comply with the components shown on page 4
of this document
2.
Unless previously done in section 6.2, remove the two FlowVis lid screws that will align with the hole mounting tabs
for the sensor (refer to Fig.2.5 on pg. 7).
3.
Mount the sensor, ensuring that it is fully seated and the screw holes line-up with those on the FlowVis lid assembly (see
Fig.2.5).
4.
Place the 2 extended screws provided with your FlowVis Digital (Fig.1.3 on page 4) in the holes for the sensor and
using a hand Phillips-head screwdriver, slowly tighten the screws. Do not fully tighten either screw before proceeding
to the next, i.e., pull them down slowly, multiple times to avoid stressing and cracking the sensor. Screws should be
tighteneed to a final torque of 25 in./lbs. or 2.8 Nm. Disclaimer: Under no circumstances should the screws in the
FlowVis lid assembly or sensor be tightened with an electric screwdriver in the 'drill' setting. This can result in a
cracked lid or sensor, and will invalidate the product warranty.
5.
Mount the FlowVis Digital Display enclosure in a location that is: a) convenient for viewing, b) close enough to the
FlowVis flow meter for the sensor cable length (including any extension cables you may have purchased), and c)
close enough to a 100-240VAC receptacle to allow the power supply to connect. Note: The power supply output
(12VDC) cable has a total length of 10 feet / 3M, but can be extended up to a total length of 24 feet / 8M. It is essential that
its polarity is maintained. Good electrical practices should be used when extending this cable.
6.
f )
Connect the Power Supply low voltage (12VDC) output to the Display (see wiring diagrams on pages 9 & 10).
7.
g) Connect the Sensor to the display using either the standard-length cables provided or the extension cable (if
purchased).
8.
Disclaimer: The sensor-to-display cables MUST NOT be cut or spliced in any way. Doing so will invalidate the
FlowVis Digital product warranty. If these cables are longer than needed, we suggest coiling the excess cable
and tying with a zip-tie.
9.
h) Plug in the Power Supply and ensure that the Digital Display illuminates and the blue light on the sensor is on (not
flashing). If the blue light is flashing, please refer to section 6.4.
10. i)
If being used, connect 4-20 mA output to external equipment such as a VFD (see Fig.2.9).
11. j)
If being used, connect the alarm relay (see Fig.3.1).
12. k) Proceed to the Programming section.
6.4. Sensor/blue light is flashing
A blue LED is visible when looking at the sensor. A flashing blue LED indicates that the FlowVis does not have a magnet installed.
All FlowVis models that are 3" (DN80) and larger that were manufactured after November 2020 had this magnet installed. If
your application involves a unit that is ≥ 3" (DN80), and the sensor light is flashing, it is apparent that your FlowVis unit was
manufactured before this date. Please contact Dryden Aqua to find a solution. If your FlowVis model is for a 2.5" (DN65) or smaller,
and the blue sensor light is flashing, please install the replacement flapper/indicator that was included in the FlowVis Digital
shipping box (see section 6.1 of this document).
8
