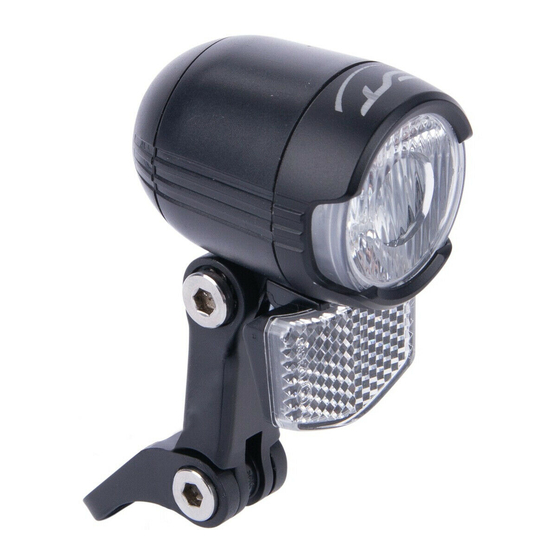
CON-TEC Luna 80 N+ Panduan Pengguna - Halaman 7
Jelajahi secara online atau unduh pdf Panduan Pengguna untuk Aksesori Sepeda CON-TEC Luna 80 N+. CON-TEC Luna 80 N+ 8 halaman. Dynamo led front light

User manual
dynamo LED front light
Luna 80 N+ / Luna 80 N++
Congratulations on the purchase of your new device. The user's manual is part of this device and
contains important information to safety, installation and disposal. Familiarize yourself with all
operating and safety instructions before using the device. Use the device as described and in the
specified areas of application. Keep this manual in a safe place and have it with you when using
the device.
Used symbols
Green Point – Recycling the packaging
Symbol for the detection of electrical and electronic devices
Test mark of the Federal Motor Transport Authority
K XXXX
(K with the following approval number)
Proper use
The product is intended for use on bicycles with pedal assistance and serves the illumination of the
road. This LED front light is approved according to the currently valid RTLR (StVZO). The product is
intended for outdoor use.
Safety information
- Do not look into the light.
- Do not point the light directly at people or animals.
- The light beam of the LED front light must point straight in direction and may not blind other road
users.
- The light distribution may be obscured by no other attached parts or pieces of luggage, not even
partially.
- The LEDs are not interchangeable. If the LED fails, the entire luminaire must be replaced.
- Tail light and headlight may only be switched on together when operated by a generator.
WARNING! LIFE AND ACCIDENT HAZARD FOR INFANTS AND CHILDREN!
Never leave children unattended with the packaging material, because of suffocation danger by
swallowing packaging parts. Always keep the device away from children. The device is not a toy!
This device can be used by children of age 8 and over and by persons with reduced physical or
mental capabilities or lack of experience and knowledge if they have been supervised or instructed
concerning the safe use of the device and by understanding resulting hazards. Children are not
allowed to play with the device. Cleaning and user maintenance should not be carried out by children
without supervision. Do not disassemble the device. Improper repairs can cause significant risks for
the user. Only have repairing made by qualified personnel.
Manual_Luna 80_2019-03 DE-01
Front light with holder and front reflector
1
2
3
Mapped components
1
Front light
2
Integrated front reflector
Dynamo connecting cable
3
4
On/off/automatic front light switch
5
Cable for the rear light connection
6
Adjusting screw for height adjustment
7
Front light holder
Front light assembly
Fasten the headlamp
1
to the bike using a steel bracket and make sure that the headlamp
be adjusted by itself (tighten the screw properly!
Connecting to a dynamo and rear light
4
5
6
7
A pair of cables
front light
1
are designed for connecting to the existing tail light wiring. If a dynamo tail light is used, this must
be connected to the headlight. If there is no wiring from the rear light, this can be made with an
extension cord (authorized dealer). The headlight can be connected to hub dynamos - and side-
running dynamos producing 6 V.
Attention: If the headlamp is connected to a side-runner dynamo, the dynamo caster must be in
constant contact with the tire so that the headlamp will function properly.
Attention: Always pay attention to the correct polarity. Never completely cap the headlight cable. The
electrical connection may only be made by a qualified electrician.
Black cable = power
Black-white cable = earth
LED front light adjustment
Align the LED front light so that the light beam reaches the road approx. 10 meters in front of the
wheel (see ill.).
Attention!
Check regularly the correct setting of your front light. The light beam of the LED front light must point
straight in direction from 400 up to 1200mm.
1
cannot
for connecting to the electrical bicycle system is located at the bottom of the
3
. The cables can be shortened if necessary. The plugs
5
installed in the headlamp
