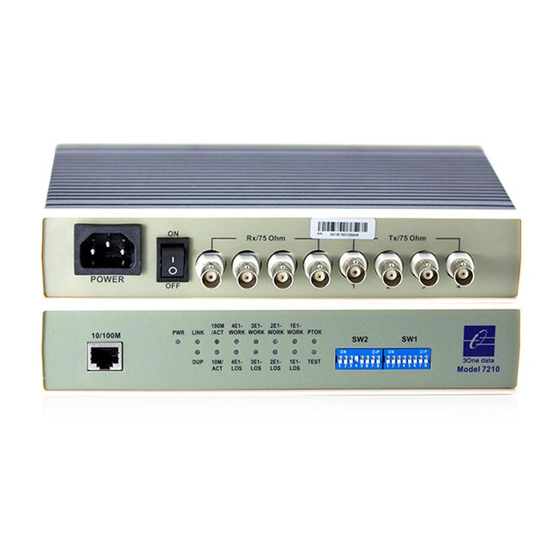
3onedata 7210-1U Panduan Instalasi Cepat - Halaman 2
Jelajahi secara online atau unduh pdf Panduan Instalasi Cepat untuk Konverter Media 3onedata 7210-1U. 3onedata 7210-1U 3 halaman. Ethernet/4e1 protocol converter

device.
The device surface temperature is high after running;
please don't directly contact to avoid scalding.
【Rack-mounted】
Mounting the device
Step 1
Select the device mounting location to ensure
enough size.
Step 2
Place the device on the rack surface plate; adopt 4
screws to mount the right and left mounting lugs on
the rack.
Step 3
Check and confirm the product is mounted firmly on
the rack, mounting ends.
Device disassembling
Step 1
Device powers off.
Step 2
Unscrew the fixed mounting lug screw on the rack.
Step 3
Shift out the device from rack, disassembling ends.
【Power Supply Connection】
AC power supply input
The device supports 1-way AC power
supply input. It provides 3-hole socket and AC
power supply switch. Power supply input range:
220VAC
DC power supply input
The rack-mounted device supports 1-way
220VAC power supply input or 1-way -48VDC
power supply input. It provides 3-pin power
supply input terminal blocks. Power supply input range:
-48VDC. Its pin definition is as follows:
Pin NO.
1
Definition
-48VDC
FG frame
cathode
GND
【DIP Switch Setting】
setting. Its definition is as follows:
Rack-mounted
The setting function of SW1 is as follows:
NO. 1 NO. 2 NO. 3
OFF
OFF
OFF
OFF
ON
ON
ON
ON
No. 4
OFF
ON
The setting function of SW2 is as follows:
NO. 1
2
3
-48VDC
OFF
anode
ON
Note:
Power ON operation: first connect power line to the
connection terminal of device power supply, then power
on.
Power OFF operation: first unpin the power plug, then
remove the power line, please note the operation order
above.
The device provides 2 sets of
DIP switches for Ethernet port,
clock modes and loopback test
Note:
The DIP switch definitions of rack-mounted and
desktop device are different; please refer to the
corresponding setting function.
Ethernet port mode setting
OFF
OFF
10/100M, full/half duplex self-adaption
ON
OFF
10/100M self-adaption, half duplex
OFF
ON
10M, full/half duplex self-adaption
ON
ON
10M, half duplex
OFF
OFF
100M, full duplex
ON
OFF
100M, half duplex
OFF
ON
10M, full duplex
ON
ON
10M, half duplex
Clock mode setting
This end is set as slave clock
This end is set as master clock
E1 loopback test
No. 2 E1loopback test type
enablement
Turn off loopback test OFF
Local loopback
Turn on loopback test ON
Remote loopback
No. 3 No. 4
Loopback test E1 channel
selection setting
ON
ON
Select No. 1 E1
OFF
ON
Select No. 2 E1
ON
OFF
Select No. 3 E1
OFF
OFF
Select No. 4 E1
Desktop
The setting function of SW1 is as follows:
No. 1
E1 loopback test
No. 2 E1 loopback test type
enablement
OFF
Turn off loopback test OFF Local loopback
ON
Turn on loopback test ON
No. 3 No. 4
Loopback test E1 channel
selection setting
ON
ON
Select No. 1 E1
ON
OFF
Select No. 2 E1
OFF
ON
Select No. 3 E1
OFF
OFF
Select No. 4 E1
No. 8
Clock mode setting
OFF
Recover clock
ON
Local clock
The setting function of SW2 is as follows:
No. 3 No. 4 No. 5
Ethernet port mode setting
OFF
OFF
OFF
10/100M, full/half duplex self-adaption
OFF
ON
OFF
10/100M self-adaption, half duplex
OFF
OFF
ON
10M, full/half duplex self-adaption
OFF
ON
ON
10M, half duplex
ON
OFF
OFF
100M, full duplex
ON
ON
OFF
100M, half duplex
ON
OFF
ON
10M, full duplex
ON
ON
ON
10M, half duplex
【E1 Port】
The E1 port of rack-mounted device provides
two connection ways, asymmetrical 75Ω
BNC port and symmetrical 120Ω RJ45 port.
The pin definition of E1 RJ45 is as follows:
Remote loopback
