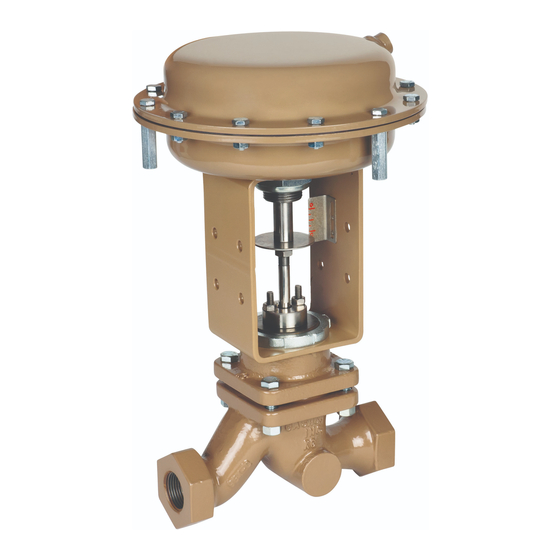
cashco 988 Panduan Pemasangan, Pengoperasian & Pemeliharaan - Halaman 9
Jelajahi secara online atau unduh pdf Panduan Pemasangan, Pengoperasian & Pemeliharaan untuk Unit Kontrol cashco 988. cashco 988 20 halaman. Globe-style pneumatic control valve body

22.
Examine gaskets (12,13) to see if leakage oc curred.
Re move and discard both gas kets. Always use new
gaskets upon reassembly.
23.
Remove body (1) from vise. Solvent clean all loose
parts with suitable solvent. Determine parts to be
replaced due to wear and/or corrosion. Clean seat
ring (11), cage (10), and seat re tain er (23).
24.
Place body (1) into vise with body/bonnet flange
up. Install a new seat ring gasket (13) inside body
25.
Note correct orientation of seat ring (11)and place
inside the body (1).
26.
For a composition/soft seat design, position a new
soft seat inset (24) and the seat retainer (23) into
po si tion on top of seat ring (11).
27.
Place a new bonnet gasket (12) on the body's (1)
bon net flange face.
28.
With cage (10) oriented correctly on the stem
assembly (3), set plug head down into the seat
ring (11). Keep firm hold of stem with one hand;
use other hand to push cage down into proper
alignment.
29.
Lift bonnet (2) over threaded end of plug/stem
(3) and care ful ly lower bonnet down over stem,
en sur ing that the crit i cal finish zone of the bonnet's
stuffing box is not scratched by the stem's threads.
Align body (1) to-bonnet (2) flanges to matchmarks
as bonnet comes down over bon net studs (16).
Carefully release stem (3) only when bonnet is
completely resting on the body.
30.
Install bonnet nuts (17) onto bonnet studs (16) and
fin ger -tighten.
31.
Place packing spacer (9) over end of plug/stem (3)
and care ful ly lower into stuffing box.
32A. For Opt-EXT and Opt-KRE Packing option –
(Ref er ence Figure 3 for proper packing orientation) –
a.
Carefully place lower adapter (6.3) of the new
packing ring set (6) over plug/stem's (3) end,
properly ori ent ed. Using the packing follower
(5), push the low er adapter into bonnet's (2)
stuffing box.
b.
Carefully place a packing ring (6.2) properly
ori ent ed over the plug/stem's end and push
into the stuffing box similar to the adapter (6.3).
Repeat for each of the four rings (6.2).
c.
Carefully place upper adapter (6.1) similar to
low er adapter (6.3). Leave packing fol low er
(5) in po si tion, properly ori ent ed.
d.
Place lower retainers (39) over each packing
stud (14). See Fig. 4 for proper orientation.
e.
Orient spring washers (41) stacks per Figure
5. Low er spring washer stacks over studs and
down onto the lower retainers (39).
f.
Place spacer rings (40) over studs and onto
ledge of lower retainers (39).
IOM-988/989-BODY
Figure 5: Belleville Spring Washers Orientation
g.
Place upper retainers (39) over the pack ing
studs (14), and onto the ledge of the spac er
rings (40). Ensure the up per retainers (39) are
prop er ly po si tioned around its cir cum fer ence.
h.
Install packing stud nuts (15), finger-tight, on
top of the upper re tain ers (39). (See Fig. 4.)
i.
Ensure that nuts (15) are drawn down evenly
such that the upper retainers (39) are lev el.
Wrench tighten pack ing nuts in 1/2 rev o lu tion
increments. Con tin ue to tight en nuts until the
spacer rings (40) can no long er be manually
rotated by use of fin gers; add 1/2 revolution of
additional draw-down to each nut to properly
load the packing (6).
32B. For Opt-HTE-Hi and Opt-HTE-Lo packing options
(Ref er to Fig. 6 for proper packing ori en ta tion) –
Figure 6: Packing Orientation for Opt-"HTE-Hi & Lo"
a.
Carefully place the lower braided ring (6.4)
over the plug/stem's (3) end. Using the packing
follower (5) push the lower braided ring (6.4)
into the bonnet's (2) stuffing box.
b.
Carefully place lower adapter (6.3) prop er ly
ori ent ed over the plug/stem's end and push
into the stuffing box similar to the lower braid ed
ring.
c.
Carefully place a packing ring (6.2) properly
ori ent ed over the plug/stem's end and push
into the stuffing box similar to the lower braided
ring . Repeat for each ring.
d.
Carefully place the upper adapter (6.1) similar
to the lower adapter (6.3). Leave packing
fol low er (5) in po si tion, prop er ly oriented.
e.
Place one of the lower retainers(39) over each
of the packing studs (14). In stall pack ing nuts
(15) and finger-tighten.
9
