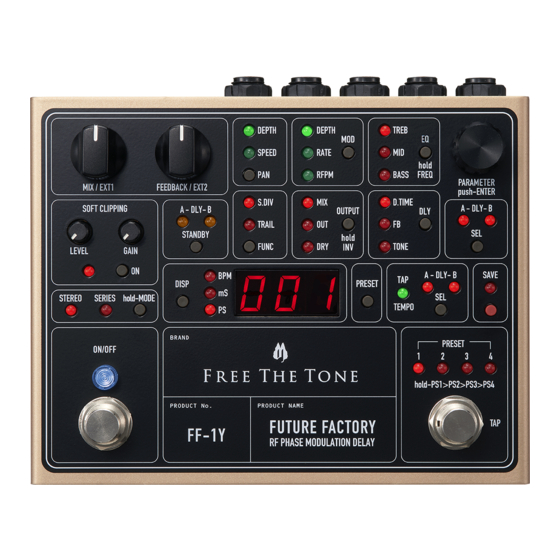
Free The Tone FF-1Y Panduan Pemilik - Halaman 4
Jelajahi secara online atau unduh pdf Panduan Pemilik untuk Peralatan Perekaman Free The Tone FF-1Y. Free The Tone FF-1Y 12 halaman. Rf phase modulation delay
Juga untuk Free The Tone FF-1Y: Panduan Memulai Cepat (2 halaman), Prosedur Pembaruan Firmware (10 halaman)

Rear Panel
EXT Terminal
MIDI IN/OUT Switch
By connecting an expression
Selects the function of the MIDI
pedal or momentary (unlatch)
terminal.
type switch to this terminal,
you can activate the function
assigned to it.
Assigning Functions to EXT
Terminal p.15
Input (A (MONO)-IN-B) Terminal
For connecting a guitar, another
musical instrument, or effects
unit.
Connect a device with stereo
output to the IN A (MONO) and IN
B terminals. To use the unit in
Output (A (SERIES)-OUT-B) Terminal
monaural, connect to the IN A
Used to connect to an amplifier, mixer, etc.
(MONO) terminal only.
To output monaural signal, connect to the
By implementing Free The
OUT A (SERIES) terminal.
Tone's original HTS
(Holistic Tonal Solution)
circuit, sound texture is
kept the same whether
the effect is turn on or off.
Side Panel
6
POWER DC9V IN Terminal
For connecting the dedicated AC
adapter supplied with your FF-1Y.
MIDI Terminal
I/O terminal for MIDI signal. Its function is
selected by the MIDI IN/OUT switch.
INPUT LEVEL Switch
This switch is used to select the FF-1Y's input level based on the
output level of the device connected to the INPUT terminal. To
connect an instrument level device, set the switch to the rear side
(closer to the I/O terminals). To connect a line level device, set the
switch to the front side. Use a small flat-blade screwdriver to slide
the switch.
Basic Operations and How to Use Each Function
Storing Changes in a Preset
1. Press the SAVE switch. The SAVE LED flashes.
2. The display flashes the number for the preset currently selected.
3. Turn the PARAMETER encoder until the display shows the preset number to which you want to save your data. (Skip
this step if you save the data into the same preset number.)
4. Press the SAVE switch to confirm. The data is saved in the preset.
NOTE
To cancel the storing operation, press any switch other than SAVE while the display is flashing the preset number. Alternatively, turn the
MIX/EXT1 or FEEDBACK/EXT2 knob. The SAVE LED is turned off and the save operation is canceled. The storing operation is automatically
canceled by leaving the unit for about 10 seconds when it is flashing its display.
When a parameter in the preset is changed, the dot below the first digit of the preset number illuminates. The dot turns off when the
data is saved to the preset.
Confirming Recalled Preset Number
1. Press the DISP switch to turn on the PS LED.
2. The number for the selected preset is shown in the display.
NOTE
When the PRESET switch is pressed, the display flashes the currently selected preset number even if it is showing another parameter. By
pressing the PRESET switch again, the previous BPM or msec unit display selected by the DISP switch returns. Or, the BPM or msec unit
display returns automatically after leaving the unit for about 10 seconds when its display is flashing.
Selecting Delay Unit Connection
The FF-1Y contains the two delay effect units (A and B) and their connection mode can be selected internally.
1. Press the MODE switch for more than 2 seconds.
2. When the MODE switch is pressed, the STEREO and SERIES LEDs illuminate alternately.
3. Release the switch when the LED for the desired connection method is illuminated.
NOTE
STEREO Illuminated: The delay units are internally connected in parallel.
SERIES Illuminated: The delay units are internally connected in series.
Block Diagram p.17
Outputting Delay Sound Individually
The two delay effect units (A and B) in the FF-1Y can be setup individually.
To confirm each delay sound during sound design process, either delay unit can be put in Standby status.
1. Press the STANDBY switch to select the delay unit to be in Standby status (muted).
NOTE
Turn on the DLY B LED if you want to output the delay A sound only. Turn on the DLY A LED if you want to output the delay B sound only.
If the DLY A and DLY B LEDs are illuminated, the sound is output from both the delay units A and B.
7
