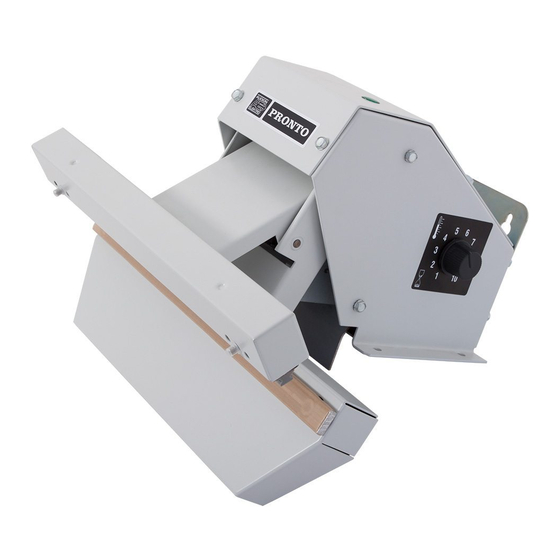
Audion Elektro 420 PR Manual - Halaman 2
Jelajahi secara online atau unduh pdf Manual untuk Penghemat Makanan Audion Elektro 420 PR. Audion Elektro 420 PR 16 halaman.

NEDERLANDS
1.
Kontroleer of het voltage zoals aangegeven op de machine overeenkomt met de netspanning.
2.
Bevestig de Pronto op een tafel, aan de wand of op de Hoprostand.
3.
Stop de stekker in het stopcontact.
4.
Het sealen met de Pronto met timer (PRA) gaat als volgt:
De juiste sealtijd wordt bepaald door de dikte van het te sealen materiaal. Maak eerst een proefseal met de regelknop op stand 4 of
5. Steek de folie tussen de lasbekken en druk de onderarm naar achteren zodat de lasbekken sluiten. Gedurende de ingestelde
sealtijd gaat het seallampje branden. Nadat het seallampje is uitgegaan de sealarm nog 1 - 2 sekonden gesloten houden (koeltijd).
Uiteraard heeft dunne folie een kortere sealtijd nodig (regelknop op stand 2 - 3) dan dikke folie (regelknop op stand 6 - 8). De ideale
sealtijd is eenvoudig te vinden door een aantal proefseals te maken.
4.
Het sealen met de Pronto zonder timer (PR) gaat als volgt:
Steek de folie tussen de lasbekken en druk de onderarm naar achteren zodat de lasbekken sluiten en het seallampje gaat branden.
Na 1 a 2 sekonden de druk op de onderarm zoveel verminderen dat het seallampje net uitgaat. Houdt de sealbekken gedurende 2
sekonden in deze stand. Dit is de koeltijd.
Onderhoud:
BIJ ONDERHOUD AAN DE MACHINE ALTIJD EERST DE STEKKER UIT HET STOPKONTAKT HALEN !!
ONDERHOUD, REPARATIES EN/OF VERANDERINGEN AAN DE MACHINE MOGEN NIMMER DOOR ONBEVOEGDEN
WORDEN UITGEVOERD !!
5.
Is de PTFEbekleding van de sealbalk versleten en/of de sealdraad doorgebrand, dan moet deze worden vervangen. Draai de twee
schroeven uit de sealbalk en trek de sealbalk uit het apparaat. Steek een nieuwe sealbalk in de daarvoor bestemde stekerbussen
en zet de sealbalk weer vast met de twee schroeven. Let op dat de sealdraad, welke uit het midden op de sealbalk is gemonteerd,
in gesloten stand precies onder het midden van het rubber ligt.
NOTE:
Indien e.e.a. is doorgebrand kontroleer dan ook het silikonenrubber in de aandrukarm. Als dit ingebrand is dient ook dit
vervangen te worden.
ENGLISH
1.
Ensure that the voltage shown on the machine corresponds with your mains supply.
2.
Mount the Pronto on a table, on the wall or on the Hoprostand.
3.
Put the plug into the mains socket.
4.
Sealing with the Pronto with timer (PRA) goes as follows:
The sealing time will vary according to the thickness of the material to seal. Make a trial seal by turning the adjusting knob to
position 4 or 5. Place a piece of film between de sealing-jaws and push the underarm backwards. The sealing-jaws will close. During
the sealing time the pilot light will be lit. When the light turns off, keep the arm closed for 1 - 2 seconds (cooling time). In case the
seal is not good increase or decrease the sealing period. Thin film needs a short sealing period (control knob set at 2 - 3), thicker
film a longer period (set at 6 - 8). By making a couple of try out seals the ideal sealing time is easy to find.
4.
Sealing with the Pronto without timer (PR) goes as follows:
Place a piece of film between de sealing-jaws and push the underarm backwards. So the sealing-jaws will close and the pilot light
will be lit. After 1 or 2 seconds, release the pressure on the underarm sufficient to switch off the pilot light, at the same time keeping
the film still under pressure. After 2 seconds, release the pressure on the underarm completely. This is the cooling time.
Maintenance:
FOR ANY MAINTENANCE ON THE MACHINE, ALWAYS SWITCH OFF THE MACHINE BY TAKING THE PLUG OUT OF THE
SOCKET.
MAINTENANCE, REPAIR AND/OR CHANGES OF THE MACHINE SHOULD BE EXECUTED BY QUALIFIED PEOPLE ONLY.
5.
When the PTFE cover on the sealing bar has become burnt or worn, it should be replaced. Unscrew the sealingbar and lift both
ends at the same time. Replace the new sealingbar in the machine and fix it with the screws. Take care that the sealwire, which has
been mounted excentrically on the sealbar, is exactly in the middle of the rubber when the sealing arm is in a closed position.
NOTE:
If the PTFE has been burnt, it can be that the silicone rubber has also been burnt. Please check and replace if necessary.
HANDLEIDING
MANUAL
