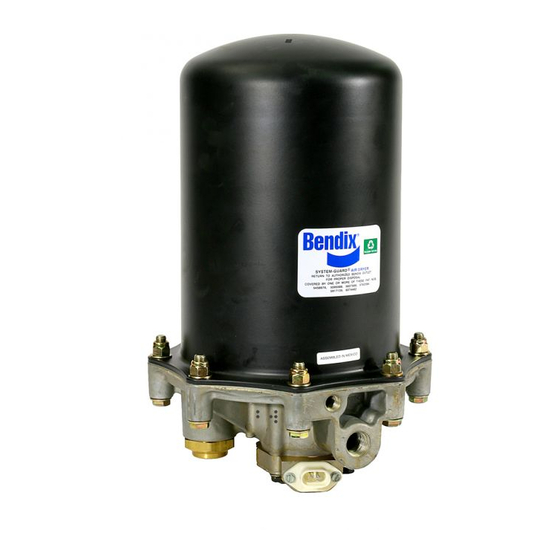
BENDIX AD-9 Data Layanan - Halaman 6
Jelajahi secara online atau unduh pdf Data Layanan untuk Dehumidifier BENDIX AD-9. BENDIX AD-9 20 halaman.

assembly. Note: Some early models of the AD-9
will have resistance readings of 1.0 to 2.5 ohms for
the 12 volt heater assembly and 4.8 to 7.2 ohms for
the 24 volt heater assembly. If the resistance is higher
than the maximum stated, replace the purge valve
housing assembly, which includes the heater and
thermostat assembly.
Warm the end cover assembly to over 90 degrees
Fahrenheit and again check the resistance. The re-
sistance should exceed 1000 ohms. If the resistance
values obtained are within the stated limits, the ther-
mostat and heater assembly is operating properly. If
the resistance values obtained are outside the stated
limits, replace the purge valve housing assembly,
which includes the heater and thermostat assem-
bly.
REBUILDING THE AD-9 AIR DRYER
GENERAL
If, after completing the routine operation and leakage tests,
it has been determined that one or more components of the
air dryer requires replacement or maintenance, refer to the
following list to find the appropriate kit(s).
When rebuilding or replacing components of the air dryer
use only genuine Bendix parts. For ease in servicing the
AD-9 desiccant cartridge assembly, it is recommended that
the air dryer be removed from the vehicle.
MAINTENANCE KITS AVAILABLE:
5005037Hard Seat Purge Valve Housing Maintenance Kit
5005893Soft Seat Purge Valve Housing Maintenance Kit
These kits contain the parts necessary to rebuild
the air portion of the purge valve housing and do not
include the heater and thermostat.
107794 Desiccant Cartridge Replacement Kit
This kit contains the parts necessary to change
the desiccant cartridge only.
107796 Remanufactured Desiccant Cartridge
Replacement Kit
This kit contains the parts necessary to change
the desiccant cartridge only.
107799 End Cover Check Valve Assembly Replacement
3/4 inch thread size.
107800 End Cover Check Valve Assembly Replacement
1/2 inch thread size.
800405 Service New or Remanufactured Exchange Purge
Valve Housing Assembly - Soft Seat (w/heater
and thermo.) 12 volt system.
5004479Service New or Remanufactured Exchange Purge
Valve Housing Assembly - Hard Seat (w/heater
and thermo.) 12 volt system.
6
5004339Service New or Remanufactured Exchange Purge
Valve Housing Assembly - DLU (w/heater and
thermo.) 12 volt system.
5004338Service New or Remanufactured Exchange Purge
Valve Housing Assembly - Soft Seat (w/heater and
thermo.) 24 volt system.
5004480Service New or Remanufactured Exchange Purge
Valve Housing Assembly - Hard Seat (w/heater and
thermo.) 24 volt system.
5004340Service New or Remanufactured Exchange Purge
Valve Housing Assembly - DLU (w/heater and
thermo.) 24 volt system.
107695 Complete Mounting Bracket Kit
This kit contains the upper and lower brackets as
well as the necessary hardware items to mount
them.
IMPORTANT! PLEASE READ AND FOLLOW
THESE
INSTRUCTIONS
PERSONAL INJURY OR DEATH:
When working on or around a vehicle, the following
general precautions should be observed at all times:
1. Park the vehicle on a level surface, apply the
parking brakes, and always block the wheels.
2. Stop the engine when working around the vehicle.
3. If the vehicle is equipped with air brakes, make
certain to drain the air pressure from all reservoirs
before beginning ANY work on the vehicle.
4. Following
the
recommended procedures, deactivate the electrical
system in a manner that removes all electrical
power from the vehicle.
5. When working in the engine compartment the
engine should be shut off. Where circumstances
require that the engine be in operation, EXTREME
CAUTION should be used to prevent personal injury
resulting from contact with moving, rotating,
leaking, heated, or electrically charged
components.
6. Never connect or disconnect a hose or line
containing pressure; it may whip. Never remove a
component or plug unless you are certain all
system pressure has been depleted.
7. Never exceed recommended pressures and always
wear safety glasses.
8. Do not attempt to install, remove, disassemble or
assemble a component until you have read and
thoroughly understand the recommended
procedures. Use only the proper tools and observe
all precautions pertaining to use of those tools.
TO
AVOID
vehicle
manufacturers
