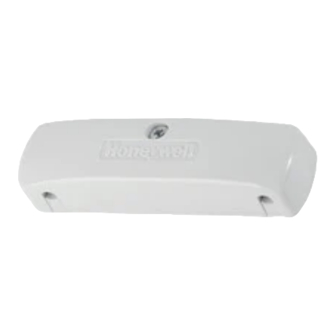
ADEMCO 11BR Instruksi Instalasi
Jelajahi secara online atau unduh pdf Instruksi Instalasi untuk Sensor Keamanan ADEMCO 11BR. ADEMCO 11BR 2 halaman. Vibration sensors

INSTALLATION INSTRUCTIONS
INSTALLATION INSTRUCTIONS
INSTALLATION INSTRUCTIONS
INSTALLATION INSTRUCTIONS
COVER
The No. 11BR (Brown Housing) and 11WH (White Housing) Vibration Sen-
sors are used indoors, in closed circuit alarm systems, to protect against
intrusion through windows, walls, ceilings, safes, cabinets, etc. The sensors
are UL Listed for use as supplemental protection (UL File AMQV:BP547).
INSTALLATION CONSIDERATIONS
Two holes are provided in the base for screw mounting The ribbed rear
surface of the base permits cementing to a glass, or other smooth, surface
if necessary.
When installing on a vertical surface, such as a wall, mount the sensor with
its long dimension vertical and its interior weighted blade downward, as
shown in the illustration.
On a ceiling, the sensor may be mounted directly thereon (upside down)
without the use of any bracket.
When protecting a window, mount the vibration sensor on the frame of the
window rather than directly on the glass. This reduces the danger of false
alarms from heavy vehicles passing by or from tapping on the window by
pedestrians.
When connected in a fast response (approximately 10ms) closed circuit
protection loop, vibration sensors will initiate an alarm when a blow of suf-
ficient force strikes the protection surface. The sensors can be adjusted to
respond on virtually any surface (e.g. plaster, sheet rock, plywood, cement
block, brick, glass).
Low frequency vibration caused by normal building vibration has little effect
on the sensor, as it is designed to respond much more efficiently to sharp
blows.
The sensor contacts are enclosed in an inner compartment that guards
against erratic operation in dusty or particle laden environments.
Temperatures ranging from -5° F (-21° C) to 150° F (66° C) had negligible
effect on the operation of the sensor in tests conducted by Underwriters
Laboratories.
The coverage of vibration sensors on walls and ceilings can be increased if
the contacts can be mounted on furring strips. On walls, run furring strips
vertically, from the ceiling to about 4 feet from the floor (the distance
between them is dependent on the type of construction). On ceilings, run
the furring strips from one end of the protected area to the other.
A typical installation for wall protection might consist of vibration sensors
mounted 42 to 48 inches above the floor and spaced at 36 to 48 inch
intervals along the wall. Optimum locations for vibration sensors can best
be determined by experimentation, because of the variety of construction
materials and methods that may be encountered.
N4712
3/89
MOUNTING
HOLES (2)
ON VERTICAL
SURFACES,
MOUNT AS
SHOWN, WITH
WEIGHT
DOWNWARD
WIRING
TERMINALS (2)
INTERIOR
No. 11 TYPE VIBRATION SENSOR
Nos. 11BR & 11WH
Nos. 11BR & 11WH
Nos. 11BR & 11WH
Nos. 11BR & 11WH
RIBBED REAR
SURFACE FOR
EASY CEMENTING
TO WALLS AND
WINDOWS
TURN SCREW TO
ADJUST SENSITIVITY.
(CLOCKWISE TO
DECREASE).
STAY WITHIN RANGE
OF 1/8 TO 5/8 TURN
PAST POINT OF
INITIAL CONTACT
CLOSURE. SEE
ADJUSTMENT
PROCEDURE.
ADJUSTMENT AND TESTING
An adjustment screw on the sensor's contact assembly permits sensitivity
adjustment with a screwdriver (see the illustration).
Initial Adjustment
Mount the sensor (leave the cover off). Connect an ohmmeter across the
sensor's terminals and slowly turn the adjustment screw. If the sensor
contacts are already closed, turn the screw counterclockwise until they
open. With the sensor contacts open, turn the screw slowly clockwise until
the contacts just close and continue turning exactly 1/8 turn (45 ) past the
closure point. This is the sensor's maximum advisable sensitivity setting.
Note:
Higher sensitivity (less than 1/8 turn past the closure point) is not
recommended, as erratic operation and raise alarms may result.
Final Adjustment
Connect the sensor in series with the closed protection circuit intended for
it. Light blows with a small hammer, approximately 2 to 3 feet from the
sensor, will permit its adjustment for desired response.
The sensor can be made less sensitive by turning its adjustment screw
clockwise. Turn it in 1/8 turn steps until the desired response is obtained.
Caution: Do not turn the screw more than 1/2 turn clockwise from the
maximum advisable sensitivity position described previously or
the sensor's contact assembly vibration blade may be perman-
ently injured.
Replace the sensor's cover (do not overtighten!) and recheck the final
adjustment with the cover in place.
SPECIFICATIONS:
Length: 3" (76mm); Width 13/16" (21mm); Height 5/8" (16mm)
Contact Rating: 50mA @ 28VDC (max).
VIBRATION
SENSORS
REAR
