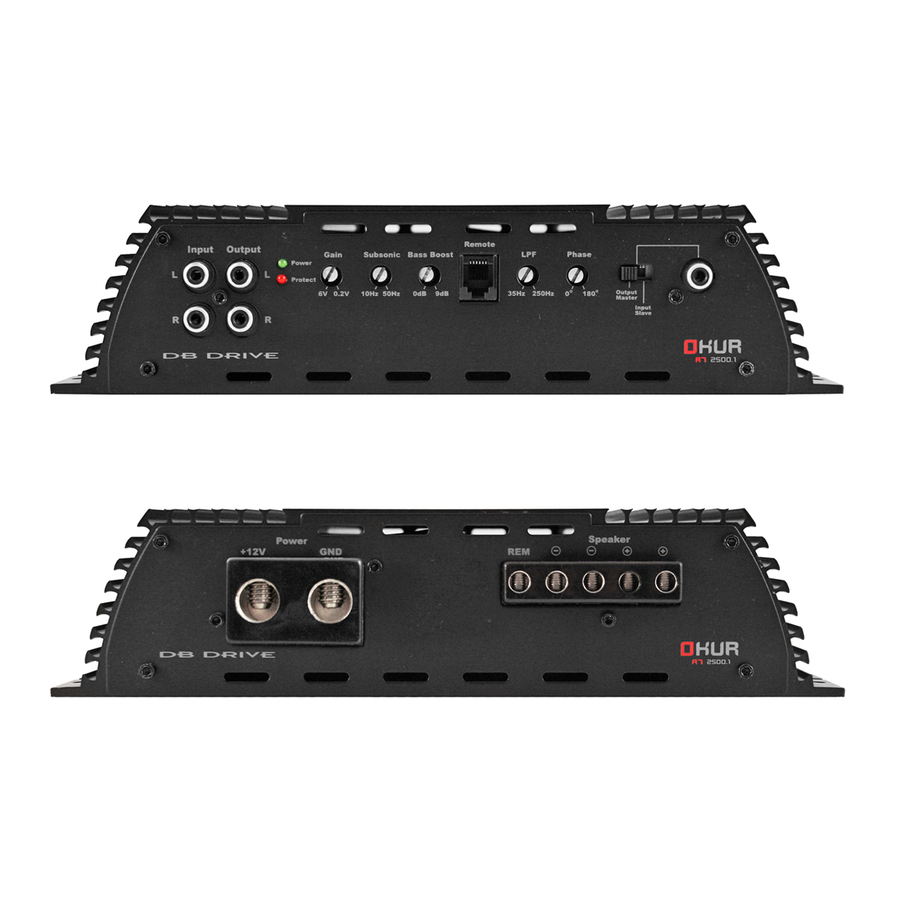
DB Drive Okur A7 125.4 Panduan Pengguna - Halaman 5
Jelajahi secara online atau unduh pdf Panduan Pengguna untuk Penguat Mobil DB Drive Okur A7 125.4. DB Drive Okur A7 125.4 12 halaman. Db drive okur a7 series a71100.1: user guide

www.dbdrive.net
3. INSTALLATION
In case you install the OKUR amplifiers by yourself, please read owner's manual very carefully. Before you
start your installation, please take all steps into consideration. or, you can have DB Drive or DB Reseach's
authorized dealer to check installation and set your car audio systems.
3-1. MOUNTING PREPARATION
Disconnect the negative ( - ) battery cable before mounting your OKUR amplifier or making any connections.
Check the battery and alternator ground ( - ) connections. Make sure they are properly connected and Free of
corrosion before selecting a mounting location. Please take some concerns into consideration with cooling
efficiency and safety.
3-2. MOUNTING PREPARATION
The OKUR amplifier uses a specially designed heat radiation heatsink to avoid excessive heat from OKUR
circuitry. But for better heat dissipation, It is good to find the mounting location where you can install OKUR
vertically with the heatsink fins and better air flow around heat sink.
For the safety, you have to find a dry and well ventilated location and make sure any cables and drilling car
equipment are not interfere with mounting location. Be sure the mounting location and drilling of pilot cables
will not present a hazard to any cables, control cables, fuel lines, Fuel tanks, hydraulic lines or other vehicle
systems or components.
3-3. +12V, GND, REM CONNECTION
12V ( POWER CONNECTION )
Before mounting Platinum series, disconnect the negative ( - ) wire from battery to protect any accidentIal
damage to amplifier and audio system. A775.4 , A7 125.4, A7 300.2 ,A7 750.1 ,A7 1100.1 and A7 1500.1
are designed to use minimum 4 gauge power and ground cables A7 2000.1, A7 2500.1, are designed to
use minimum 0 gauge cables.
Connect the power cables to power terminal labeled as + 12V. A775.4, A7 125.4, A7 300.2, A7 750.1,
A7 1100.1 and A7 1500.1 have built-in fuses. A7 2000.1, and A7 2500.1 are not euipped with fuses so
you need to install external fuses.
In order to install external fuses, connect one end of fuse holder to the power cable and the other end of
fuse holder to positive battery within 18in of the same cable gauge. This fuse location will protect the system
and the vehicle against the possibility of a short circuit in the power cable. Be sure to use fuses and fuse
holders adequate for the current draw application.
GND ( GROUND CONNECTION )
Locate a secure grounding connection as close to platinum series as possible. Make sure the location is
clean and provides a direct electrical connection to the frame of the vehicle.
Connect one end of a short piece of the same gauge cable as the power cable to the grounding point.
Run the one end of the cable to the grounding point.
Run the other end of the cable to the mounting location.
Connect the ground cable to the screw terminal labeled as GND.
REM ( REMOTE CONNECTION )
Run a remote turn on cable from the head units remote switched + 12V output.
04
