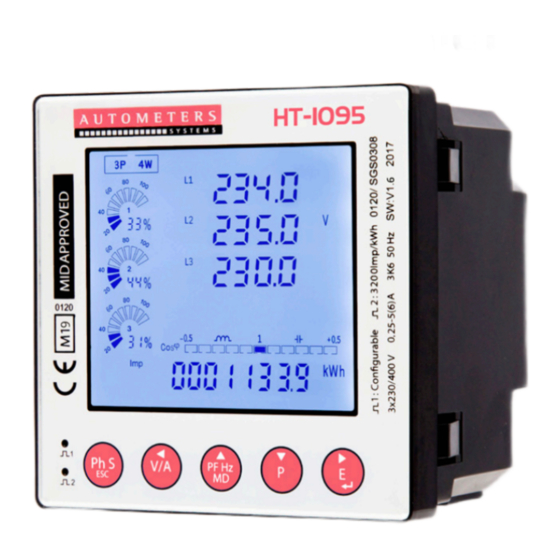
Autometers Systems HORIZON HT-1095 Panduan Pengaturan Cepat
Jelajahi secara online atau unduh pdf Panduan Pengaturan Cepat untuk Alat Ukur Autometers Systems HORIZON HT-1095. Autometers Systems HORIZON HT-1095 2 halaman.

Programming the meter
When you receive the meter there will be at least one value that you must
programme into the meter. This is the current transformer ratio.
If the meter has been purchased with the intention of using the RS 485
Modbus output then you will have to program the Modbus parameters you
require. See reverse Communication. (RS 485 Modbus)
IMPORTANT NOTICE
The HT-1095 is a MID approved panel meter, once you have altered any of the
parameters e.g. Current transformer ratio or voltage ratio and you have come
out of the programming mode you cannot alter them again.
This rule does not apply to the Modbus settings.
Meter programming check
To check the settings which have been progammed into the
meter.
P
Long press
PF Hz
Short press
MD
Baud Rate
Parity
Primary current transformer ratio ( c. .t 1)
Secondary current transformer ratio ( c.t. 2)
Meter serial number, 7 day program time
Date and Time
Tariff 1-8
Full test icons on display
Password Entry
Setting-up mode is password protected, so you must enter
the correct password.
By firmly pressing the button
password screen appears.
The default password is 1000.
If an incorrect password is entered, the display shows ERR.
C.T. (Current Transformer)
From the main Set-up menu, Use
CT option.
And long press
C.T.2 (Current Transformer)
Set C.T.2 secondary current input.
Options: 5A or 1A
Default CT2: 5A
E
Long press
E
Press
for 3s, the CT2 setting will flash.
PF Hz
Use
and
MD
And long press
C.T. Rate (Current Transformer)
To set the primary current ratio in the meter you must
program the divider into the meter. e.g. to set 200/5 amp
input "0040" (Divide the primary by 5) 5 amp being the
secondary of the c.t. See table below.
Options: 1~2000
Default CT rate 1. ( New Ratio Must Be Programmed Into
The Meter)
E
Long press
E
Press
for 3s, the CT rate setting will flash.
PF Hz
Use
and
MD
And long press
Modbus Address.
to scroll through the other settings:
for 3 seconds, the
E
PF Hz
P
and
to select the
MD
E
for confirmation
to enter the CT2 routine.
P
to choose CT2 with 5A or 1A.
E
for confirmation
to enter the CT Rate routine.
P
to choose CT rate with 1~2000.
E
for confirmation
HT-1095 METER
Quick setup guide
Example of meter set at 200/5 amp
Example of how
the display should
look for a meter
programmed to
200/5 amp.
See table for
more settings.
Example of meter set at 200/1 amp
Example of how
the display should
look for a meter
programmed to
200/1 amp.
See table for
more settings.
Pulse Output
The pulse outputs can be set to generate pulses to
represent kWh/kVarh
Pulse constant: 0.001/0.01/0.1/1/10/100/1000 kWh or
kVarh per Pulse
Pulse width: 200/100/60 Ms.
The pulse output is passive type, complies with
IEC62053-31 Class A.
ATTENTION: Pulse output must be fed as shown in
the wiring diagram below. Scrupulously respect
polarties and the connection mode. Opto-coupler with
potential-free SPST-No Contact.
Contact range: 5~27VDC Max. current Input: 27mADC
Pulse
This option allows you to configure the pulse output. The output can be set to
provide a pulse for a defined amount of energy active or reactive.
This option sets the pulse output type, pulse rate, duration
time.
From the Set-up menu, Use
Pulse option.
And long press
Pulse rate
Pulse rate options: 0.001 , 0.01 , 0.1 , 1, 10, 100, 1000 kWh /
kVarh per Pulse. Default : 0.01 kWh (100imp/kWh)
PF Hz
Use
and
MD
E
Long press
PF Hz
Use
and
MD
Long press
E
C.T Primary
Number to program
into the meter
100/5
0020
150/5
0030
200/5
0040
250/5
0050
300/5
0060
400/5
0080
500/5
0100
600/5
0120
800/5
0160
C.T Primary
Number to program
into the meter
100/1
0100
150/1
0150
200/1
0200
250/1
0250
300/1
0300
400/1
0400
500/1
0500
600/1
0600
800/1
0800
OUTPUT
P+
R
U
PF Hz
and
to select the
P
MD
E
for confirmation
P
to select Pulse Rate option.
the setting will flash.
P
to choose Options.
for confirmation.
Com
imp
