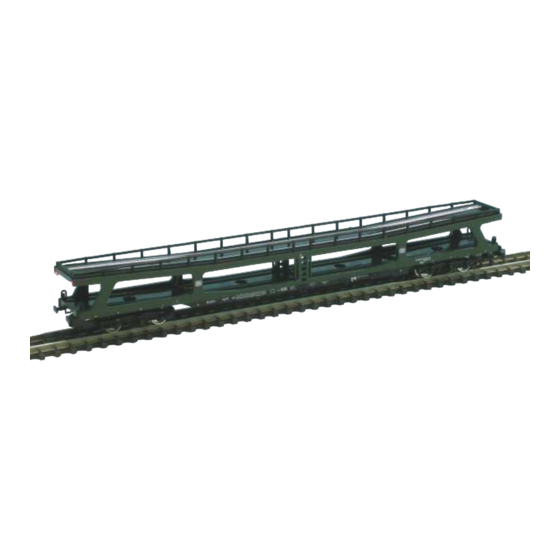
High Tech 3003 Petunjuk
Jelajahi secara online atau unduh pdf Petunjuk untuk Mainan High Tech 3003. High Tech 3003 2 halaman. Red backlights 4-axle up to 16 volt

Art-Nr: 3003 Red backlights 4-axle up to 16 volt
1. These parts are not suitable for small children. There is a
danger of swallowing.
2. The product can be seen in figure 1. These instructions are
part of the product. Please retain them well.
3. The product is suited for direct and alternating current from 6 –
16 volt. The current consumption depends on the brightness of
the LED, usually a couple of milliampere.
4. The metal weight inside the wagon has been removed, the
built-in electronics weigh approximately the same, so the
weight of the model basically has not changed.
5. The installed backlights are ready to use, so you just can put
the car on the tracks and start running it. The lights will start
working as soon as they are connected to a current of the
above mentioned strength, no extra charging time is
necessary. The built-in electronics are able to bridge voltage
gaps up to a few seconds that are normal to occur when
working with model trains and due to the light weight of the
car. This has the effect that the backlights always shine with a
continous intensity when the car is moving.
6. Under normal circumstances the backlights are also working when the wagon is standing, e.g. if in a
digital system the tracks are always provided with current or when using our controller for analog
systems. But this cannot be guaranteed, since it is due to physical reasons that the current input is
not continous, but always interrupted for short intervals. If the wagon comes to a halt where the
contact of the current to the current collectors is interrupted, it is logical that the lights turn off after a
short afterglow. But as soon as the car starts to move again, the current collectors have contact to the
current again and the LEDs will be shining again continously as described above.
7. The LEDs are affixed underneath the upper platform of the wagon very firmly. Nevertheless it is
advisable to avoid mechanical impact, contact with screwdrivers or other tools, or getting stuck with
your fingernails. If the LED is broken off, this very often also damages the small wires.
8. Unlike the wheels moving along without current, these wheels are picking up a lot of dirt. We know
this problem from the locomotives. For working properly, they need to be cleaned from time to time.
For doing this, dismantle the wheels carefully using some tweezers. Avoid contact with the current
collectors by picking them up on the side opposite to the current collectors.
9. Never try to dismantle the bogie. There is a thin wire attached firmly to the car chassis and the bogie,
which will break in case of dismantling. For cleaning, always only dismantle the axles. As described
under point 8, do not damage the current collector.
10. Ultrasonic treatment and using a damp cloth are the best methods to clean the wheels, especially the
contact surfaces and the axle. According to our experience it is best to use ultrasonic treatment
and/or polish everything with a damp cloth. The contact surfaces should not be matt afterwards, but
shining like the ones of a new wheel. The cleaning process does not influence the abrasion of the
nickel layer. The abrasion of the nickel layer usually has a different reason, e.g. the different speed of
the wheels on each side when going through curves. But the nickel layer can also be damaged
unnecessarily when using a whire brush or fiber glass pen, so we strongly advise to use the method
described above for cleaning your wheels.
11. The best liquids for cleaning the wheels are benzine, alcohol, purified alcohol, surgical spirit, or simply
spirit, all of them mild cleaning liquids for metal. Just soak a cloth and wipe off the dirt. The wheels
should not be soaked and remain in these or other detergents for any length of time. Also do not use
any solvents or thinners that are used when working with paint. These are likely to damage the plastic
foam insulation on one side of the wheel and make it soft. As a consequence, the wheel starts to
flatter.
Instructions
figure 1: Red backlights in a motorvehicle transport car
figure 2: A closer look at the backlights
page 1
page 2
