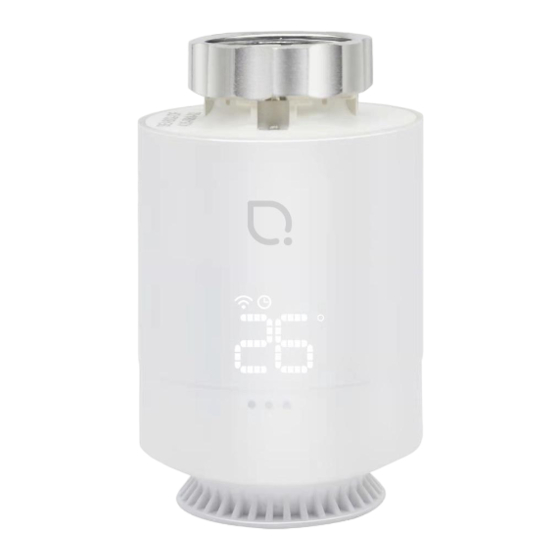
COQON HTHERMB1 Manual - Halaman 2
Jelajahi secara online atau unduh pdf Manual untuk Unit Kontrol COQON HTHERMB1. COQON HTHERMB1 2 halaman. Radiator valve
Juga untuk COQON HTHERMB1: Manual (2 halaman)

Installation
Mounting
Montage und Kalibrierung
/ Mounting and Calibration
1. Entfernen Sie den manuellen Regler vom Heizkörper, indem Sie das
Gewinde lösen und diesen abziehen.
2. Setzen Sie die Batterien ein. Im Display erscheint „LA". Warten Sie, bis
die Anzeige statisch leuchtet und nicht mehr blinkt.
3. Setzen Sie das Heizkörperthermostat auf das Ventil und verschrauben
Sie es. Bei einigen Ventilen müssen Sie hierfür die im Lieferumfang
befindlichen Adapter verwenden.
4. Nachdem das Heizkörperthermostat fest verschraubt wurde, drücken
Sie einmal auf die Radtaste. „LA" blinkt, bis die Kalibrierung vollständig
abgeschlossen ist. Nach erfolgreichem Abschluss des Vorgangs wird
die Zieltemperatur angezeigt.
Der Kalibrierungsprozess kann, sollte er beim Einlegen der Batterien nicht
automatisch starten bzw. im Bedarfsfall, durch 5-maliges Drücken der
Radtaste gestartet werden.
1. Remove the manual regulator from the radiator by loosening the thread
and removing the part.
2. Insert the batteries. "LA" appears on the display. Wait until the message
is static and no longer flashing.
3. Place the radiator thermostat on the valve and screw it together. For
some valves, you need to use the adapters supplied with the device.
4. Once the radiator thermostat has been screwed tightly, press the wheel
button once. "LA" flashes until calibration is complete. After successful
completion of the process, the set temperature is displayed.
The calibration process can be started if it is not started automatically when
the batteries are inserted or, if necessary, by pressing the wheel button 5
times.
Betrieb
Operation
Temperatur einstellen
/ Set temperature
Nach erfolgreicher Montage und Kalibrierung wird die Zieltemperatur
entweder über das Smart Home System oder den Drehregler eingestellt.
Im Uhrzeigersinn erhöht sich die Temperatur, gegen den Uhrzeigersinn
wird sie gesenkt. In der niedrigsten Stellung schaltet sich das Thermostat
aus
und
es
wird
„OF"
im
Einstellungsvorgangs wird die Zieltemperatur angezeigt, bei Drücken des
Drehreglers im Ruhebetrieb die Raumtemperatur.
After successful assembly and calibration, the target temperature is set
either via the smart home system or the rotary control. Clockwise the
temperature increases, counterclockwise it is lowered. In the lowest position,
the thermostat turns off and "OF" is displayed on the display. During the
adjustment process, the target temperature is displayed, when pressing the
rotary control in idle mode, the room temperature is displayed.
Kindersicherung
/ Parental lock
Um die Einstellung der Temperatur durch das Drehrad zu unterbinden,
aktivieren Sie die Kindersicherung durch Drücken der Radtaste für etwa 10
Sekunden, bis die Meldung „LC" angezeigt wird. In diesem Zustand wird
die Zieltemperatur ausschließlich durch das Smart Home System gesetzt.
Durch erneutes Drücken der Taste für etwa 5 Sekunden wird die Sperre
aufgehoben und die Temperatur angezeigt.
To prevent the manual setting of the temperature, activate the parental lock
by pressing the wheel button for about 10 seconds until the message "LC"
appears. In this state, the target temperature is set exclusively by the smart
home system. Pressing the button again for about 5 seconds will release the
lock and display the temperature.
Fensteröffnungserkennung
/ Window-opening detection
Durch einen plötzlichen Temperaturabfall erkennt das Thermostat die
Öffnung einer Tür oder eines Fensters und kann die Temperatur für die
Dauer der Öffnung reduzieren. Diese Funktion kann nur über das Smart
Home System aktiviert werden.
By a sudden drop in temperature, the thermostat detects the opening of a
door or window and can reduce the temperature accordingly for the
duration of the opening. This function can only be activated via the Smart
Home System.
Display
angezeigt.
Während
Coqon
Öffnen Sie die Coqon Oberfläche und gehen auf
verwalten > + > Coqon
auf den Data Matrix Code ein oder geben Sie die Gerätebezeichnung
HTHERMB1 ein. Der Einrichtungsassistent führt Sie durch die Einrichtung
des Geräts.
Open the Coqon interface and go to
Coqon
device. Point your smart phone's cameras on Data Matrix code or
enter the device name HTHERMB1. The setup wizard will guide you through
the setup of the device.
Andere Systeme
Versetzen Sie das Smart Home System in den Verbindungsmodus zum
Hinzufügen neuer Geräte. Drehen Sie die Radtaste gegen den
Uhrzeigersinn, bis im Display „OF" erscheint. Drücken Sie 3 Mal auf den
Regler, bis „—" angezeigt wird. Das erfolgreiche Anlernen wird durch die
Meldung „PA" bestätigt.
Put the smart home system into connection mode to add new devices. Turn
the wheel button counterclockwise until "OF" appears on the display. Press
the wheel 3 times until "—" appears. The successful teach-in is confirmed by
the message "PA".
Batteriewechsel
Zum Austausch der Batterien öffnen Sie das Gehäuse durch Drücken der
seitlichen Lasche und Abziehen der Abdeckung. Tauschen Sie die Batterie
durch ein Produkt gleichen Typs (2x Alkali 1,5V Typ AA) aus und schließen
Sie das Gehäuse wieder.
des
To replace the batteries, open the case by pressing the side tab and
removing the cover. Replace the battery with a product of the same type (2x
alkaline 1.5V type AA) and close the cover again.
Erneutes Anlernen
Zur Verwendung des Thermostats an einem anderen System ist es
ausreichend, das Gerät am neuen System anzulernen. Sobald der
Installationsprozess erfolgreich abgeschlossen wurde, wird sich der
Sensor nicht mehr mit dem System, an dem er zuvor registriert war,
verbinden.
To use the thermostat in another system, it is sufficient to follow the process
of adding new devices to your system. Once the installation process has
been successfully completed, the sensor will no longer connect to the
system in which it was previously registered.
Inbetriebnahme
First setup
Einstellungen > Geräte
Gerät. Richten Sie die Kamera Ihres Smartphones
Manage settings > devices > + >
/ Other systems
Wartung
Maintenance
/ Battery replacement
/ New pairing
