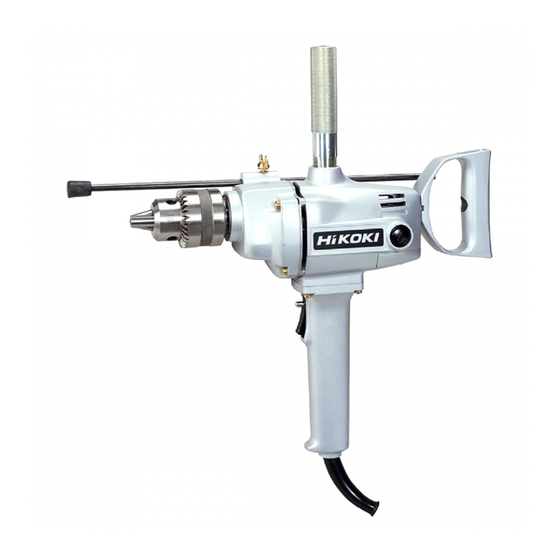
HIKOKI PU-PM3 Manual Petunjuk Penanganan - Halaman 4
Jelajahi secara online atau unduh pdf Manual Petunjuk Penanganan untuk Bor HIKOKI PU-PM3. HIKOKI PU-PM3 20 halaman.

English
PRECAUTIONS ON USING DRILL
1. Do not make this drill work beyond the ability.
2. Operate the Electric Drill safely for correct use.
3. Hold the drill fi rmly and use it.
4. Do not wear the gloves while operating.
5. Never let the drill alone in the rotating conditions.
SPECIFICATIONS
Voltage (by areas)*
Power Input
No-load speed
Steel
Capacity
Wood
Weight (without cord)
*Be sure to check the nameplate on product as it is subject to change by areas.
STANDARD ACCESSORIES
(1) Chuck wrench ...............................................................1
(2) Stopper .........................................................................1
Standard accessories are subject to change without notice.
APPLICATIONS
○ Drilling holes into various metals, lumbers and plastics.
PRIOR TO OPERATION
1. Power source
Ensure that the power source to be utilized conforms
to the power requirements specifi ed on the product
nameplate.
2. Grounding
This tool should be grounded while in use to protect the
operator from electric shock. The tool is equipped with a
three conductor cord and grounding type plug to fi t the
proper grounding type receptacle. The green (or green
and yellow) conductor in the cord is the grounding wire.
Never connect the green (or green and yellow) wire to a
live terminal.
3. Power switch
Ensure that the power switch is in the OFF position. If the
plug is connected to a receptacle while the power switch
is in the ON position, the power tool will start operating
immediately, inviting serious accident.
4. Extension cord
When the work area is removed from the power source.
Use an extension cord of suffi cient thickness and rated
capacity. The extension cord should be kept as short as
practicable.
5. Confi rming condition of the environment
Confi rm that the work site is placed under appropriate
conditions conforming to prescribed precautions.
6. Selecting the appropriate drill bit
(1) When drilling holes in metals or plastics:
Use ordinary metalworking drill bits;
Applicable drill sizes range from 3.2 mm min. to 16 mm
max.
(2) When drilling holes in lumber:
Use woodworking drill bits of 36 mm diam. or below. For
small holes of 6. 5 mm diam. or below, use metaloworking
drill bits.
3
6. Avoid letting the revolution down largely by means of
pressing it by force.
7. Take care of downward direction in the high position.
8. Before drilling into a wall, fl oor or ceiling, thoroughly
confi rm that no items such as electric cables or conduits
are buried inside.
(110 V, 115 V, 120 V, 127 V, 220 V, 230 V, 240 V)
670 W*
750 /min
16 mm
36 mm
4.7 kg
7. Mounting drill bits
Tighten drill bits with the chuck wrench. There are three
holes in which the chuck wrench should be inserted.
Tighten them equally in turn at three holes, without
tightening them only at one holes.
8. Confi rm the power receptacle
If the power receptacle only loosely accepts the plug, the
receptacle must be repaired. Contact the nearest electric
store for repair service.
If such a faulty receptacle is used, it may cause
overheating, resulting in a serious hazard.
HOW TO USE THE DRILL
1. Pressing force of drill
You can not get holes quickly even if pressing it by strong
force more than necessory.
It not only damages the tip of drill bits and decreases the
effi ciency of operation, but also shortens the life of the
drill.
2. In case of penetrating holes
It is subject to break the drill bits when penetrating.
It is important to decrease pressing force when
penetrating.
3. Operation of switch
Pulling the trigger of switch and push the stopper, it
keeps, the switch-on condition and it is convenient for
the contineous running.
When switched off , the stopper can be disconnected by
means of pulling the trigger again.
4. Installing the stopper (Fig. 1)
Pass the stopper through the hole on the gear cover
and secure it with the wing bolt. Distance between the
stopper and the drill bit tip will be the hole depth.
5. Regarding the drill chuck
The drill chuck is secured to the spindle with a taper.
Should the drill chuck be accidentally detached from the
spindle, deposited on the chuck taper section and the
spindle chuck mount, tap the side plane of the chuck after
retracting its three claws, and reattach it to the spindle.
Carefully handle the taper section so that its surface does
not become scarred.
