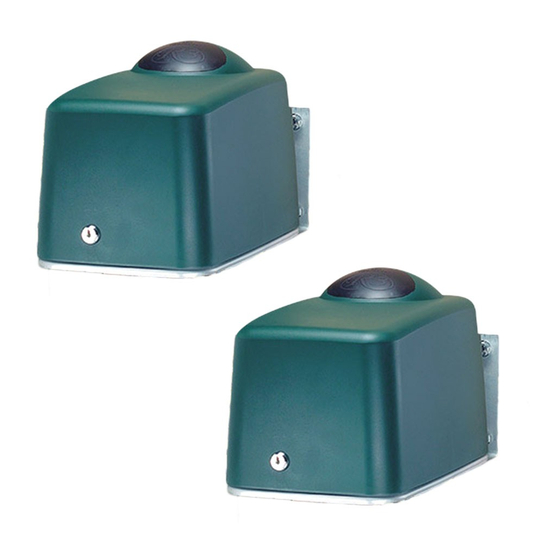
Centurion R5 Panduan Pengaturan Cepat
Jelajahi secara online atau unduh pdf Panduan Pengaturan Cepat untuk Pembuka Pintu Garasi Centurion R5. Centurion R5 2 halaman. Rotary swing gate operator
Juga untuk Centurion R5: Panduan Pengaturan Cepat (19 halaman), Panduan Pengaturan Cepat (17 halaman)

CENTURION
THE AUTOMATIC CHOICE
R O T A R Y
Q
S
G
UICK
ETUP
UIDE
© Centurion Systems (Pty) Ltd.
1150.D.01.0012_6
UPDATED FOR V2 OPERATORS
This guide is intended for the experienced installer who has done an R3
or R5 installation before, knows all the safety aspects required of a site,
but who needs reminding of the basic steps to follow.
This guide does not replace the manual, but is supplementary to it.
WARNING
WARNING
Always ensure that all safety instructions as described in the
Installation Manual are adhered to during the installation
process, and also apply to the completed installation.
TIP!! If in doubt .... refer to the installation manual. (IM)
9
F
D
A
IT THE
RIVE
RM
Put the gearbox into manual mode. (IM page 24).
Fit the drive arm to the operator as shown.
A
C
D
A
SSEMBLE
LAMP TO
RIVE
RM
R3
R5
Clamp
Clamp
Drive Arm
Drive Arm
Wedge
Wedge
M12 Washer
M12 Washer
M12 x 65 Bolt
M12 x 65 Bolt
To mount: push clamp onto drive shaft,
tap into place, slide drive arm into clamp,
slip wedge in and fasten with bolt and
washer.
Figure 7 Assemble Clamp to Drive Arm
1
R
T
& E
EQUIRED
OOLS
QUIPMENT
Check that you have all the tools required. (IM page 12)
2
S
C
ITE
ONSIDERATIONS
Check for the safety and suitability of the site by looking at: (IM
page 13)
All safety and local authority requirements.
That the gate is within the operator specifications.
Check that there is enough ground clearance to enable assembly
of the drivearm clamps. (See Figure 4)
3
C
R
ABLING
EQUIREMENTS
Consider all cabling requirements and routing as in Figure 9. (
IM page
14
)
4
O
I
PERATOR
NSTALLATION
Estimate the gate swing angle with figure 1.
Then mark the operator's position according to figure 2 or 3.
(IM page 15)
o
0
b
(Gate opening angle)
o
o
120
60
o
o
110
o
o
o
70
100
90
80
Figure 1 Gate Opening Angle Diagram
7
F
G
P
ASTEN
EARBOX IN
OSITION
Fasten the motor onto the pedestal adaptor plate or the wall bracket
using the M8 bolts and washers supplied. (IM page 23)
8
C
D
A
L
UT
RIVE
RM TO
ENGTH
Using the relevant tables below, read off the required drive arm
length.
Then cut the drivearm 50mm longer than D, as shown in Figure 6.
C
D
L
UT
RIVEARM TO
ENGTH
Standard
Perpendicular
Pedestal Mount
Wall Mount
b
Drivearm
Drivearm
D
Gate Opening
Angle (Degrees)
60
325
70
370
80
430
90
470
100
490
110
480
120
470
Connecting Arm
Drivearm
Cut drivearm length=D+50mm
Figure 6 Cut Drive Arm Length
S
P
M
TANDARD
EDESTAL
OUNT
Pedestal Mount
Installation
H
Gate Bracket
GATE LEAF IN CLOSED POSITION
b
H
B
C
b
Gate Opening
Angle (Degrees)
Gate Bracket
60
0
750
700
70
90
750
700
80
130
750
700
90
220
700
700
100
355
700
650
110
570
600
610
120
605
450
570
Figure 2 Standard Pedestal Mount Installation
W
M
I
ALL
OUNT
NSTALLATION
Wall
Bracket
Gate Bracket
C (See Fig. 3)
D
250
300
350
420
480
500
500
Figure 5 Wall/Gate Position
6
R
C
& S
OUTE
ABLES
ECURE
Route cables as determined in the cabling plan in Figure 9.
Make sure at least 400mm of cable protrudes above the pedestal or
wall mount bracket. (IM page 22)
P
ERPENDICULAR
C
B B
B E S U R E T O U S E A L O N G
C O N N E C T I N G A R M F O R T H I S
INSTALLATION TYPE.
Ensure that the gate does not exceed the
relevant specifications (IM page 9)
Only recommended values are provided. For
variances, refer to the Installation Manual.
All dimensions shown are indicated in millimetres.
BE SURE TO USE A SHORT CONNECTING ARM FOR
THIS INSTALLATION TYPE.
All recommended values will result in gates with
similar opening times.
Ensure that the gate does not exceed the relevant specifications (IM page 9)
#The minimum value will ensure a clearance of
Only recommended values are provided. For variances, refer to the Installation Manual.
30mm if the gate is 50mm thick
All dimensions shown are indicated in millimetres.
All recommended values will result in gates with similar opening times.
H
b
Gate Opening
Angle (Degrees)
60
140
70
180
80
180
90
210
100
305
110
380
120
485
Figure 3 Standard Wall Mount Installation
M
OUNT THE
5
D
ETERMINE
Locate a suitable place for mounting the gate bracket according to
dimension "C" in the tables of Figures 2 or 3.
Determine pedestal or wall mount bracket height relative to gate
bracket as in figure 4 and 5. (IM page 21)
Mount the gate bracket.
P
M
EDESTAL
OUNT
M
OTOR
300mm sqr
Figure 4 Pedestal/Gate Bracket vertical position
W
M
ALL
OUNT
Wall Mount
Installation
H
C
Gate Bracket
GATE LEAF IN CLOSED POSITION
b
B
C
Gate Bracket
180
700
180
700
140
700
140
700
180
700
80
700
80
610
G
ATE BRACKET AND
P
H
EDESTAL
EIGHT
I
NSTALLATION
C (See Fig. 2)
Gate
Bracket
Cabling
Pedestal
Concrete
