CORNING Centrix Petunjuk Manual - Halaman 7
Jelajahi secara online atau unduh pdf Petunjuk Manual untuk Perangkat Keras Jaringan CORNING Centrix. CORNING Centrix 8 halaman. System splitter/cwdm cassette installation
Juga untuk CORNING Centrix: Perutean Jumper (20 halaman), Panduan Memulai Cepat (2 halaman)
6.
Install Distribution Jumpers into the Front of the Cassette
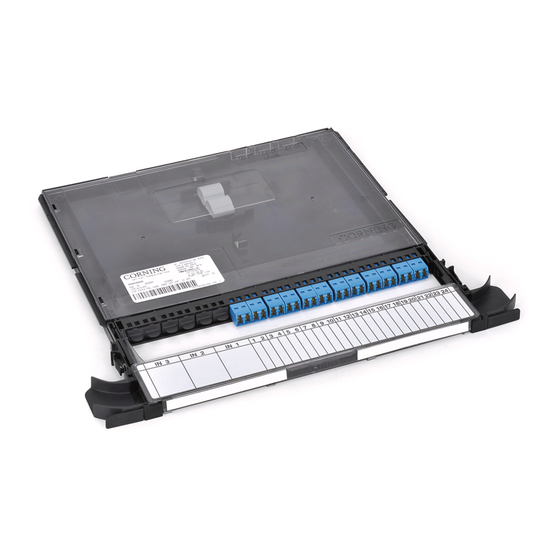
NOTE: Rear-access cassettes are shown in Figures 15 and 16. Distribution jumper routing principals are the same
for front-access cassettes.
Step 1:
Press latch on right side of cassette and pull cassette out to detent position (Figure 15 left).
Step 2:
Press buttons on each side of the cassette and lower the handle.
Step 3:
Open the handle cover (Figure 15 right).
TPA-4699
Step 4: Clean adapters and connectors per standard company practices or as described in Section 7. Mate the
jumpers (Figure 16 left).
Step 5:
Raise handle. Dress jumper cords to the side of the cassette (Figure 16 right).
• In a Centrix™ System frame, jumpers must route out the left side of the cassette.
• In a 19-in rack or a 23-in frame, jumpers may route to the left, to the right, or in both directions. If
routing jumpers out the right-hand side of the cassette, install the optional right-hand waterfall
kit (CTX-KIT-RT-DH) as shown in Figure 6.
Step 6: Close handle cover.
Step 7:
Push cassette back into the housing and dress jumper cords in the frame as described in the
installation instruction provided with the housing.
IMPORTANT:
Guide fibers while inserting cassette to avoid pinching fibers.
TPA-4700
Button
Standard Recommended Procedure 003-1017-AEN | Issue 2 | April 2017 | Page 7 of 8
Figure 15
Figure 16