Gardena 19500 AquaSensor Panduan Operator - Halaman 6
Jelajahi secara online atau unduh pdf Panduan Operator untuk Pompa Air Gardena 19500 AquaSensor. Gardena 19500 AquaSensor 12 halaman. Clear/dirty water submersible pump
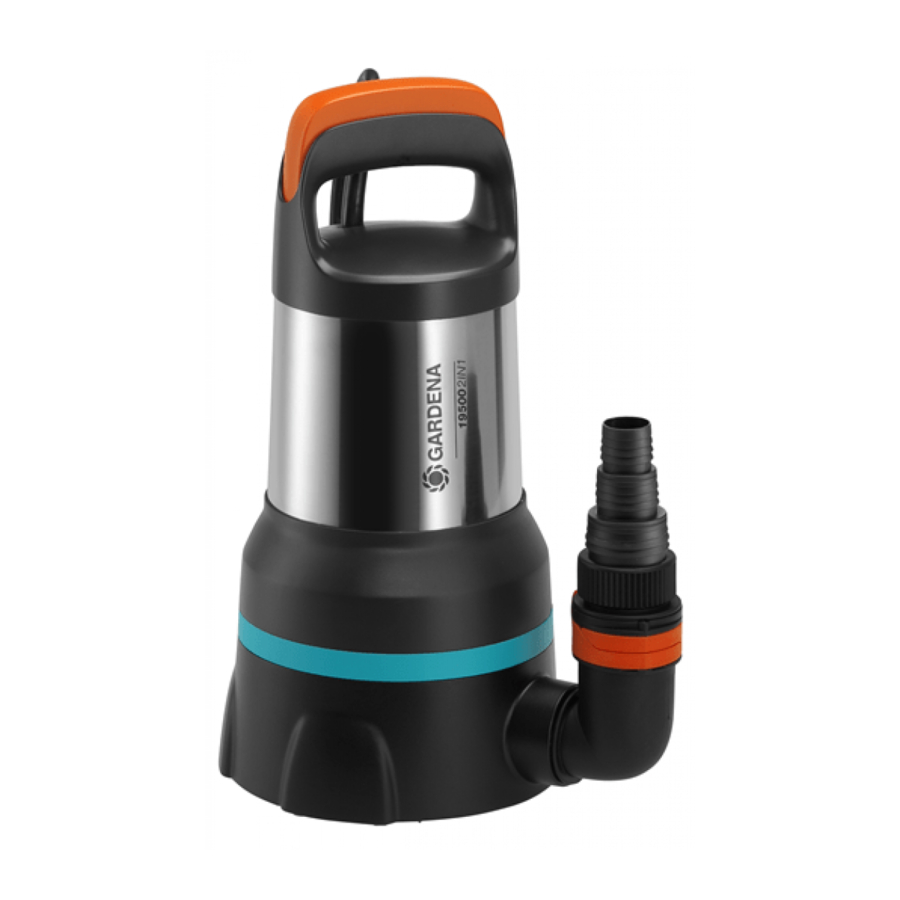
To assemble the pump connection [ Fig. A5 ]:
DANGER! Risk of physical injury!
Cut injury by the impeller.
v Operate the pump only with the elbow connector.
The hose can be easily connected and disconnected using the locking
(2)
devices
on the elbow connector
(1)
1. Screw the elbow connector
(If the hose is to be installed horizontally, the elbow connector
be screwed out again up to half a turn.)
2. Screw the connection piece
(3)
3. Push the connection nipple
(4)
until it stops and it engages audibly and visibly.
The hose is securely connected to the pump.
3. OPERATION
DANGER! Risk of physical injury!
Injury when the product starts accidentally.
v Disconnect the product from the mains before you connect,
adjust or transport the product.
To pump water:
If the pump cannot be immersed via the handle, the pump must always
ß
be immersed via a rope
[ Fig. O1 ].
R
ß
Attach the rope
by tying it to the handle. The button
R
be depressed. Minimum immersion depth during initial operation
see 7. TECHNICAL DATA.
Take care that the pump is located where the inlet openings at the suction
base are not obstructed neither completely nor partly.
Stand the pump on a brick if using in a pond.
If the suction process is close to the minimum water level at start-up,
the suction process may take longer.
1. Immerse the pump.
2. Connect the pump to the mains.
Attention! The pump can start immediately depending on the sensor
setting.
Automatic operation [ Fig. O10 ]:
In automatic operation the pump switches on automatically when the
water level reaches the switch-on level and switches off automatically
when the water level reaches the switch-off level.
Switch-on / switch-off heights of the sensor fields:
The sensor has nine sensor fields (
are located to the right of the LEDs.
The sensor fields are about 1 cm high (no finger or changed water level
is detected between the sensor fields).
Switch-on / switch-off heights in mm:
ß
ß
ß
Sensor field
S1
S2
S3
Clear water:
11
23
38
Off / On
Dirty water:
49
61
73
Off / On
After plugging in the pump the 9 LED's light up one after the other.
The pump starts at the factory in automatic mode with sensor field
switch-on height
ß
and sensor field switch-off height
S8
To adjust the switch-on / switch-off heights [ Fig. O10 ]:
The sensor fields can only be adjusted outside the water.
When the pump has been removed from the water, the sensor should be
dried for programming.
The upper sensor field is always the switch-on height, the lower sensor
field is always the switch-off height.
1. Operate the sensor field until the input is acknowledged with a short
double flash of all LEDs.
2. Keep the sensor field
ß
pushed until the double flashing of all LED's
S7
has acknowledged the input.
The currently set switch-on and switch-off heights are briefly displayed.
After that all sensor fields light up.
10
(1)
.
clockwise into the pump until it stops.
(1)
into the connection nipple
(4)
.
of the hose into the elbow connector
(6)
must not
ß
ß
to
from bottom to top), which
S1
S9
ß
ß
ß
ß
ß
S4
S5
S6
S7
S8
57
81
109
140
174
95
119
147
178
212
ß
.
S4
3. Push the desired upper sensor field for the switch-on height.
The LED of the selected sensor field switches off.
4. Push the desired lower sensor field for the switch-off height.
The LED of the selected sensor field switches off.
After 3 seconds, the set switch-on and switch-off heights are accepted
and displayed.
Automatic clear water suction for very low water levels:
ß
Sensor field
can be selected both as switch-on and switch-off point.
S1
ß
can
If the sensor field
still detects water within 10 minutes after starting the
S1
pump, the pump switches off to prevent damage due to dry running.
The pump will still start if sensor field
ever, the sensor should be cleaned to ensure exact water level detection.
(1)
To display switch-on and switch-off heights:
1. Take the pump out of the water and dry the sensor area.
2. Keep the sensor field
has acknowledged the input.
The currently set switch-on and switch-off heights are displayed.
Disable the water level tracking:
In automatic operation, the LEDs follow the water level. This can be
deactivated.
1. Take the pump out of the water and dry the sensor area.
2. Keep the sensor field
flashing of all LED's has acknowledged the input (see To pump water).
To switch the water level tracking back on, push and hold the sensor
field
ß
again during initialisation until the double flashing of all LED's has
S8
acknowledged the input.
Demo mode:
For presentation purposes, the pump can be put into demo mode. In this
mode, the LEDs simulate the pump's functions via flashing sequences and
the sensor fields react to touch.
1. Take the pump out of the water and dry the sensor area.
2. Keep the sensor fields
switching on or during the self-test after plugging in until the double
flashing of all LED's has acknowledged the input.
To switch off the demo mode again, push and hold the sensor fields
and
ß
during initialization when switching on or during the self-test after
S8
plugging in until the double flashing of all LED's has acknowledged the
input.
Manual operation [ Fig. O10 ]:
In manual mode the pump runs until the pump is disconnected from the
mains. This mode is particularly suitable for flat suction.
In manual operation the sensor fields are deactivated. The pump then runs
until the pump is disconnected from the mains or another operating mode
is selected.
v Keep the sensor fields
all LED's has acknowledged the input.
All LEDs will light up and within 5 seconds all the LEDs will switch off
one after the other. The pump starts.
During these 5 seconds the pump should be placed in the water. A start
will only take place if the pump detects water. If this is not the case, the
ß
S9
countdown is repeated up to three times.
If you need more time to put the pump into the water, please disconnect
211
the pump from the power supply. The countdown will continue after the
sensor is plugged in again.
249
The manual operation remains active even after disconnecting the power
supply.
To stop manual operation, disconnect the pump from the mains and take
it out of the water. Connect the pump to the power supply again and keep
sensor field
ß
pressed until it is acknowledged by double flashing of all
S9
LEDs. Now you are again in automatic mode.
Only operate the manual mode under supervision.
Time-limited manual operation:
In time-limited manual operation, the sensor fields are deactivated for
10 minutes. The pump then runs for 10 minutes and then switches off
automatically.
v Keep both sensor fields
all LED's has acknowledged the input.
All LEDs will light up and within 10 seconds all LEDs will switch off one
after the other. The pump starts.
After 10 minutes the pump automatically switches back to automatic
operation.
ß
detects water. In this case, how-
S2
ß
pushed until the double flashing of all LED's
S6
ß
pushed during initialisation until the double
S8
ß
and
ß
pushed during initialisation when
S5
S8
ß
and
ß
pushed until the double flashing of
S6
S8
ß
and
ß
pushed until the double flashing of
S7
S8
ß
S5