Gardena 884 Panduan Petunjuk Pengoperasian - Halaman 3
Jelajahi secara online atau unduh pdf Panduan Petunjuk Pengoperasian untuk Penyemprot Cat Gardena 884. Gardena 884 6 halaman. Backpack sprayer 12
Juga untuk Gardena 884: Panduan Petunjuk Pengoperasian (9 halaman), Panduan Petunjuk Pengoperasian (9 halaman), Panduan Petunjuk Pengoperasian (10 halaman)
G
2. For Your Safety
V Never open the Backpack Sprayer or unscrew the
Danger of
physical injuries :
sprayer handle when the Backpack Sprayer is still pres-
surised.
V Always release the pressure completely before opening
the Backpack Sprayer by pressing the pushbutton of the
sprayer handle.
Cleaning :
V After using your Backpack Sprayer, always release the
pressure then empty, carefully clean and rinse the tank
in clean water. Leave the Backpack Sprayer open and
allow it to dry (see 5. Maintenance).
v Always clean the Backpack Sprayer before using a different
product to avoid chemical reactions.
v To prevent reactions with the products you are using, never
use aggressive cleaning agents that contain solvent or
petrol.
v Check the Backpack Sprayer for possible damages before
Operation :
each use.
Never leave your Backpack Sprayer unattended or for long
periods when full and pressurised.
v Keep the Backpack Sprayer out of the reach of children.
You are responsible for the safety of others.
v Keep your Backpack Sprayer away from heat sources and
hot environments.
The tank cap is equipped with a pressure relief valve. This valve
draws in air to equalise the pressure inside the tank and pre-
vents liquid leaking out if the Backpack Sprayer falls over.
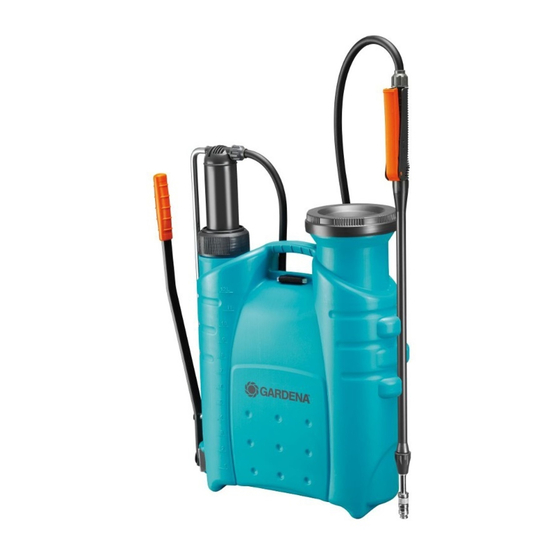
3. Assembly
1. Pull each unstitched end of the carrying
Fitting the carrying strap :
1
strap
5
metal buckles
2. Pull the carrying strap
opening
so that the strap adjuster
front.
3. Push the strap lock
1
6
the carrying strap
4. Pull back the carrying strap
until the strap lock
carrying strap from sliding out.
4
5. Pull the metal buckles
2
3
lugs
them click into place.
If you are right-handed the pump lever
3
left-hand side so that you can hold the spray lance in your
right hand.
10
1
approx. 2 to 3 cm through the
2
.
1
through the
5
under the carrying handle
7
is at the
6
7
sideways into
1
.
1
6
prevents the
2
onto the
on the bottom of the Backpack Sprayer until you hear
4
should be on the
Attaching the sprayer head :
8 0 9
A
D
C
E
B C
F
2
4. Operation
Filling the tank :
1
A
8
0
Attaching the sprayer head to the handle:
9
1. Push the sprayer head
all the way into the sprayer handle
0
2. Push the sprayer lock
all the way into the sprayer handle
3. Screw the sprayer head
9
onto the sprayer handle
8
using the union nut
(do not use pliers).
B
Attaching the sprayer handle to the hose :
B
4. Push the union nut
onto the hose
D
5. Push the filter
into the sprayer handle
C
D
6. Push the hose
onto the filter
C
7. Screw the hose
onto the sprayer handle
B
the union nut
(do not use pliers).
Attaching the hose to the pump :
B
8. Push the union nut
onto the hose
E
9. Push the connector
into the pump
C
10. Push the hose
onto the connector
C
11. Screw the hose
onto the pump
B
nut
(do not use pliers).
1. Thoroughly stir the product you are going to use.
G
2. Unscrew the tank cap
.
3. Pour in the product up to the highest mark (12 litres).
Always comply with the precautionary measures and correct
G
dosage specified by the product manufacturer.
G
4. Fit the tank cap
and screw tight by hand (do not use pliers).
G
A
.
A
.
A
by hand
C
.
A
.
.
A
by hand using
C
.
F
.
E
.
F
by hand using the union
11