Garmin BMW Motorrad Navigator VI Panduan Pemilik - Halaman 7
Jelajahi secara online atau unduh pdf Panduan Pemilik untuk Sistem Navigasi Mobil Garmin BMW Motorrad Navigator VI. Garmin BMW Motorrad Navigator VI 21 halaman.

Select Where To? > Recent.
Clearing the List of Recently Found Locations
Select Where To? > Recent >
About Shortcuts
Adding a Shortcut
You can add shortcuts to the Where To? menu. A shortcut can
point to a location, a category, or a search tool.
The Where To? menu can contain up to 36 shortcut icons.
1
Select Where To? > Add Shortcut.
2
Select an item.
Removing a Shortcut
1
Select Where To? >
2
Select a shortcut to remove.
3
Select the shortcut again to confirm.
4
Select Save.
Navigation
Starting a Route
1
Search for a location.
2
Select a location.
3
Select Go!.
Previewing Multiple Routes
1
Search for a location.
2
From the search results, select a location.
3
Select Routes.
4
Select a route.
Changing the Route Calculation Mode
1
Select Settings > Navigation > Calculation Mode.
2
Select an option:
• Select Faster Time to calculate routes that are faster to
drive but can be longer in distance.
• Select Curvy Roads to calculate routes that prefer curvy
roads.
• Select Off Road to calculate point-to-point routes (without
roads).
• Select Shorter Distance to calculate routes that are
shorter in distance but can take more time to drive.
Navigating Off Road
If you are not following roadways as you navigate, you can use
Off Road mode.
1
Select Settings > Navigation.
2
Select Calculation Mode > Off Road > Save.
The next route will be calculated as a straight line to the
location.
Taking a Route Using Curvy Roads
Your device can calculate routes that prefer curvy, scenic roads
and avoid major highways and cities. This feature can provide a
more enjoyable ride, but it may increase the time or distance to
your destination.
1
Select Settings > Navigation > Calculation Mode > Curvy
Roads > Save.
2
Start a route.
Starting a Route to a Saved Location
1
Select Where To? > Saved.
2
If necessary, select a category, or select All Saved Places.
Navigation
> Clear > Yes.
> Remove Shortcut(s).
3
Select a location.
4
Select Go!.
Your Route on the Map
The speed limit feature is for information only and does not
replace your responsibility to abide by all posted speed limit
signs and to use safe driving judgment at all times. Garmin will
not be responsible for any traffic fines or citations you receive for
failing to follow all applicable traffic laws and signs.
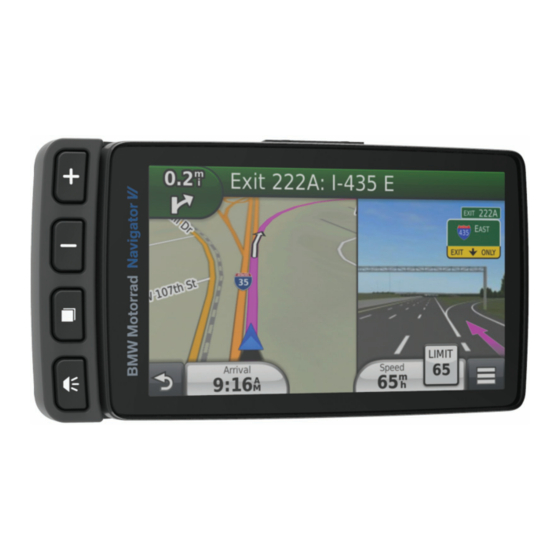
The route is marked with a magenta line. A checkered flag
marks your destination.
As you travel, the device guides you to the destination with voice
prompts (when the device is in the automotive mount or
connected to a Bluetooth headset), arrows on the map, and
directions at the top of the map. Depending on recalculation
settings, if you depart from the original route, the device
recalculates the route and provides new directions.
A data field displaying the current speed limit may appear as
you travel on major roadways.
Using the Navigation Map
1
Select View Map.
2
Select anywhere on the map.
3
Select an option:
• To zoom in or out, select
• To switch between North Up and 3-D views, select the
map and then select .
• To view specific categories when not navigating a route,
select
.
• To center the map on your current location, select
Adding a Point to a Route
Before you can add a point, you must be navigating a route.
1
From the map, select
2
Search for a location.
3
Select a location.
4
Select Go!.
5
Select Add to Active Route.
Skipping a Point in Your Route
Before you can skip a point in your route, you must add the Skip
button to the map
(Customizing Map Buttons, page
If you decide not to go to the next point in your route, you can
skip the point. This prevents the device from attempting to route
you back to the missed point. This feature is not available when
the next point is your final destination.
From the map, select
Navigating to Skipped Waypoints
By default, your device skips waypoints automatically as you
pass them. If you did not intend to skip a waypoint, you can
navigate to a waypoint that has been skipped automatically.
From the map, select
Taking a Detour
While navigating a route, you can use detours to avoid obstacles
ahead of you, such as construction zones.
While navigating, select
The device creates a detour around the next 0.5 miles or
0.5 km of your current route using the nearest viable roads.
Stopping the Route
Before you can cancel your route, you must add the Stop button
to the map
(Customizing Map Buttons, page
From the map, select
NOTICE
or
.
> Where To?.
6).
.
.
> Detour.
6).
.
.
5
