• To change the boundary lines or name, select Edit
Boundary.
• To edit the boundary alarm, select Alarm.
Setting a Boundary Alarm
Boundary alarms alert you when you are within a specified
distance of a set boundary.
1
Select Nav Info > Boundaries.
2
Select a boundary.
3
Select Alarm > On.
4
Enter a distance.
5
Select an option.
• To set an alarm to sound when your boat is a specified
distance from the boundary of an area that you want to
stay within, select Exiting.
• To set an alarm to sound when your boat is a specified
distance from the boundary of an area that you want to
avoid, select Entering.
Deleting a Boundary
1
Select Nav Info > Boundaries.
2
Select a boundary.
3
Select Edit Boundary > Delete.
Stopping Navigation
While navigating, from the Navigation or Fishing chart, select
an option:
• Select Menu > Stop Navigation.
• When navigating with Auto Guidance, select Menu >
Navigation Options > Stop Navigation.
Synchronizing User Data Across the Garmin
Marine Network
Before you synchronize the user data across the network, you
should backup your user data to prevent possible data loss. See
Backing Up Data to a Computer, page
You can share waypoints, tracks, and routes with all compatible
devices connected to the Garmin Marine Network (Ethernet)
automatically.
NOTE: This feature is not available on all models.
Select Nav Info > Manage Data > User Data Sharing > On.
If a change is made to a waypoint, track, or route on one
chartplotter, that data is synchronized automatically across all
chartplotters on the Ethernet network.
Deleting All Saved Waypoints, Routes, and
Tracks
Select Nav Info > Manage Data > Clear User Data > All >
OK.
Combinations
The Combination screen shows a combination of different
screens at the same time. The number of options available on
the Combination screen depends on the optional devices you
have connected to your chartplotter and whether you are using
premium maps.
Selecting a Combination
1
Select Combinations.
2
Select a combination.
Combinations
NOTICE
38.
Customizing a Combination Screen
Not all options are available on all chartplotter models.
1
Select Combinations.
2
Select a combination.
3
Select Menu > Configure Combination.
4
Select an option:
• To change the name, select Name, and enter a new
name.
• To change what is shown, the number of windows, and
the layout, select Change Layout, and follow the on-
screen instructions.
• To change the data shown in the combination, select Edit
Combination, select the screen to change, and select the
new data.
• To resize the windows, select Edit Combination, and
drag the arrows.
• To customize the numbers shown on the screen, select
Overlay Numbers.
5
Select Done.
Adding a Custom Combination Screen
You can create a custom combination screen to suit your needs.
1
Select Combinations > Menu > Add.
2
Follow the on-screen instructions.
When properly connected to an optional Garmin sounder
module and a transducer, your compatible chartplotter can be
used as a fishfinder. Different sonar views can help you view the
fish in the area.
The adjustments you can make to each sonar view vary
depending on the view you are in and the chartplotter model,
sounder module, and transducer you have connected.
Sonar Views
The sonar views available vary depending on the type of
transducer and optional sounder module connected to the
chartplotter. For example, you can view the Split Frequency
view only if you have a dual-frequency transducer connected.
There are four basic styles of sonar views available: a full-
screen view, a split-screen view that combines two or more
views, a split-zoom view, and a split-frequency view that
displays two different frequencies. You can customize the
settings for each view in the screen. For example, if you are
viewing the split-frequency view, you can separately adjust the
gain for each frequency.
Traditional Sonar View
There are several full-screen views available, depending on the
equipment connected.
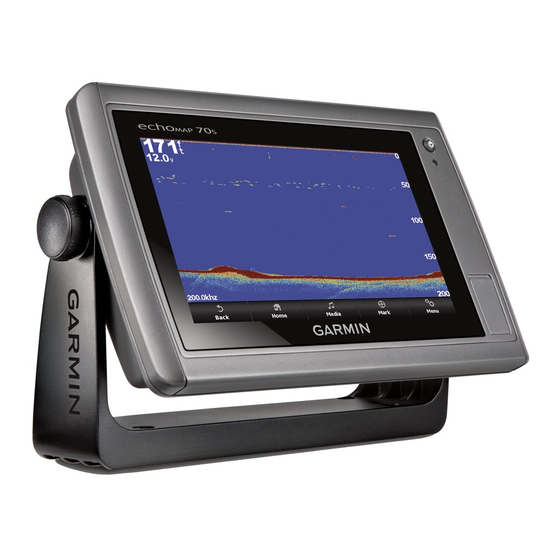
The full-screen Traditional sonar view show a large image of the
sonar readings from a transducer. The range scale along the
right side of the screen shows the depth of detected objects as
the screen scrolls from the right to the left.
Sonar
15

