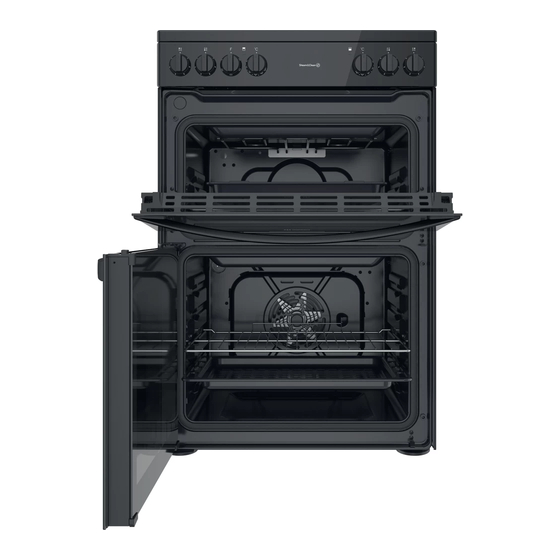
Indesit ID67V9KMB/UK Petunjuk Penggunaan Manual - Halaman 12
Jelajahi secara online atau unduh pdf Petunjuk Penggunaan Manual untuk Kompor Indesit ID67V9KMB/UK. Indesit ID67V9KMB/UK 17 halaman.
Juga untuk Indesit ID67V9KMB/UK: Instalasi dan Manual Cepat (17 halaman)

EN
CLEANING AND MAINTENANCE
TURN OFF THE MAIN SWITCH AND ENSURE
THE COOKER IS COLD BEFORE CLEANING.
BEFORE SWITCHING ON AGAIN, ENSURE THAT
ALL CONTROLS ARE IN THE OFF POSITION.
Do not use steam cleaning
equipment.
Use protective gloves during all
operations.
Disconnect the appliance from the power
CLEANING THE CERAMIC HOB
Although ceramic glass is hard wearing and can be kept
looking attractive for many years, some marks may
not be easily removed from the glass by simply wiping
with a damp cloth. For everyday marks, regular use
of a ceramic hob cleaner is recommended for care and
protection of the hob glass surface. It contains a mild
cleaning agent so that subsequent applications may
clean and apply a protective film at the same time.
Stubborn stains or burnt-on residue from spillage on
the glass surface, can be removed using a safety scraper
in addition to the ceramic hob cleaner.
While there are many brands available through major retailers,
we recommend WPRO cleaning products for our domestic
appliance range. To order a WPRO cleaning kit including
Cream Cleaner and Safety Scraper, call us on 03448 224224
and choose the option to purchase parts.
Please quote part number 484000008418 to help identify
exactly the kit required.
CLEANING THE OVEN SURFACE
EXTERIOR SURFACES
• Clean the surfaces with a damp microfibre cloth.
If they are very dirty, add a few drops of pH-neutral
detergent. Dry them with a dry cloth.
• Do not use corrosive or abrasive detergents. If any of
these products inadvertently comes into contact with
the surfaces of the appliance, clean immediately with
a damp microfibre cloth.
INTERIOR SURFACES
• After every use, leave the oven to cool and then
clean it, preferably while it is still warm, to remove any
deposits or stains caused by food residues To dry any
condensation that has formed as a result of cooking
foods with a high water content, let the oven to cool
completely and then wipe it with a cloth or sponge.
• Clean the glass in the door with a suitable liquid
detergent.
ACCESSORIES
Soak the accessories in a washing-up liquid solution
after use, handling them with oven gloves if they
are still hot. Food residues can be removed using a
washing-up brush or a sponge.
12
Carry out the required
operations when the oven is cold.
Disconnect the appliance from
the power supply.
supply.
Do not use wire wool, abrasive
scourers or abrasive/corrosive
cleaning agents, as these could
damage the surfaces of the
appliance.
REPLACING THE LIGHT
1. Disconnect the oven from the power supply.
2. Unscrew the cover from the light, replace the bulb
and screw the cover back on the light.
Reconnect the oven to the power supply.
3.
Note: Use 40 W/230 V type
Note: Use 40 W/230 V type
The bulb used in the product is specifically designed for
The bulb used in the product is specifically designed for
The bulb used in the product is specifically designed for
The bulb used in the product is specifically designed for
domestic appliances and is not suitable for general room
domestic appliances and is not suitable for general room
domestic appliances and is not suitable for general room
domestic appliances and is not suitable for general room
lighting within the home (EC Regulation 244/2009).
lighting within the home (EC Regulation 244/2009).
lighting within the home (EC Regulation 244/2009).
lighting within the home (EC Regulation 244/2009).
Light bulbs are available from our After-sales Service.
Light bulbs are available from our After-sales Service.
Light bulbs are available from our After-sales Service.
Light bulbs are available from our After-sales Service.
- Do not handle bulbs with your bare hands as your
- Do not handle bulbs with your bare hands as your
- Do not handle bulbs with your bare hands as your
- Do not handle bulbs with your bare hands as your
fingerprints could damage them. Do not use the oven until
fingerprints could damage them. Do not use the oven until
fingerprints could damage them. Do not use the oven until
fingerprints could damage them. Do not use the oven until
the light cover has been refitted.
the light cover has been refitted.
the light cover has been refitted.
the light cover has been refitted.
This product contains a light source of energy
efficiency class G
Steam & Clean ( Top oven only )
Steam & Clean ( Top oven only )
Steam & Clean ( Top oven only )
The action of the steam released during this special low-
temperature cleaning cycle allows dirt and food residues
to be removed with ease. Pour 200 ml of drinking water on
the bottom of the oven and set the temperature at 90
for 20'. Activate the function "CONVENTIONAL" after 20'
switch off the oven and let it cool down for 15'.
LOWER THE TOP HEATING ELEMENT
The top heating element of the grill can be lowered
to clean the upper panel of the oven: xtract the heating
element from its seating, then lower it. To return the
heating element to its position, lift it up, pull it slightly
towards you and make sure that the tab support is in its
proper seating.
G9
E
°C
°C
