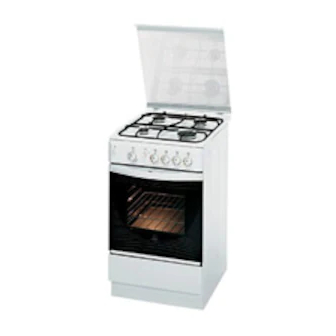
Indesit K 34 G/G Petunjuk Instalasi dan Penggunaan Manual - Halaman 5
Jelajahi secara online atau unduh pdf Petunjuk Instalasi dan Penggunaan Manual untuk Kompor Indesit K 34 G/G. Indesit K 34 G/G 16 halaman. Indesit cooker with gas oven & gas grill instruction for installation & use

Important: make sure the supply pressure conforms with
the values shown in the table entitled "Caracteristics of the
burners and nozzles". When the cooker is installed
between cabinets (recessed), the gas connection must
be effected by an approved flexible hose with bayonet
fitting (BS 669 Current Edition). The gas inlet for the
cookers is a threaded G 1/2 gas female fitting.
Connecting the gas supply
To make the connection, a flexible hose should be used
corresponding to the current gas regulations which are:
the hose must never be at any point in its lenght in contact
•
with the "hot" parts of the cooker;
the hose must never be longer than 1,5 metre;
•
the hose must not be subject to any tension or torsional
•
stress and it must not have any excessively narrow curves
or bottlenecks;
the hose must be easy to inspect along its entire length
•
to check its condition;
the hose must always be in good condition, never attempt
•
to repair.
Important: the installation must comply with gas safety
(installation and use) regulations 1984. In all cases for the
above, by low, a qualified, corgi approved engineer must be
called for installation.
Electrial connection
Power supply voltage and frequency: 230-240V a.c. 50/60 Hz.
Note: the supply cable must be positioned so that it never
reaches at any point a temperature 50°C higher than the
room temperature. The cable must be routed away from the
rear vents. Should you require it, you may use a longer cable,
however, you must ensure that the cable supplied with the
appliance is replaced by one of the same specifications in
accordance with current standards and legislation.
Your appliance is supplied with a 13 amp fused plug that can
be plugged into a 13 amp socket for immediate use. Before
using the appliance please read the instructions below.
WARNING - THIS APPLIANCE MUST BE EARTHED.
THE FOLLOWING OPERATIONS SHOULD BE CARRIED
OUT BY A QUALIFIED ELECTRICIAN.
Replacing the fuse:
When replacing a faulty fuse, a 13 amp ASTA approved fuse
to BS 1362 should always be used, and the fuse cover re-
fitted. If the fuse cover is lost, the plug must not be used until
a replacement is obtained.
Replacement fuse covers:
If a replacement fuse cover is fitted, it must be of the correct
colour as indicated by the coloured marking or the colour
that is embossed in words on the base of the plug.
Replacements can be obtained directly from your nearest
HOT PARTS
Service Depot.
Removing the plug:
If your appliance has a non-rewireable moulded plug and
you should wish to remove it to add a cable extension or to
re-route the mains cable through partitions, units etc., please
ensure that either:
the plug is replaced by a fused 13 amp re-wireable plug
•
bearing the BSI mark of approval.
or:
•
the mains cable is wired directly into a 13 amp cable outlet,
controlled by a switch, (in compliance with BS 5733) which
is accessible without moving the appliance.
Please note: for appliances with a rating greater than 13
amp (eg: electric hob, double ovens and freestanding electric
cookers etc.) the mains cable must be wired into a cooker
output point with a rating of 45 amp. In this case the cable is
not supplied.
Disposing of the plug:
Ensure that before disposing of the plug itself, you make the
pins unusable so that it cannot be accidentally inserted into
a socket. Instructions for connecting cable to an alternative
plug:
Important: the wires in the mains lead are coloured in
accordance with the following code:
Green & Yellow
Blue
Brown
If the colours of the wires in the mains lead do not correspond
with the coloured markings identifying the terminals in your
plug, proceed as follows:
Connect Green & Yellow wire to terminal marked "E" or
or coloured Green or Green & Yellow.
Connect Brown wire to terminal marked "L" or coloured Red.
Connect Blue wire to terminal marked "N" or coloured Black.
If a 13 amp plug (BS 1363) is used it must be fitted with a 13
amp fuse. A 15 amp plug must be protected by a 15 amp
fuse, either in the plug or adaptor or at the distribution board.
If you are in any doubt about the electrical supply to your
machine, consult a qualified electrician before use.
How to connect an alternative plug:
The wires in this mains lead are coloured in accordance with
the following code:
BLUE
BROWN
GREEN AND YELLOW
GREEN &
YELLOW
BROWN
BLUE
Disposing of the appliance
When disposing of the appliance please remove the plug by
cutting the mains cable as close as possible to the plug body
and dispose of it as described above.
5
- Earth
- Neutral
- Live
"NEUTRAL" ("N")
"LIVE" ("L")
"EARTH" ("E")
13 amp fuse
CROSS-BAR
CORD GRIP
