Kohler OnCue Plus Panduan Petunjuk Instalasi - Halaman 7
Jelajahi secara online atau unduh pdf Panduan Petunjuk Instalasi untuk Generator Portabel Kohler OnCue Plus. Kohler OnCue Plus 17 halaman. Residential/commercial generator sets
Juga untuk Kohler OnCue Plus: Panduan Memulai Cepat (21 halaman), Panduan Pengguna (44 halaman)
Setup Procedure
A laptop computer with access to the Internet is required
to set up the wireless access point. Once setup is
complete, the computer is no longer needed.
Note: The screen shots shown in this document were
created using Windowsr 7.
instructions may vary for different computer
operating systems.
4.
Connect the wireless access point to the
computer.
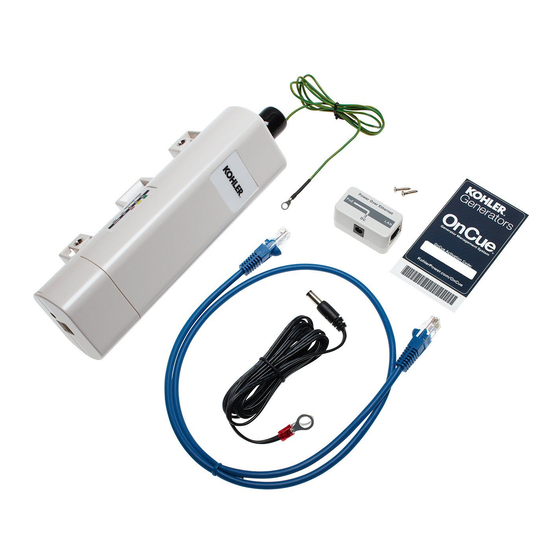
4.1
Check that the power and network cables are
connected to the wireless access point and PoE
box as described in step 3.
4.2
Use a customer-provided network cable to
attach a laptop computer to the LAN port on on
the PoE Box. See Figure 2.
5.
Change
the
Windowsr PC to connect to the device.
Note: For Macr computers, go to step 6.
5.1
Click on the the Windows start menu icon in the
lower left corner of your screen. See Figure 8.
5.2
Type "network connections" into the Search
programs and files box.
5.3
Press Enter or click on View network
connections.
5.4
Click on Local Area Connection.
Figure 8 Selecting the Local Area Network
Connection
Windows and Internet Explorer are a registered trademarks of Microsoft Corporation in the United States and/or other countries.
Apple, the Apple logo, and Mac are registered trademarks of Apple Inc., registered in the U.S. and other countries.
TT-1618 6/14
Screens and
IP
address
of
your
5.5
Select Internet Protocol Version 4.
Figure 9.
5.6
Click Properties.
Figure 9 Selecting Internet Protocol Version 4
5.7
Click on Use the following IP address. See
Figure 10.
5.8
Change the IP address to 192.168.1.5 and
Subnet mask to 255.255.255.0.
5.9
Click OK.
5.10
Go to step 7.
Figure 10 Entering the IP Address and Subnet Mask
See
7